Today, winter fishing using a balance beam is becoming increasingly popular. Many novice fishermen are of the opinion that such a technique is complex, requires specific knowledge and is not effective enough compared to tackle with a nozzle.
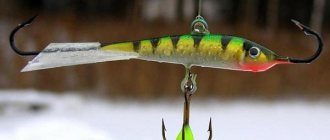
The balancer nod is convenient when catching perch, especially during periods of active feeding. This type of fish is a schooling predator and responds well to such a noisy bait, which produces noticeable vibrations.
What does he look like
Most often this is a thin spring, a stick, a hair - anything that can have the ability to quickly respond to any tension on the fishing line , but at the same time have a certain margin of strength and elasticity. The material from which this gear is made must be frost-resistant and not freeze when water comes into contact with it at low temperatures.
At the same time, the guard, like all winter gear, should not be heavy - after all, the fisherman holds the rod in his hand all the time.
Which one to choose for winter perch fishing?
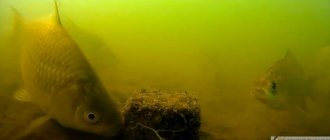
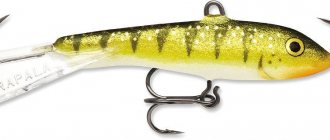
Perch, a nimble predator, the king of the underwater world, first of all rushes to where some kind of movement occurs. To catch it, a medium-sized balancer is best suited.
IMPORTANT! The nod is the most popular bite signal for perch.
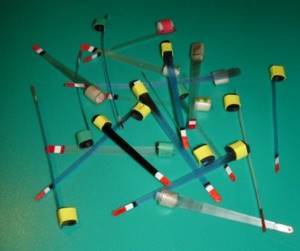
There are different types of gear: plastic, metal, combined, sheet lavsan, bristles and bamboo.
The material can be any, the most common is plastic with a clock spring. It should bend 20–40 degrees and be no longer than seven centimeters.
For fishing in strong currents, a tackle of 20 centimeters .
It is to spring tackle perch most often reacts.
Need a nod or not?
There is still ongoing debate about whether a nod is needed for such a river hunt at all. Some enthusiasts are sure that a sensitive whip is enough - the basis of the fishing rod itself. In fact, when attacking the bait used by pike or zander, it is difficult not to notice a powerful bite. Moreover, when catching this fish, the fisherman often positions himself standing above the hole, so it is more convenient to catch a large and mobile specimen. You really can’t use a nod in such a situation.
Expert opinion
Knipovich Nikolai Mikhailovich
Zoologist, hydrobiologist. I am interested in fishing at a professional level.
Important! However, when fishing for smaller, slow-moving perch in cold water, the lack of a sensitive nod can cause a missed bite.
So the nod when sitting fishing above the hole is still more necessary than it is an extra tackle.
Functions
As already mentioned, first of all, the guard is a bite indicator , as when fishing with a jig or bloodworm.
Another practical purpose of such a nod is that, with a slight twitch, it should provide the so-called game of bait , which imitates the behavior of a fry or small fish, which is bound to attract predatory fish.
This game depends not only on the movements of the fisherman (although you still need to learn how to imitate the behavior of a balancer in the water), but also on the material from which this tackle is made.
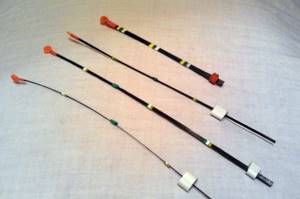
There are many store-bought options, but ice fishing veterans often prefer to make their own poles. The choice of materials today is quite diverse.
However, even industrial production nods can be quite catchy. You just need to choose them correctly.
Types of nods
In general, nods can be divided into the following two types:
- To create the directly necessary game of a particular bait. Its use is to create active play with a jig while catching perch, bream, and roach. However, it is obvious that the shape, length and material of a nod for catching, for example, perch, will be radically different from the same element, but designed to catch the same bream.
- To fix the bite. However, this in no way prevents such a nod from creating attractive movements with a jig or a hook with a bloodworm attached to it.
How to choose a gatehouse
The choice of such gear depends on many factors:
- from the fish that live in a given body of water;
- from the reservoir itself: from its depth and the presence of vegetation;
- from the current;
- from the weight of the balancer.
Each lodge has its pros and cons. Some amateurs prefer to take several species with them at once and determine on the spot which one is more catchy.
But there are adherents of one particular type of nod; they thoroughly study its features and use them to the fullest.
From a spring
Quite rational guards, have good sensitivity, are relatively inexpensive, but have a number of disadvantages:
- in the cold, when water gets in, the resulting ice particles stick to them;
- Over time, the spring stretches and loses its elasticity;
- Also, over time, such a nod simply rusts.
Lavsan
It has good sensitivity , but due to increased flexibility they are only suitable for light weight balancers. A significant disadvantage is fragility : during moving fishing, the fishing line quickly destroys the internal silicone tube.
To prevent this cut, some hobbyists insert a small metal ring .
From a metal plate
Such nods have the same positive properties as lavsan ones. But they are much stronger, so they can be used when fishing with large balancers.
The disadvantages include, perhaps, the relative complexity of self-production.
Combined
These gatehouses are made both from lavsan elements and using a metal plate. Usually these materials do not combine well, but in this case, high-quality industrially produced combined nods are quite reliable.
The disadvantage is the relatively high cost of the product .
Carbon fiber
Most often it is made independently from carbon whips. This type of nod has high plasticity and is frost-resistant, but it takes a long time to process.
Apparently, this is why there is practically no industrial production of such gatehouses, unlike whips.
What kind of nod do you need?
In answering the question of which nod is most suitable for a particular fishing method, you should understand the following:
- Nod to the rewinder. This nod is usually made from lavsan, which is capable of providing high-frequency vibrations.
- A nod designed for a jig. This element can be of two types, depending on what kind of fish you plan to catch. That is, for perch and roach a lavsan nod is preferable, and for bream it is more advisable to use a metal one.
- Nod for balancer or lure. A distinctive feature of this nod is its short length, and its rigidity is selected directly according to the weight of the bait. As a rule, this nod is not involved in the bait game itself. It is used only to detect a bite while the bait is at rest. Sometimes such a nod is made directly from fishing line.
- Nod for a “devil” type load. In the finished state there is a long metal nod that is capable of providing unhurried, smooth vibrations.
- Shcherbakov's nod or balance nod. Designed exclusively for catching bream. There are no flexible elements in this nod. A wire is soldered to the bearing attached to the very tip of the whip. A corresponding fishing line is threaded into the ring, which is located at one end of the wire. A movable balance weight is mounted at the other end of the wire. It is this that directly regulates the lifting power of the nod, and also compensates for the mass of the jig. This nod is especially good in cases where a timid bream, feeling the weight of the jig, tries to spit it out.
Selecting a nod for a balancer
The nod is selected to match the weight of the balancer so that it does not bend too much, and at the same time, is sensitive. We pay attention to other factors:
- how well the line passes through it;
- check the flexibility of the product in the cold;
- when choosing between a silicone tube and electrical wire insulation, give preference to the first option, it is more flexible in the cold;
- when the nod is loaded, its deflection angle is permissible within 30-45 degrees; this is easy to check with a protractor;
- the color of the tackle should be bright so that any, even the slightest fluctuations are noticeable;
- nods for jigs are most often not suitable for fishing with a balancer; they cannot withstand the weight of the bait.
- and do not forget to check the strength of the nod on the whip, especially for homemade structures.
Do you need a nod when fishing with a balance beam?
With the development of modern materials, the need for the wholesale installation of nods on tackle for trolling is no longer necessary. The predatory fish bites quite hard, the bite is transmitted to the hand. Modern carbon fiber and graphite whips work out this point perfectly. With a clearly adjusted fishing rod (matching the weight of the bait, the thickness of the fishing line and the elasticity of the whip), an additional bite indicator is not needed. When using homemade rough gear, or old “wooden” gear, when the action is not felt by the fishing rod, the guard can help in fixing the bite.
The peculiarity of using nodding equipment is that a soft guard is required. A blank that in no way makes spring vibrations under the weight of the bait is suitable. In the working position under load, the nod should be almost completely bent.

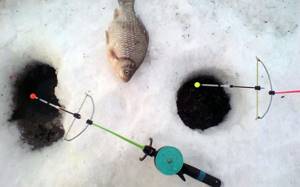
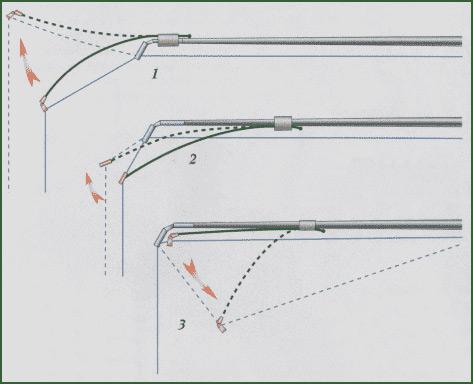
Correct position of the balancer
Non-standard models
We have already talked about traditional nods, which are usually used for this type of fishing. Such models are simply put on the whip and serve as its continuation. But there are also more original and complex models.
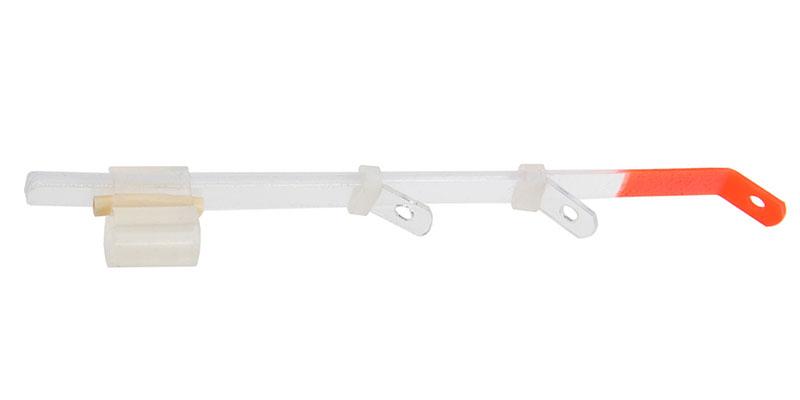
Crossbow guard
The attractiveness of the design is that it creates virtually no resistance when biting. but creates a certain game for the bait.
The guard consists of a triangular wire structure with a twisted rubber band, onto which a silicone tube is placed. A regular nod is inserted into the cut into the tubes.
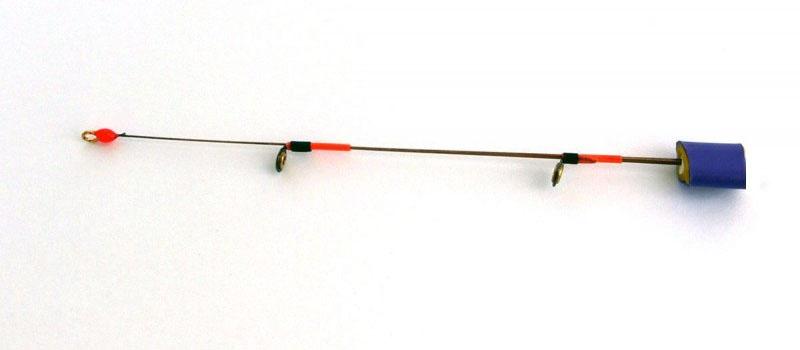
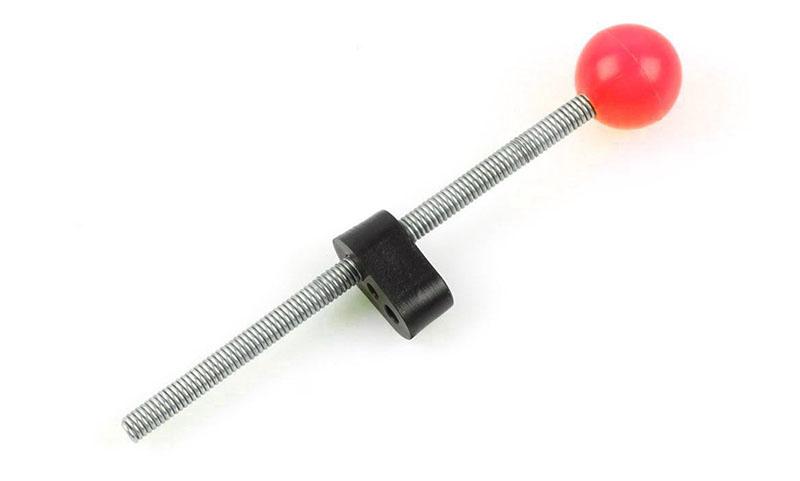
Shcherbakov's nod
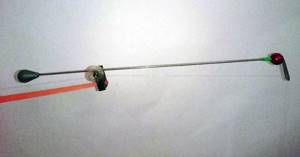
It is called a balancer, but when fishing with a balancer it is practically not used, since it does not provide the action of the bait. The essence of the gear is unusual. The nod itself is mounted across the main rod on a bearing, the upper part of which is equipped with a tulip and fishing line, and a small weight or signaling device remains on the lower part. When biting, the upper part of the nod smoothly lowers with the assistance of the bearing.
Is the bite unnoticeable? Making a balancing nod
Winter is approaching and for many fishermen this means the opening of the ice fishing season.
In this matter you will need a good nod, especially when it comes to catching crucian carp. The fact is that in winter the crucian carp is quite sluggish and its bites are almost unnoticeable. They can manifest themselves in a short, instantaneous nod, which the fisherman may not notice; moreover, the crucian carp often raises the nod, which is also hard to see. Thanks to the inertia of the nod, you will immediately be able to clearly see that the fish has taken the bait. Materials and tools for homemade work:
From materials:
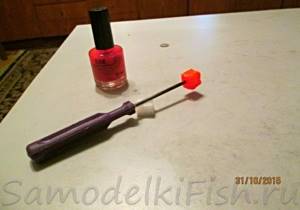
- an umbrella knitting needle or a flat piece of steel wire; — a small bearing (suitable for a fishing reel or hard drive); — a piece of high-voltage ignition cable; - cambrics; — sliding sinker; - waterproof glue; - fluorescent varnish.
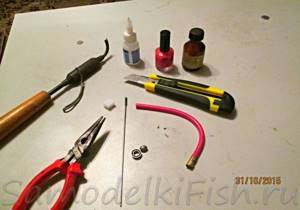
Tools:
- stationery knife; - soldering iron with all accessories; - awl; - pliers.
Nod making process:
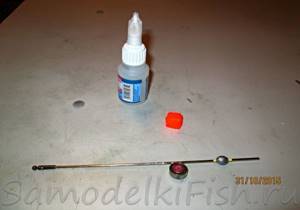
Step one. Preparing the components
First of all, take the bearing, we need to prepare it so that it can be easily put on the tip of the winter fishing rod. To do this, you will need a piece of thick cambric, which can be obtained from a high-voltage car ignition cable. We cut off the required piece and insert it into the bearing core. For reliability, the elastic band can be coated with glue.
Next, take a knitting needle and a sliding sinker.
We adjust the hole in the sliding sinker so that the sinker slides freely along the knitting needle. You also need to put two pieces of cambric on the knitting needle, one in front of the sinker and one in the back. Step two. Making a signal beacon
In order for the nod to be clearly visible at a great distance, you need to make a beacon for it. Here you will need a small piece of polystyrene or foam rubber for packaging. Having cut off the required piece, we have to paint it. To do this, the author places a piece on an awl and then paints it with bright fluorescent paint.
As for the sizes, the author has a cube 1 cm wide. If you wish, you can make the beacon round, triangular, and so on.
Step three.
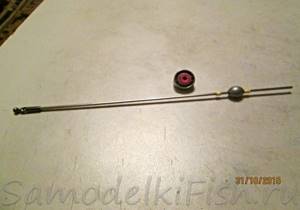
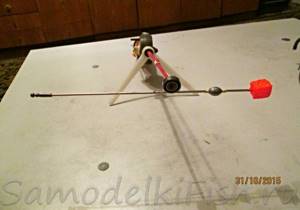
Gluing the structure At this stage it is necessary to glue the spoke to the bearing. Here you will need a good waterproof glue, the author uses cyanoacrylate-based glue, but hot glue will work just fine. We glue the knitting needle so that a lever is formed. The idea is that the weight on the short lever balances the long, heavy part.
Now all that remains is to attach the beacon to the lever; it is installed on the short part of the lever.
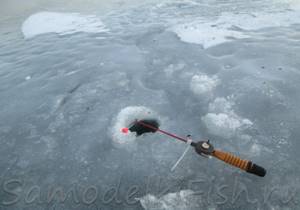
That's all, install the nod on the fishing rod. The task will be to adjust the nod so that it is in a horizontal position. Our weight is fixed with cambrics, so by moving them we establish the desired position of the weight relative to the center.
You will also need to glue cambrics to the fishing rod and to the bearing; the fishing line will pass through them.
How it all works
First of all, we pass the fishing line through the cambrics, and then through the ring at the end of the knitting needle. Having attached the hook, bait and everything you need, you will need to balance the nod, since the gear creates additional weight. We move the sinker forward/backward and select the horizontal position of the nod. That's it, we're waiting for the first bite! Now about the bites. Let's say a crucian carp swims up to the bait and makes even the slightest poke downwards. As a result, the long lever goes down and the beacon rises up.
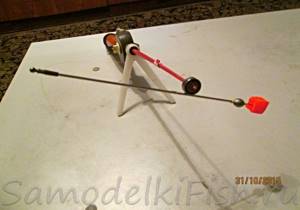
If the crucian carp lifts the bait, the long part of the lever becomes lighter than the short part with the sinker and rises up. As a result, we will have a beacon below.
That's all, the nod is completely ready. With its help you can catch rotan crucian carp and other fish, which are distinguished by their caution and slowness.
One of the advantages of this design is that the beacons can be seen quite far away, which cannot be said about ordinary fishing rods. The disadvantages include the complexity of manufacturing, the difficulty of setting, as well as the problem with hooking. You need to hook with a long wave of your hand in order to compensate for the stroke of the lever.
Good luck and big catches!
Source
Become the author of the site, publish your own articles, descriptions of homemade products and pay for the text. Read more here.
How to do it yourself
It is necessary to sequentially manufacture the nod itself and the connector (holder) that will attach it to the fishing rod. The materials we need are scissors, a needle and a plastic mylar strip:
- the strip is made about 6 cm long;
- make it cone-shaped;
- On the thin side with a hot needle we make a hole for the fishing line.
Now let's start making the connector:
- take a two-core wire, cut off a piece of about 5-6 mm;
- from one part we remove the conductive core along with the insulation;
- from the other - only the core.
The hole of the larger diameter will be put on the rod of the fishing rod, and the fishing line will pass through the small one.
Making a nod - instructions
You can make such a nod by following the following instructions:
- From a lavsan plate - this can be an X-ray film, a plastic bag, etc., you should cut a wedge-shaped piece 8 cm long with a sharp knife under a ruler. In this case, the width of the narrow part should be 2 mm, and the wide part - 4 mm.
- Then use a hot needle to make two holes in the resulting workpiece. One is approximately at a distance of 2 mm from the narrow edge, and the second is in the middle of the product or slightly offset towards the same narrow edge.
- Next, we reduce the thickness of the workpiece directly in its narrow part. To do this, use a knife to carefully remove layer by layer. In this case, the smallest thickness should be at the end of the narrow edge.
- From a two-core wire with a diameter of 10 mm, you should cut a small piece of 5 - 10 mm. After that, the Mylar blank must be placed in a heat-shrinkable tube corresponding to the size of the wire. We put the tube on the wire and hold it for some time over the steam coming out, for example, from a boiling kettle.
- The resulting nod should be painted with an appropriate marker, with the whip entering the insulating hole. The second hole in the insulation is designed for fishing line. The line itself, naturally, must pass through two holes in the nod.