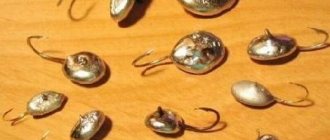
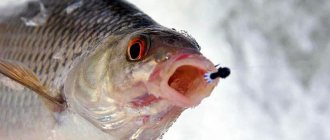
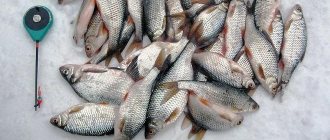
Homemade jigs are famous for their catchability among fishermen, because such an exclusive tool allows you to consistently catch various fish not only in winter, but also in the open water season, using a certain fishing technique. Already having accumulated experience in fishing this way, fishermen have a number of significant requirements for bait, which are not always satisfied when using purchased versions of the product. And in order to have a truly working and at the same time catchy jig, the best way is to make them yourself, as a result of which you can achieve those characteristics that will contribute to the efficiency of hunting.
There are quite a lot of methods for creating fishing lures of this type, but we will tell you about the simplest and most accessible to a wide range of fishermen in the continuation of our article. In addition to considering manufacturing methods, the reader will learn about the materials from which jigs are easiest to make and will become familiar with the specifics of producing baits intended for catching a certain type of fish, the most common in our reservoirs.
Advantages of homemade products
Making jigs at home is not only an interesting and entertaining process, but also provides a number of advantages compared to buying a finished product. Since this type of bait can be safely classified as a consumable item, the loss of purchased tools always causes frustration and irritation. The ability to produce an analogue of a lost homemade product greatly simplifies the replenishment of the fishing arsenal; moreover, during production, most fishermen initially make several baits of the same type for the game.
An important factor is the production of products that are similar in shape, but different in weight, and an already assembled nozzle can always be modified by adding useful additional weight to it or reducing its weight by mechanical processing. In addition to the fact that you can paint the weight in a color that suits special fishing conditions, the bait can be equipped with additional accessories in the form of cambrics and small beads in different quantities, thereby giving the same type of tool different effects in terms of playing parameters and noise design.
6th method
The jig with the bait sinks to the bottom. After this you need to move it. Then it rises 0.5–1 cm above the bottom. At the end of every 3-4 cycles, a pause of 5-7 seconds is made. That is, the jig is held either at the bottom or above it. It is necessary that all movements be slow and smooth. After 1–2 min. the line is directed to the far edge of the hole. After which, without stopping the vertical movement of the jig, it is pulled towards the near side. In this case, this device is dragged along the bottom and above it. This technique is the only one that can bring success during the winter lack of biting. Moreover, in this case you need a small jig. This is an important condition.
Characteristics of a homemade nozzle
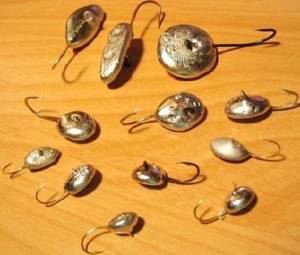
The weight of the bait is classified as heavy and light. Lightweight - suitable for playing fine and delicate games. They are made from plastic, nylon and metal alloys. The weight of such an accessory ranges from 1 to 30 grams.
Heavy - designed for catching shy and cautious fish. They have a stable and even game. They are made purely from metal and its alloys.
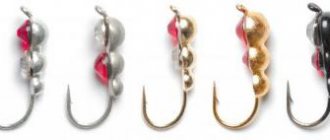
Another important characteristic is the shape. The shape of the bait is quite varied, but in essence it should resemble a small insect or its larva, which are usually included in the diet of all types of fish. The most common shapes are pellets, barrels, crescents, cones, and droplets. These shapes can be either voluminous or flattened.
The third characteristic determines the color spectrum of the bait. Typically, promising colors are those that resemble the color of the fish's natural food source. As a rule, black, red and dark green are considered working colors. During certain periods, fish perfectly perceive instruments that have silver and golden tones.
An important parameter for jigs is the hook. The attractiveness and play of the weight depend on its type and size. To assemble the product, depending on the final purposes of the tool, single- and double-bend hooks, as well as miniature tees, are used. Sometimes purchased hooks are modified by first tempering them by heating over a fire and bending their forend to the required angles, subsequently subjecting the structure, already formed to the required requirements, to hardening.
5th method
Having determined the desired depth of descent, as well as securing the fishing line to the reel using a locking screw, the jig is baited with one bloodworm or other bait. Then she sinks to the bottom again. At the same time, the descent is controlled. At the bottom, moving the jig, you can tap it 5-7 times. Then you need to start lifting it slowly with twitching. In this case, the amplitude of vibration of the tip of the fishing rod should be up to three centimeters. The lift is made to a height of approximately 50 cm. Then a pause is made for 2–3 seconds. Then the jig lowers to the bottom on a slightly bent nod. After completing 5–10 of these cycles, you need to try to change the tempo of twitching, as well as reduce the oscillatory amplitude. In this case, this device can be raised higher.
DIY materials
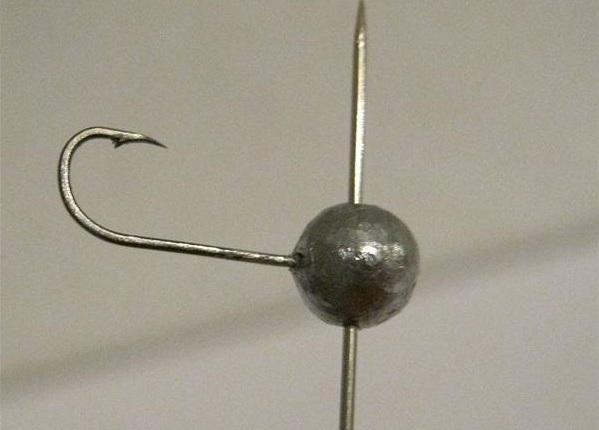
You can make your own jigs from several types of materials that are quite accessible to every angler. The most common and easily processed type of such metal is lead. It melts easily at home, has excellent casting properties and does not require specific tools for processing. Bronze and tungsten are considered more difficult to process materials.
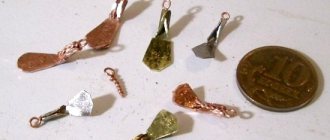
Also, the work product can be made from stainless steel, cupronickel and even tin cans. The use of copper wires of small diameters, which are wound in coils around the hook chosen for the production of the product, is quite widespread. More exotic materials for making jigs include plastics and epoxy resin. Some craftsmen make exclusive catchy accessories from coins, preferring silver and even gold specimens.
How to make a jig with your own hands
Methods for making jigs depend on the material of the workpiece, as well as the availability of the tools and equipment necessary for production.
Important! The simplest design of a bait of this type can be made directly on a pond, having on hand a cut lead pellet intended for weight in float rigs and a small-sized hook. It is enough to use a knife to press a small recess into the cut of the pellet for the shank of the hook, insert the hook itself there and crimp the pellet so that the fastening eye and the sting are outside the load.
But to produce a solid fishing tool, other and more time-consuming and equipment-consuming methods are used. We will dwell on some of these simpler technological processes in more detail, considering the basic techniques and the algorithm for performing the work itself.
Making jigs by casting
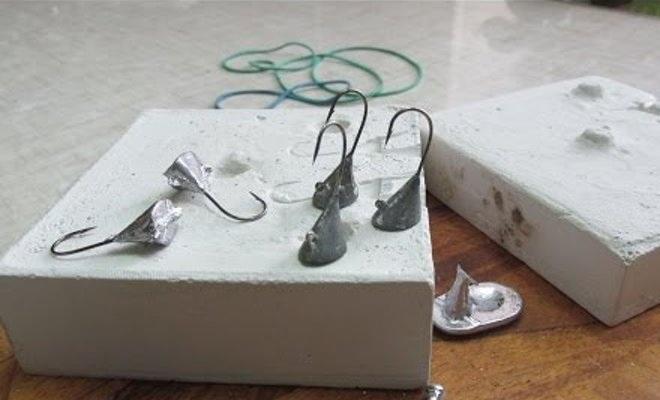
Casting is a relatively simple method of producing jigs of all kinds at home. For manufacturing, lead is used, which has both high density and excellent casting properties. The mold for casting is prepared from plaster, having previously made an impression of the blank required for the final type of product. Using a prototype or an analogue of the desired final type of accessory, a purchased jig shape is selected, and the required stamp is made with it. The matrix will consist of two parts, including a sprue device in its design. Before pouring molten lead into the mold, insert the hook of the required size.
After the metal has cooled, the workpiece is processed with a needle file, polished and painted in the color required for the fishing conditions. To melt the metal, use a can from a can, placing a molding groove on its edge. Lead melts quite easily on household gas. To cast molten metal directly from a tin can, use pliers or construct a reliable grip, taking care and special care when casting, protecting yourself from possible burns.
Use of a soldering iron
Using a soldering iron, jigs can be made in several simple ways. The simplest is to simply solder the required weight of the load onto the shank of the hook with tin. Before soldering, the hook shank is etched with acid and a layer of tin is applied for better adhesion to the metal. To install a mounting hole in the weight for jigs, the metal that has not yet hardened is pierced through with a thin needle. After filing, the product is completely ready for use.
The next method is the technique of making a weight from a tin can. First, from a tin can, using metal scissors, cut metal strips of the required width and use pliers to twist these blanks around the shank of the hook chosen as the basis until the desired mass is achieved. The technological process ends with careful soldering of the twist and abrasive processing of the edges of the new accessory.
The third common method of producing jigs at home using soldering is a technique that requires copper wire. To do this, you will need rolled copper no thicker than 0.5 mm in diameter, which, by tightly applying turns on the shank of the hook, forms the shape and weight of the future jig. To achieve the optimal weight and shape, you can use layer-by-layer winding of wire, ultimately obtaining the final weight and type of fishing tool required according to the characteristics of the bait. After the winding operation, the workpiece is tinning and subsequently polished, bringing the surface to its final form.
Instrumental method
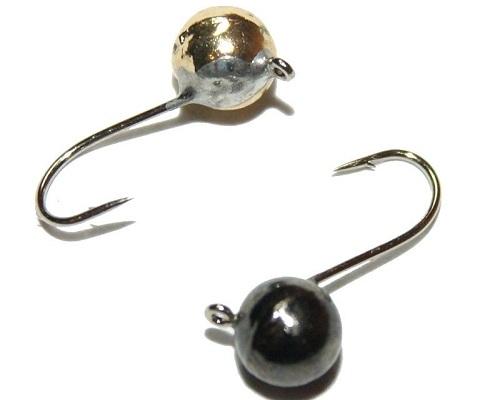
This technology is used for the manufacture of tungsten and bronze jigs. To process metal you will need a small cutting machine, a set of needle files, diamond wheels, a soldering iron and related materials for soldering. A tungsten billet is made from a cut of a tungsten electrode, which is used in some types of electric welding. It is from this rod that the desired shape for the product is obtained using a mechanized power tool using cutting and grinding methods and connected to the shank of the hook by soldering.
The production method requires special skills in using power tools and is considered the most complex of the possible types of home production of bait. As a result of this difficult work, anglers receive miniature in size, but quite heavy baits, characterized by clearness and stability of play.
4th method
The jig with the bait sinks to the bottom. Then it will rise 3–5 cm. Next, you need to play it smoothly 3–5 times, like a spinner. Then, lowering it back to the bottom, you need to pause for 2-4 seconds. Then the ascent begins. This is done with slow acceleration. Then you should stop the device at a distance of 40 to 50 cm from the bottom. After this, you need to immediately lower it by 2-3 cm with pushes, with a break of 2-3 seconds. Then for 3-4 seconds. stops at the bottom. This technique is recommended for flat-oval jigs (at the end and beginning of winter).
Improving the quality and catchability of winter jigs
To improve the quality of the manufactured bait, fishermen resort to minor, but quite important modifications. One of these variations of improving the accessory is the installation of a cambric in the mounting hole, which prevents abrasion of the fishing line during the animation process of the homemade product. To increase the catchability of jigs, the technique of changing the shape or flat is used. In spherical or teardrop-shaped instruments, use a file to grind off the upper part of the equipment from the hook to the center of the product, thus increasing the area of its resistance and making the game softer. An effective way to increase catchability is to modify the shank of the hook, as well as its bend, with elements attractive to fish. For these purposes, cambrics and small beads of bright and catchy colors are used.
Important! Beads, in addition to visual appeal, endow the weight with an additional noise effect that arises from the contact of plastic balls when the jig plays with each other, which also helps to increase the catchability of the homemade product.
In addition to these techniques, fishermen paint products with fluorescent paints and attach synthetic red threads to the hooks that do not get wet or lose their shape.
2nd method
Having found the bottom and baited the jig with bait, you can begin to lower it. At a distance of 0.6 to 1.0 m from the bottom, the dive is delayed. This is done to proceed to the game. The jig drops 2–3 cm, after which it lingers for 2–3 seconds. At this stage, sometimes they wiggle it a little. Then, having reached the bottom, a pause is made for 3-4 seconds. and the jig is moved. This is repeated 5-6 times. Then the jig is raised slowly to a distance of 0.5–1.0 m from the bottom. After this, its descent is carried out in the same way as previously indicated. The cycle is repeated 5–10 times. The technique works especially well with the bait of slightly frozen small bloodworms.
Features of homemade jigs for certain types of fish
In addition to the general operating parameters, jigs have a specific application depending on the type of fish being caught. When producing baits, you should pay special attention to this nuance, purposefully equipping your fishing arsenal with specific and narrow-profile fishing tools. The distinctive features of narrowly targeted jigs are both the shape preferred by the fish and the promising color. In some cases, weight matters. We will highlight a number of such important features in the further part of our material, taking as an example the most attractive fish species for ice fishing.
Jig for perch
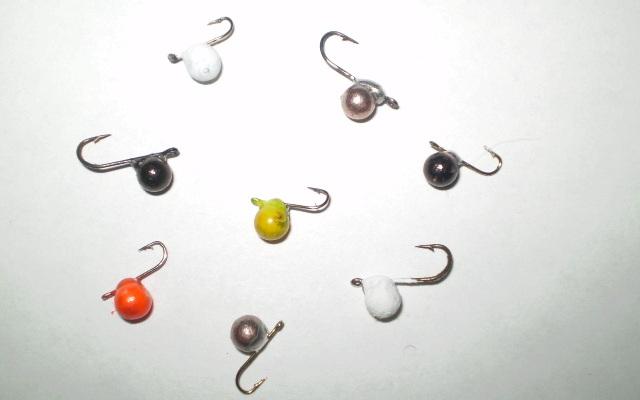
The striped robber is the most common target of ice fishing. Perch prefers jigs in the shape of a droplet, a pellet and any small insect, which is often a type of imitation ant. The optimal size of the simulator should not exceed 4 mm. In relatively calm waters, lead homemade products satisfy this criterion. When fishing rivers with moderate and strong currents, tungsten specimens, which are heavier in mass but identical in size to lead, show the best results. In color schemes, perches prefer dark tones or weights with a shiny surface. Often, the red point of attack in the form of beads, cambric or a piece of thread has a fairly serious effect on the number of bites, which is something you should definitely pay attention to when experimenting with the nozzle when the bite is weak, depressive.
Jig for bream
Bream is considered another coveted ice fishing trophy. As a rule, the larger and heavier the bait, the more you can count on catching a larger bream. Bream loves elongated and elongated shapes of jigs.
Important! It has been noted that the most catchy specimens of bream, those that bring trophy a couple of kilogram specimens into the subglacial standings, are the forms that resemble oatmeal or a grain of oats in appearance.
Breeders will willingly take homemade products in the form of a drop. When hunting bream, you should not additionally load the shank of the hook with beads. Excessive suspicious noise alarms large fish. It is worth paying attention to the colors of bream jigs, which are made in calm natural dark colors. Shiny instruments scare away fish when played.
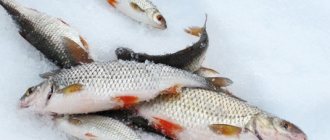
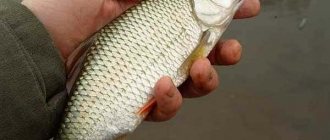
Jig for roach
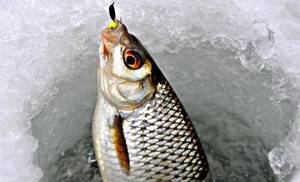
Roach is also one of the most common fish in winter catches. With proper knowledge of the nuances of the Uralka, made with your own hands and a well-chosen fishing spot, even in the dead of winter, the result is significant in terms of the size of the catch. Roach prefers the shape of jigs in the form of insect larvae, painted black. Ant, banana, classic jig are the most attractive types of imitators. The addition of even artificial bloodworms can greatly increase the number of bites. Do not use large-sized products. The roach is much better detected on miniature, tuned homemade products, matching the sound effects that arise when playing from the contact of beads and a hook. A sharp and distinct game attracts fish, so tungsten jigs modernized with luring elements most clearly correspond to the conditions of ice roach fishing.
Jig for crucian carp
Crucian jigs are similar in shape to roach and perch versions of homemade jigs, the only difference is the size of the hook used. The easiest way to make a product is by soldering it in the form of a spherical shape, a droplet or a bug. The black color is suitable for any fishing conditions, including hunting for crucian carp in open water in the summer. Soldering is done on a hook number 12–14 with an elongated shank and a ring-shaped fastening eye. This size and design for fastening allows you to replant animal bait in the form of a panicle of bloodworms, a pair of maggots or a small dung worm, as well as any artificial imitations of these baits made of silicone and securely attach the bait to the main fishing line. It is worth noting that placing bait on a jig hook when fishing for crucian carp is a key point that contributes to the success of the fish approaching the fishing spot and biting it.
