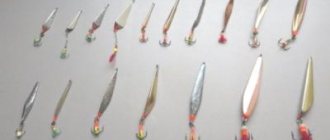
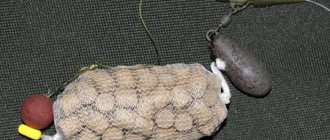
Balancers first appeared in Finland, but very soon became widespread throughout the world. Gradually, their design was modified, subsequently the baits acquired, in addition to two single hooks, a tee on the abdomen, as well as a tail in the back of the main body. It is in this form that these specific baits are familiar to many fishermen today.
As soon as the balancers gained some popularity, many craftsmen began making these baits at home.
The reasons for this are different: some are not satisfied with the effectiveness of purchased specimens, others like to try the results of their own creativity while fishing, and for others the budget simply does not allow them to often buy branded baits. In any case, there are now several proven methods for making balancers, a description of which can be read below.
Balancer for winter fishing
The capabilities of balancers during winter fishing, in contrast to fishing with the same baits in open water, can be very limited. Moreover, the restrictions are not at all related to the cleanliness of the reservoir.
By the middle of winter, the increasing thickness of ice on reservoirs begins to interfere with the sweeping movements of balancers during winter fishing. It is this factor that begins to affect the wiring capabilities of anyone, including a homemade balancer of any design.
And the lower the depth chosen for catching predatory fish in winter fishing, the greater the distortion of the balancer wiring can be, which probably not every novice fisherman has thought about.
Next, those interested can take a closer look at the very essence of the issue related to the possibilities of playing with a balance beam when fishing from ice.
Making a balancer blank
The blank for making the balancer must be cut out of wood or dense foam, giving it the required shape. Then, using a wooden beam and sandpaper, it is finished to give the workpiece the necessary parameters.
The tail part of the balancer is made thinner, the size of two thicknesses of the wall of a plastic bottle. This dimension is only needed on the back and sides of the workpiece, and its length is about seven millimeters.
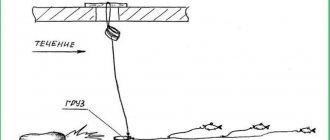
Ice fishing game
To explain the game of any homemade or purchased balancer during winter fishing, I drew a drawing that schematically shows two complete trajectories of the same balancer at different fishing depths.
Two green rays show the sector of the game of the balancer in winter fishing when fishing at relatively great depths.
The letter “G” indicates the depth of the game, where there is no failure in the balancer wiring yet. But the length of the bait’s planning trajectory should not exceed that shown by the scarlet arc under the number “2”.
But we should obviously be wary of failures in the balancer at shallower depths with a fairly noticeable ice thickness, if we take into account the winter fishing conditions shown in my drawing.
Such distortions in the game of balancers can only happen during winter fishing. An example of the trajectory of a horizontal bait in the shallows is shown by an arc under the number “1” and its two continuations in the form of black arrows.
As can be seen from the figure, the quality of the balancer's play in winter fishing conditions depends on at least two factors: the diameter of the hole and the thickness of the ice.
The larger the diameter of the hole and the thinner the ice, the longer you can set the amplitude of the throw to the balancer without the risk of distortion during the play of a homemade bait.
Obviously, this concept can only be changed by playing a homemade balancer on ice fishing within a circle of adjustable diameter. To demonstrate such a game, three videos showing the game of homemade balancers of three different designs are embedded in the page.
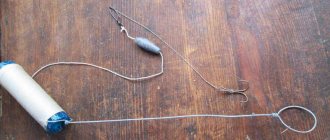
Fishing with a balance beam during winter fishing
Most of us on winter fishing catch fish on balance beams with a winter fishing rod, placing the whip of the tackle near the hole, thereby somewhat compensating for the height of the glass of ice.
If you fish with a high winter fishing rod, then the conditions for playing balancers without distortion will be much worse, as we were convinced of after reading the evidence in the previous article.
It turns out that during winter fishing, as the ice thickness increases, fishing with a balancer should shift to greater depths.
But here the prospects for catching predatory fish with a balance beam will begin to have a noticeable influence on a completely different factor, inherent in both winter and summer fishing.
As the fishing depth increases, the range of oscillations and the speed at which the balancer is pulled will be increasingly reduced by the fishing line trailing behind the balancer, which tracks the pull of the balancer with almost its entire lateral surface.
So is it any wonder that when catching fish in winter fishing from thick ice, any vaunted balancer can be given a head start by a homemade sheer gliding spoon, where the fishing line cuts through the water not so much with its side surface as with its transverse thin section?
This introduction had to be printed only because all the homemade balancers of my designs, compared to purchased ones, feel much more comfortable during winter fishing, because in addition to playing in the form of straight throws, they also have circular wiring with adjustable radii of the circles.
You will be convinced of the correctness of my words by watching videos on this page of the game of homemade balancers of various designs.
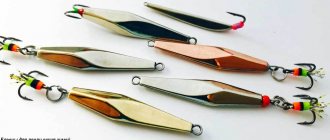
Homemade mini balancer for fishing
Homemade mini balancers for catching perch during winter fishing are shown in the picture.
The technical process for making miniature horizontal baits from scratch with your own hands is in the topic called Homemade balancer for perch. There, interested fishermen can learn how to make a simple punch and matrix for soldering jigs and mini-balancers.
I started catching perch with homemade mini-balancers on winter fishing trips about 40 years ago. And I still carry horizontal baits in sets of vertical perch spoons on my summer and winter fishing trips. Click on the photo of mini balancers.
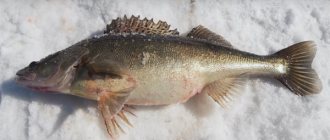
Homemade mini-balancers are quite promising baits when catching perch in shallow water immediately after freeze-up, that is, from the very first ice.
In the article “Balancer - Dolphin,” we bring to your attention another homemade horizontal bait, similar to the previous one, for catching perch in winter fishing.
The external difference between the two mini-balancers lies not only in the method of suspension to the tackle, but in the absence of a hook at the head end of this homemade balancer.
Similar mini-balancers were tested on winter fishing much later than their own. And on these homemade horizontal baits, in addition to perch, fish from the carp family often sit. (If you tie a hook with a bloodworm attachment to the tail of the balancer on a leash.)
Both modifications of mini-balancers are promising for winter fishing on the first ice when catching predatory fish in shallow areas of reservoirs without a noticeable current, where perch often feeds at the beginning of winter.
Fishing with a balance beam during summer fishing
The places for catching perch and other fish during summer fishing with any balance beam would be no different from winter ones, if not for two factors that directly affect the final result of the catch.
Taking into account the direct dependence of the trajectory of the game - guiding the balancer on the length of the descent of the fishing line, which for the summer has to be set to a larger diameter, fishing with a balancer in open water shifts to higher levels in relation to the horizons of winter fishing. That is, broke.
The second factor that adversely affects the prospects of summer fishing with a homemade or purchased balancer follows from the first - this is the unmasking of the fisherman when catching predatory fish in shallow areas of the reservoir.
Both problems are solved by a long rod, although we are unlikely to be able to control it comfortably. In addition, then another problem will arise associated with removing the caught fish from the balancer hook, hanging somewhere under the clouds at the level of hooking a long telescope.
It turns out that to catch fish on a summer fishing trip with a balance beam, it is advisable to use a rod that is not too long, with which the fisherman can set the necessary game for the balance rod, but then some kind of screen will need to be installed between the fisherman and the fish.
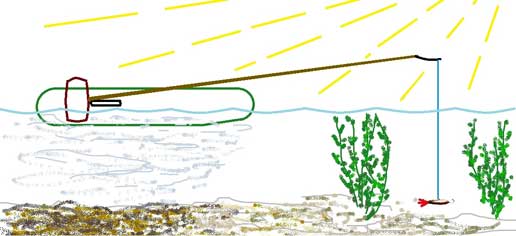
On this occasion, I drew a picture where I tried to depict all the obstacles that arise when fishing with a balance beam during summer fishing and the methods that allow you to bypass or smooth out these obstacles.
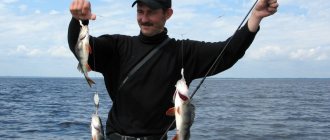
Although, to be honest, I myself rarely catch fish with a balance beam during summer fishing, and then only during the evening rutting season with perch in shallow fry. It happens that you run into a school of pike perch, but then, as a rule, you have to say goodbye to your homemade balancer.
I will list the conditions that, in my opinion, are suitable for fishing with a self-made balancer during summer fishing from a small boat:
A rigid rod no longer than 4 meters is required. In the old fashioned way, for these purposes I use plug-in bamboo fishing rods, familiar since Soviet times, with the simplest lightweight equipment and a nod made of a clock spring 10-12 centimeters long. The thickness of the fishing line on the tackle is 0.14-0.15 mm.
In order to make your hand less tired during fishing, I place a backpack between the seat and the stern side of the rubber boat, which serves as a support for the butt of the fishing rod. As a result, when controlling a homemade balancer, a lever of considerable length appears.
The best places for summer fishing for perch with a homemade balance beam are windows among the algae. I position the boat so that the shadow of a small boat at the bottom of the reservoir does not loom in front of the fish’s nose.
Although, during the rutting season, the perch in the shallows loses all caution and you can successfully catch the red-finned predator during summer fishing right next to the boat.
Homemade bladeless balancer
The topic Bladeless Balancer for Fishing provides a description of my homemade horizontal baits, which are successfully used more in winter than in summer fishing.
In terms of how labor-intensive it is to make with your own hands, these are the simplest balancers, which are soldered using the same technology as vertically gliding boat-shaped spoons.
The trajectories of circular and straight lines of homemade bladeless balancers in fishing conditions can be assessed by watching a short video.
Video - Bladeless balancer for ice fishing
The video shows techniques for accelerating homemade bladeless balancers in a horizontal plane along a broken circle and throwing baits that imitate the behavior of small fish in winter or summer fishing conditions.
In the photo on the left you see these same homemade bladeless balancers, which I managed to place on the side ribs (glued to paper).
Immediately after testing for professional aptitude in the bathroom, the homemade jigs, spinners and balancers participating in the filming of the video are photographed for placement on the pages of the site (until the polish fades).
Poorly made baits are usually corrected. Therefore, there are practically no defects when making one or another bait with your own hands.
After that, homemade bladeless balancers are used in fishing conditions, if not by ourselves, then by some of my friends, a couple of whom give me a lift in their jeeps to the winter fishing spot.
Tools for making balancers
Making a balancer with your own hands should be done using the following tool:
- sharpened knife (you can use a wallpaper knife);
- nippers or side cutters;
- pliers;
- student brush with squirrel bristle;
- clamps;
- cans;
- soldering iron with a power of one hundred watts;
- orthophosphoric acid;
- wooden beam;
- sandpaper of the second number;
- set of needle files.
Homemade balancer with side rudders
In the articles under the topic heading Balancer for fishing with side blades, a description is given of homemade spinners with a horizontal suspension to the tackle with side rudders soldered into the body of the bait.
Homemade balancers of this design are suitable for winter and summer fishing and have one feature.
During the manufacturing process with your own hands, side rudders in the form of blades are soldered into the bodies of the balancers, by changing the bend of which you can directly change the play characteristics of horizontal baits while fishing.
Video - Balancer with side rudders in fishing conditions
I will explain in words some of the video plots that you may find useful when fishing with balance beams with side rudders in real conditions of summer or winter fishing.
Stabilization of both straight and circular movements when playing a balancer is carried out due to artificial attachments on the tail hooks, that is, exactly the same as with a homemade bladeless balancer.
If you have already appreciated the game of balancers in the video, you might have noticed the sweeping motion of horizontal baits with side rudders - blades, both when accelerating in a circle and when throwing to the sides. And this is with a very short descent from the winter fishing line.
Homemade balancers with side rudders are heavier than the bladeless horizontal baits disassembled above (due to the greater mass in the metal structures). Therefore, when fishing with such balancers, you can catch fish at greater depths.
How to make a balancer with your own hands at home?
If you want to make a really high-quality fishing rod, you will have to plunge into the jungle of studying this topic, and understanding it will be oh so exciting, especially for a beginner.
If you have special equipment and the ability to use a soldering iron, then you can build a bait from a metal suitable for the weight category; if you immediately reject this option, then you can use another.
To make a couple of dozen balancers you will need to have at your disposal items in the form of:
- lead;
- containers for melting lead;
- tools that every owner uses;
- steel wire;
- plaster or alabaster.
First of all, you need to make a mold for the balancer with your own hands; this is a very responsible mission that requires accuracy from the fisherman:
- Take any container and dilute gypsum in it, wait until the mixture acquires a viscous consistency, then immerse the existing balancer, which was manufactured industrially, into it, be sure to remove the tee, wings, and lubricate the selected sample with a thin layer of grease.
- After making the print, you need to fine-tune the shape using a fine file.
- When the plaster has completely hardened , begin making the second part of the mold. To do this, place the already selected balancer in its original place and lubricate the first sample with grease, attach the second part of the mold.
- When the gypsum has become as strong as granite, you can begin to make a funnel for pouring lead. To ensure high-quality pouring of lead, several drainage holes are made in the mold to allow air to pass through.
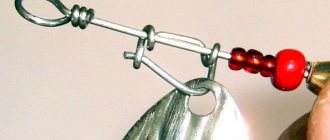
- Put the form back and start creating a wire structure for attaching the tee; it should have a ring for attaching to the fishing line.
- When the mold is ready , a wire structure is placed on it, molten lead is poured through a funnel, the poured device is brought to perfection using fine-grained sandpaper, the finished model is thoroughly sanded so that it shines, covered with your favorite coloring, you can apply a waterproof colorless varnish.
- After the paint and varnish materials have dried, all that remains is to sand the tail fins, made of plastic material, and attach the tee.
Homemade balancer with a tail blade
Making your own balancers of this design is discussed in detail in the topic Homemade balancer with a tail blade.
The tail wing serves here as an element that, within certain limits, regulates the trajectory of the balancer's movements while fishing.
An artificial attachment on the tail hook stabilizes the wiring of homemade spinners with a horizontal suspension to the tackle in the same way as the balancers of the two previous designs used in fishing.
The hook is soldered in a hinged mounting version above the tail blade of the balancer.
Video - Game of balancer with tail blade
A homemade balancer with a tail blade has wiring that “wiggles” somewhat in the horizontal plane, as you can see when watching the video. A small fish behaves in approximately the same way when escaping the jaws of a voracious perch.
The design of homemade balancers with side blades allows baits, in real conditions of summer or winter fishing, to also reproduce two types of movements: in the form of leaving a state of rest to the side and accelerating in a circle.
True, the process of making these balancers with your own hands is somewhat more complicated and takes longer in terms of time spent than soldering all my other homemade horizontal baits.
Therefore, it is quite irrational and wasteful to leave such balancers with “dead” holds on winter snags and in thickets of summer algae. And such hooks happen both during winter and summer fishing.
To help you, I recommend making a detachment with your own hands, the first of which was once made specifically to save your homemade sophisticated balancers while fishing.
***
Tips that may be useful to you
If you learn to solder balance weights with your own hands, then in the future you will no longer need to acquire skills in the manufacture of homemade vertical gliding spoons.
Before starting to manufacture both balancers and vertical spinners, I would advise you to first think about the dimensions of the baits, or more precisely, about their weight in the water.
I'll repeat it again. Lightweight homemade balancers will not be able to pull long lines behind them at a sufficient depth without noticeable distortion of the wiring.
***
Materials for making balancers
The main material used is soft wood (linden or aspen). Instead, you can use dense foam. This is necessary for the manufacture of a blank (model) of the balancer.
Moreover, to make a balancer with your own hands, you will need steel or copper wire half a millimeter thick, solder with a very low melting point, lead, a plastic bottle with thick walls (the wing will be made from it), multi-colored paints (aerosol types, quick-drying, are suitable) , hooks and tees of various sizes with a long shank, inexpensive PVA glue, alabaster with soap and graphite powder (alternatively, you can use a soft pencil core rubbed with sandpaper).
You can use acrylic paint, as well as gouache. After painting, you will need to coat the painted area with a protective varnish.