Maxim Balachevtsev | June 29, 2021
Friends, I’ll say right away that this is perhaps the only article of mine where I write about fishing of this type, in which I am still largely an amateur. That is, my level of mastery of the material is almost at the level of a “teapot” with a spinner on a nylon cord tied with a bow to a birch branch.
But since the alternative information on this method of fishing - and we’ll be talking about kherabun - is practically out of stock, and the demand for descriptions of fishing is overwhelming, I decided to write. And I’ll tell you about how I mastered this fishing and what I came to. And I think that for those who are starting to get acquainted with herabuna, the article will be useful and will at least set priorities a little and sort into shelves what may still be in complete chaos.
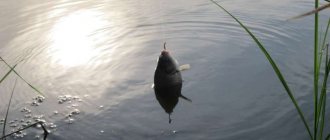
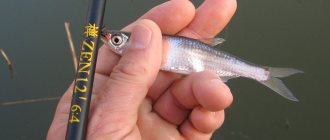
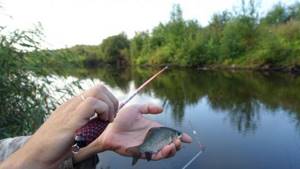
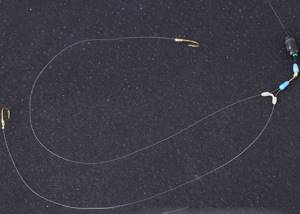
So, Herabuna . In fact, this is a type of float fishing rod, only of East Asian origin (photo 1) . And there are a lot of differences in fishing with this fishing rod from the “float” we are used to.
In general, in Asia there are many fishing methods that are new to Russians. Or rather, maybe acquaintances, but these methods were not continued in our country - and we all turned our backs on Euro-American fishing styles.
As a result, they forgot about ours. But take the same Asian tenkara . I remember about 35 years ago, in a village in the Tver region, I watched how men caught grayling with a “fly”. No, not fly fishing – tenkara, if that makes sense! A juniper fishing rod, a braided line slightly longer than a whip and a simple “fly” at its end. And now we aspirately call this very tenkara “original Japanese tackle.”
In essence, it’s the same with herabuna. After all, we also used dough as a nozzle and long floats (“goose,” let’s say). But these “old-fashioned methods” have not received modern development with more delicate, lighter and more technologically advanced gear. And in fact, the European float school with a completely different approach now dominates.
Differences
How does the herabuna differ from the European float rod, or more precisely, the fly rod?
1. The main difference is the nozzle. If in a European “float” the main baits are bloodworms, maggots, and sometimes a worm, i.e. animal (live) attachments, then in kherabun it is dough, and only dough. What are the advantages and disadvantages of such a test? The advantages are that we can easily adjust both the mechanics and the flavor/aroma components in the nozzle.
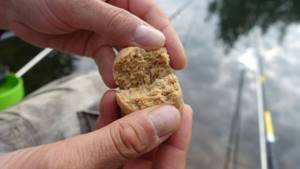
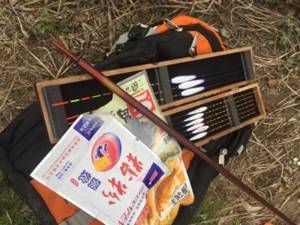
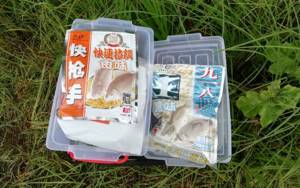
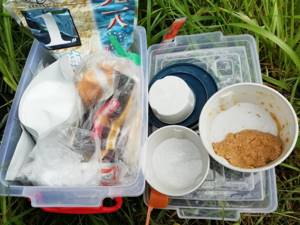
The dough for kherabuna is very different from the crucian carp dough that we have been accustomed to since childhood. And from semolina “chatter”, and from other types of our “handicrafts”. “Heratesto” is a mixture of many components, each responsible for its own properties (photo 2) . The principle of action is very similar to our branded bait. There is a base (usually potatoes, soy), there are flavorings (ground shellfish, krill), there is aromatics, there is a binder (glutens) and so on. That is, the dough for sherabuna can be very different in composition and properties. And therefore…
2. ...This fishing method does not use bait. The bait itself (dough) is the bait. Those who are familiar with the European “plug” know that feeding there is carried out using a small cup, which is fastened to the top of the “plug” and turned over exactly at the fishing point.
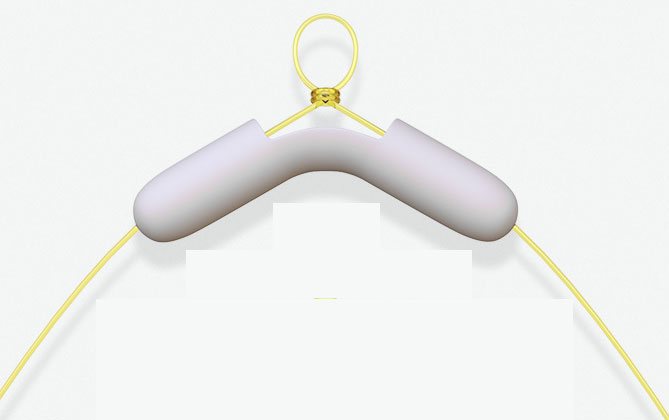
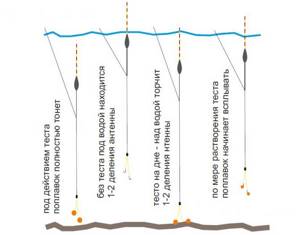
The principle is approximately the same with herabuna. The dough that is put on the hooks (and there are two hooks here - photo 3 ) is the bait. Once in the water, the dough begins to swell and particles separate from it. These particles are both small, producing turbidity, and large. Some large particles sink to the bottom, while others slowly float up.

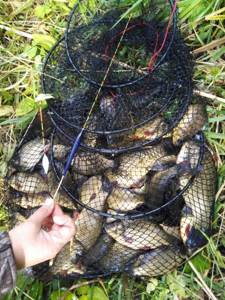
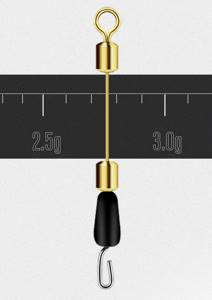
It turns out that a cloud or column of very appetizing food is formed right next to the hooks, giving off maximum aromatics (photo 4) . And this food appears at the fishing point on every cast, wherever we cast. And with the help of the test, we can regulate both the rate of disintegration of the nozzle, and its size, taste, smell, color. And if we suddenly didn’t get it right, for example, with the aromatics, then re-feeding the point will not be difficult - we just knead new dough with a different “aroma”. And we begin to make new casts. But how do we know the rate at which the dough disintegrates? What if we already have hooks there and there is no dough, but we are still sitting and waiting for a bite?
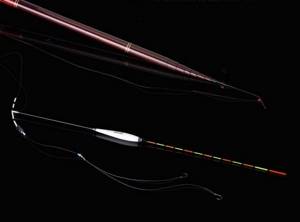
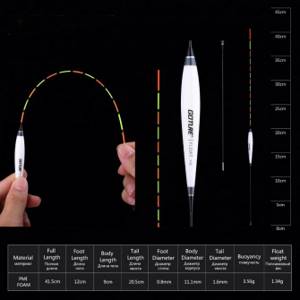
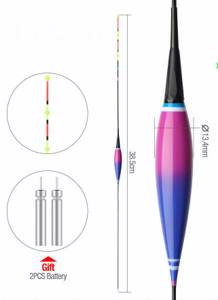
3. A kind of float is designed for this (photo 5) . Previously, when I saw this kind of floats, I thought they were for dummies. All my experience of fishing with a European “float” said that such a long antenna is complete nonsense.
A long keel - yes, it is needed. And the antenna should be short and thin. But it is this long antenna that allows you to monitor what is happening with your attachment. Otherwise, floats for herabuna are no different. Except that they have one attachment point, and not two, like on floats for a fly rod. Bodies can be of various shapes - from pear-shaped to needle-shaped (photo 6) . Keel - from very short (for shallow and calm waters) to very long. Everything is the same as in ordinary floats.
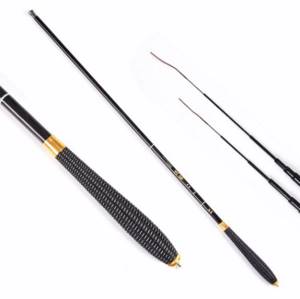
4. Rod (photo 7) . By and large, I didn’t notice any major differences. As a rule, rods for Herabuna are “slower” than European ones. And their bend is smoother. And they work the entire length. Herabun fishing rods have several characteristics. If in a “Euromax” only weight/length is most often indicated, then here the specification also necessarily indicates tuning, balance and power.
Build is a fraction. The length of the rod is conventionally divided into 10 parts, and the numerator and denominator of the fraction reflect the point of maximum inflection. For example, if a 10-meter rod bends maximum three meters from the tip, then this action is marked as 3/7, and if a 5-meter rod bends at two meters - 4/6. This is a strange designation from a mathematical point of view, but easy to understand.
Balance is simply the balance point of the rod, the distance to it is indicated in centimeters from the butt. This parameter is important both from the point of view of ease of control of the tackle and in relation to holding the rod on the stand. The lower this value, the better. It’s easier on the hand, and the length of the stand can be shorter.
The power of the rod is essentially the same as in a spinning rod. It is indicated both in lb (libres, i.e. pounds), the maximum breaking load of the fishing line, and in the unknown “N”. The fact is that very different fish are caught using this method - from crucian carp weighing 30 g to catfish weighing 20 kg. And it is clear that for such fishing you need very different fishing rods.
However, I spent my first 15 fishing trips with a Herabun rig with an ordinary European fly rod (photo ). That is, you can fish with it, but this is not “feng shui”. There is one important point with fishing rods. Dough is a delicate substance, unlike from maggots. And the cast should also be quite gentle, pendulum. And not over the head, as we are all used to. Because when casting over the head, all the dough will fly... well, or not fly. In general, it will end up separate from the hooks. And the soft action The Herabun fishing rod allows you to cast normally and gently using the “pendulum”.
The length of the rod for this fishing method can be from very short (180 cm) to extra long, more than 15 m. Lengths for our domestic conditions are from 3.6 to 6.3 m. The classic gradation of lengths for Kherabuna goes through 0.9 m, but there are also intermediate models.
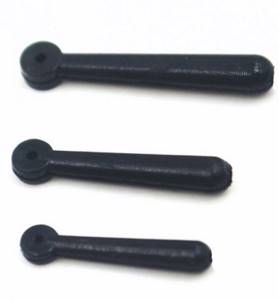
Another difference will be significant for those who catch large fish, and in particular carp. All Herabun fishing rods are equipped with a ring mounted on the butt plug (photo 9) . The ring is used to fasten the belay. We don’t hold the fishing rod in our hands all the time (like in a European school) - it lies on the counter. A sharp bite and the fishing rod is in the water. And when fishing for a very large fish, you can let go of the fishing rod - and it will calmly swim on the belay. Insurance - rubber band. And it stretches, tiring the fish. But more about insurance later.
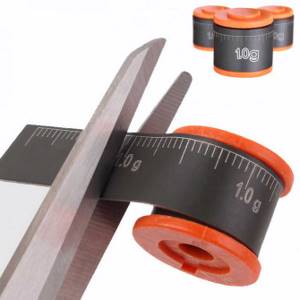
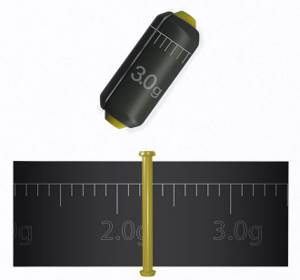
5. Another difference between the Herabuna and the Euromach is a more precise adjustment of the float load. This is very important here. More important than in the Euromach. Often you have to “catch” plus or minus a tenth of a gram. And that is why they use not the usual float pellets, but belt weights (photo 10) .
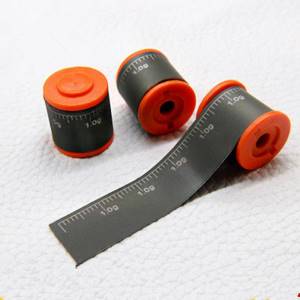
It is the tape that allows you to remove or add 0.05 g at any time - and without difficulty. At first I used regular sports pellets. But if you can still attach a 0.2 g pellet to the fishing line, then remove it... You need a special tool. With a belt load, apart from scissors (photo 11) - well, or your own teeth - nothing else is required.
In general, if you find my first video on YouTube on Herabun, then you can see my skepticism about the differences from a regular “float”. That is, then I believed that the differences were minimal, and to suit our conditions it was necessary to change some aspects of this fishing and create something transitional between the sherabuna and the “euromach”. But this was more due to inexperience. Because now, having spent more than fifty fishing trips with this equipment, those “feng shui” things that I did not understand at all became clear to me.
Important point! Many people think that this fishing method is only suitable for small ponds where there is no current or wind. That is, these are ideal conditions. And in a different environment it is impossible to work as a herabuna. And I myself thought the same thing on my first fishing trips. However, there are different types of herabuna. And schools of this fishing vary greatly. By and large, you can fish with this gear both in small currents and in windy conditions. Of course, not in a trout river and not in meter-high waves. But a small current or wave is not a hindrance for this fishing rod. It’s just that the gear for such conditions will be built a little differently.
And another very important point. Like any other type of fishing, herabuna can be divided into “simple” and “feng shui”. Anyone can master a “simple” sherabuna in a couple of fishing trips, spending mere pennies on it. Herabuna “feng shui” is a long-term comprehension of the method, a complex and lengthy arrangement of gear and, in general, a completely different approach to fishing. I have a good command of many types of fishing and I can say that Kherabuna has, perhaps, the widest range from the “teapot” level to the “pro” level. That is, even a child can be taught a simple version - and he will catch, and very successfully.
Because the gear is simple, the reservoirs are close, the equipment is minimal. There are no boats, motors, echo sounders, bait, tons of gear and boxes of bait. Do you want to introduce your child to fishing? Welcome to Herabuna. All the equipment will cost you a thousand rubles, and the pleasures will be over your head.
But if you go further and try to achieve “zen” in this type of fishing, it will not be easy. But more on that later.
Tackle elements
The structure of the Kherabun tackle is simple. It will not be difficult for even a novice fisherman to assemble it. The main differences from the classic “float” are the design features of the rod, the physical properties of the fishing line, the shape of the float and the subtleties of the equipment.
Rod
Initially, a bamboo rod was used for this fishing, but progress does not stand still. Now fishermen use telescopic fishing rods, which differ from the models familiar to domestic fans of fishing using float methods.
Classic Japanese Herabun fishing rods have the following features:
- Length is indicated in shaku (30.3 cm). Translated into the usual measurement system, it is 2.7, 3.6, 4.5, 5.4 meters. Models with a height of 6.3, 7.2 and 8.1 meters are much less commonly used.
- The rods have the minimum possible weight. Models with a length of 2.7–4.5 meters can weigh only 50 grams.
- Low rod taper. The butt has a small diameter, which rarely exceeds 15 mm.
- The fishing rod has a slow “soft” action. Under load it bends along its entire length.
It is important to know!
Many rods for fishing in other directions, for example, tenkara or tanaga, have similar properties. Asian fishermen call them differently only because of the fishing method used in a particular situation. In addition, the classic fishing rod for sherabuna on the butt has a comfortable handle made of polyurethane foam or leather, and at its end there is a mount for attaching to the safety rubber. The main line is attached to a loop with a swivel mounted on the tip of the rod.
fishing line
For the sherabun method, monofilament fishing line is used. It must be sinking, soft and have high extensibility. Combined with a slow, light rod, the result is a delicate tackle that can withstand heavy loads.
The thickness of the fishing line is selected according to the fishing conditions and the potential size of the prey. Typically, anglers use 0.18–0.24 mm nylon. When catching small fish, you can use a thread with diameters of 0.14–0.16 mm, and when hunting carp, it is advisable to coarse the tackle to 0.26–0.30 mm.
The main line is attached to a loop installed at the tip of the fishing rod using a special double knot. It allows you to remove it without any problems, changing it to a thread of the required thickness, without putting much effort. Moreover, during fishing, such a fixation is extremely reliable and never comes loose spontaneously.
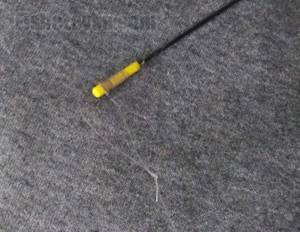
Photo 1. The loop can be attached to a glued connector.
Float
Herabuna involves the use of a highly sensitive bite alarm. For this, a thin float with a long tip and keel is used. Its carrying capacity rarely exceeds 4 grams, and most often equals 1–2.5 grams.
For reference! The total length of floats for fishing using the sherabun method is 30–50 cm.
The dimensions of the float imply that it is loaded so that its entire body is under water. A fish bite is signaled by a raised or sunken antenna, marked with bright stripes, the length of which in some models reaches 20 cm.
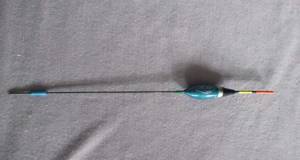
Photo 2. The main thing is a long keel!
Construction of tackle
We will need: main fishing line, leader fishing line, hooks, silicone stoppers, swivel, float connector, tape lead, float and the fishing rod itself.
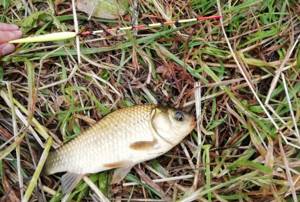
Let's assemble a simple fishing rod 4.5 m long for catching crucian carp from 50 to 200 g with “bonus” fish up to 500 g (photo 12) . This is the simplest and most common fish in our small ponds.
1. Take a 0.18 mm fishing line. At its end we knit a loop with a double knot. The length of the loop is approximately 6 cm. And we measure this fishing line 4.2 - 4.4 m. Cut it off.
2. From a package of silicone stoppers (there are usually 5-6 pieces - photo 13 ), we move 2 stoppers to the free end of the fishing line.

3. Take the connector for the float (photo 14) and put it on the fishing line.
4. We move 2 - 3 more stoppers onto the fishing line.
5. Now we put on the reel for the belt weight (photo 15) .
6. We slide the last stopper onto the fishing line and tie a regular swivel to the end of the fishing line. Or, instead of a swivel, we tie a special leash carabiner with a stopper (photo 16) - it makes it easier to replace leashes.
That's it, the main part of the equipment is ready. Now we knit a leash. The leash in the sherabun has 2 hooks, and they hang at different levels with a distance from each other from 1 to 10 cm (photo 17) .
But not one after another on the same line, but at separate ends of the leash. Usually I cut a piece of 10 + 13 cm long from the leader line (0.14 mm in diameter) and plus about 15 cm for tying the hooks. First, I mount a plastic rocker that separates the ends of the leash (photo 18) so that they don’t get tangled. But you can do without this separator, limiting yourself to just a loop. But in the end you need to get a piece of fishing line 23 cm long with attached hooks at the ends.
Hooks. In general, in kherabun, the founders of this type of fishing often use barbless hooks. For the most part, this is a tribute to the “catch and release” principle. But in this type of fishing, the use of barbless hooks also has a second meaning.
Since there are two hooks, after catching a fish, one hook will be in the fish itself, and the second... And the second may end up in the landing net, in your clothes, in your hand. And it’s much easier to pull him out if he’s beardless. However, finding such hooks of the right numbers and the right quality from us is not an easy task.
I personally use regular barbed hooks. So far there have been no problems, but this is for now... The hook numbers are the same as in a regular float fishing rod. For crucian carp from 50 to 300 g, I use hooks from 18 to 14 numbers (according to Western European classification). Keep in mind that the Asian classification is very different from both Western European and ours.
So, we have a 23 cm piece of fishing line with two hooks at the ends. Now fold the fishing line in half so that there is 3 cm between the hooks. And tie a regular loop with a double knot. The length of the loop is about 1 cm. Pull the loop to the separator. That’s it, the leash assembly is ready, you can attach it to the connector (leash carabiner) under the load. It is advisable to knit heels of these in advance so as not to have to do this cute thing on the pond.
Great! Now it seems like you need to fasten the float and leash - and the tackle is ready? But this is where the most difficult part begins - the float and its loading.
Models of rods for fishing using the herabun method
Rods for fishing using the sherabun method are produced by several companies:
1. Lohas Hera Rod XC - a series of inexpensive fishing rods. The blanks are of medium action, there are two rods in the series, 360 and 450 cm long. The rods are telescopic, when folded their length is 47 cm. The blank material is carbon fiber.
2. Nissin Carp Competition – a line of elite Japanese carp fishing rods. The blanks are made of high-density carbon fiber of the HSVF brand. A connector on a Rolling Top bearing is installed on the tip. The tube joints are reinforced using Whirl technology. The series includes three blanks with lengths of 450, 540 and 630 cm. The rods are available in red (RX), black (BX) and yellow (YX).
3. Nissin Seikon Hakuryu – a classic series of rods for fishing using the herabun method. The blanks are made of high modulus HSVF carbon. There are 6 rods in the series, ranging from 360 to 810 cm in length and weighing from 80 to 395 grams. When folded, the length of the blank is 104 cm. The rods are very light and sensitive, transmitting the bite well to the angler’s hand.
4. Red-Fox Goture - a series of light rods. The series includes 6 forms ranging from 300 to 720 cm in length and weighing from 72 to 286 grams. In the transport position, the size of the forms is 74 cm. The handle is braided with a decorative cord.
5. Nissin Pocket Mini V3 – fishing rods for travelers. When folded, their length is 25 cm. There are 5 forms in the series, ranging from 270 to 450 cm in length, weighing from 25 to 75 g. A Rollig Top connector is installed on the top.
6. Daishin Koushi – plug form for fishing using the Asian method. The line includes fishing rods with lengths from 210 cm to 538 cm and weights from 56 to 144 grams. The rods are disassembled into 3-5 parts, their length in transport position is from 80 to 121 cm.
Float
What stands out to us most about the sherabun is the float. What are we all used to? A long keel, a body of one shape or another and a low, sometimes thick, antenna. Sometimes - also with a boss. And here is a keel from a couple of centimeters to 30 cm. The bodies are of completely different shapes - from pear-shaped to needle-shaped. But the antenna... The shortest I have ever seen is 15 cm. The longest is both 30 and 40 cm. The average length of the antenna is 20 cm (photo 19) . The antenna has contrasting stripes, usually orange and yellow with black stripes. There may be options for cloudy weather or sunny weather. The antenna can also have bosses - from 1 to 3 pieces. Their purpose will be discussed later.
It is this long antenna that allows you to feel (see) what is happening with the nozzle. It is this that allows you to adjust the depth very precisely, which is very important in this type of fishing. And it is precisely this that will allow you to record the bite of such “harmful” fish as crucian carp.
The load capacity of the floats can also be any. From 0.5 to 7 - 8 g. This is one of those that I held in my hands. There is less, there is more. But my main ones are from 1 to 3 g. As a rule, the load capacity is not marked on the floats. Only his number is entered. And they are often sold in sets of three with numbers 1, 2 and 3 (photo 20) . The load capacity of the rooms differs very slightly. For example, in a set, floats with numbers 1, 2 and 3 may have a load capacity of 1.5 - 1.6 - 1.7 g (usually this can be seen on the manufacturer’s or seller’s website).

Features of fishing with herabuna
The gear allows you to fish in different horizons: closer to the surface, in mid-water, in the bottom layer, with the bait touching the bottom or even with the load lying on the ground. This indicates its versatility and the ability to be used for catching different fish in any conditions.
The main advantage of the herabuna is its high sensitivity, thanks to which the angler can see even a sluggish bite and quickly react to it. This is achieved by eliminating the windage of the fishing line. It must be sinking and must be taut after casting. For the same reason, the tip is lowered into the water a couple of centimeters, the rod itself is placed on a special stand, and not held in the hand. In this position, the fishing rod can be dragged away by a large fish, so it is fixed with a rubber cord, tying it to the ring on the butt plug of the rod.
Despite the apparent simplicity of the design, correct adjustment of the herabuna is quite a complex intellectual task for the fisherman. Adaptation to a specific type of fish, fishing depth, casting distance, weather and other conditions open up wide scope for experimentation. There are a lot of different nuances in this method, which at first glance are insignificant, but in practice are very important.
How to load
Now our gear is ready. Float in hands. Let its carrying capacity be 1.6 g. We put a weight on the fishing line of 2 g. Now our task is to make sure that all the tackle with weights, connectors and hooks sinks the float so that there are 2 - 3 divisions of the antenna under water, and the rest of it stuck out of the water. We achieve this by little by little cutting off pieces of lead from a 2-gram tape weight.
If you accidentally cut off a little more and it turns out that the entire antenna sticks out of the water entirely, it’s okay. Simply unwind the lead tape from the load boss and slip an additional piece of lead under it. Next, we wind the tape back. As a result, I repeat, after all the manipulations, the entire antenna should stick out, except for two or three divisions.
On a pond, when we put the dough on the hooks, the float should completely sink. That is, the antenna will not stick out from the water.
Design of rods for fishing Kherabun
Fishing rods for fishing using the herabun method consist of several parts:
1. Fishing rod whips are made of high-modulus carbon. The material is very light and durable, allowing you to make flexible tubes (rod elbows) of small thickness from it. All fishing rods in the butt part have a thickness of 8-15 mm. The weight of carbon rods is very light, they do not tire your hand even after many hours of fishing. The whips are very flexible; when playing fish, the entire form bends;
2. Rod handles. The thickness of the butt of the form is small. To ensure that the rod fits comfortably in the hand, the handle is made of ethylene vinyl acetate (EVA), strips of leather or synthetic cord. A metal ring is installed at the end of the handle for attaching a rubber safety cord;
3. To attach the equipment, make a loop of braided cord on the top.
Depth sounding
But how can you fish if the float is not visible? Just! Look at photo 21 . To begin with, we set the float release so that the lower hook with the dough touches the bottom. It turns out that the weight of this dough hook no longer affects the load. And then, by adjusting the float release, we ensure that 2 float divisions stick out above the water. I note that when measuring the depth you do not need to push the dough each time.
It is enough to attach a piece of, say, an ordinary eraser (eraser) to the bottom hook. It is exactly close in density to heavy dough. And now, with the elastic band on the hook, you can manipulate the depth.
Here it is necessary to say about special cases:
We fish over the grass. For example, we catch grass over a carpet. A very common situation. The total depth is one and a half meters, but there is only 60–70 cm of clean water, and below there is a solid carpet. What should I do? For these situations, floats are used not with a thin monolithic antenna, but with a hollow tubular one (photo 22) . Such an antenna has sufficient load capacity. True, setting up such a float is a little more difficult. It is necessary to ensure that during fishing there is one division of the antenna above the water (or 2 divisions - in case of poor visibility).

As a rule, the carrying capacity of the antenna is such that a piece of dough drowns approximately 1.5 divisions of the antenna. 2 pieces – 3 divisions. Therefore, without dough (but with hooks), 1 + 1.5 + 1.5 = 4 float divisions should stick out above the water. But, again, a lot depends on the size of the hook and, as a result, on the size of the dough balls. But what’s good about our tackle is that you can always add or subtract a belt load. That is, at home they loaded such a float into 4 divisions, but at the reservoir they made the loading more precise.
Fishing in poor visibility conditions. For these conditions, many float manufacturers make the last 2 or 3 divisions of the antenna thicker. Essentially, here we do the same as described for classical fishing. There will simply be 2 or 3 thick float divisions sticking out above the water. This is mainly necessary at dusk at long distances (rod more than five meters long, shallow depth). Or when the reflection on the water is changeable - say, there are sparse trees on the opposite bank.
On sale you can find attachments for the antenna, including luminescent ones, which make it thicker and more noticeable (photo 23) . That is, it is not necessary to buy a specially thickened float - just buy “thickeners”. You can also use floats with bosses on the antenna for this. This is if the lighting is very bad, there are ripples on the water and the reflection is changeable.

Korean equipment. May the advanced herabunists forgive me, but I haven’t studied this option thoroughly yet, so I might as well say nonsense. This equipment is used when there is significant wind drift. Or a slight current. Mainly when catching not the smallest fish - for example, carp. An ordinary float antenna, sticking out by 2 divisions, will simply disappear under the water during wind drift due to the tension of the fishing line. That's why we use a boss antenna. This is a thickening on the float with additional buoyancy and good visibility.
However, with a strong drift or current, the hook and bait will not be able to hold the equipment in place. Therefore, loading on the line is performed differently. Closer to the European “swing”, i.e. we have the main load and below it, at the point where the leash is attached, there is a “supplement” - a small lead pellet. Or it could be a large swivel. Or a leash carabiner. In general, some kind of load. And the main load is located 20 cm above the “under-grazing”. And the float is loaded in such a way that both hooks lie on the bottom, and the “swivel” touches the bottom. And in this case, there should be one antenna division and a boss above the water.
Such equipment, of course, is not so sensitive. And we will only understand the rate of dissolution of the dough intuitively. But when catching large fish (for example, the same carp) this is no longer so important.
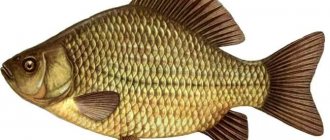
The essence of fishing using the Herabuna method
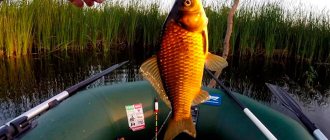
The crucian carp is attracted by a cloud of dusty dough, in which it begins to feed on small particles. Since the dough is very soft and airy, the crucian carp does not notice how it sucks in the main nozzle. Despite the complexity and unusual nature of Kherabun’s gear, baits and baits are of great importance when fishing with this method.
Nozzle
A special dough is used as a bait for this fishing method. Some companies, such as Marukyu, have more than 400 positions with attachments that are suitable for a wide variety of fishing conditions.
Attachments - Old Ghost Dough
But in general, there are 3 types of dough:
- Dusty (little or no gluten) The bait made from this dough also serves as groundbait. When it gets into water, a ball made from this dough begins to swell and disintegrate, falling into small dusty particles.
- Nozzle (lots of gluten) Due to the large number of connective fibers, this dough holds better on the hook, it generates less dust, but does not lose its attractiveness to fish. Crucian carp can peck at it both purposefully and involuntarily, while feeding in a cloud of dusty dough.
- Gelatinous or jelly-like. Unlike the attachment type, which can work independently, the jelly type only works in conjunction with dusty dough.
Ready-made dough bait for fishing using the Kherabun method.
If we use a combination of dust and bait dough, then when the bait is completely dissolved, we can still continue fishing and wait for a bite on the bait. If we fish with a gel bait, then further waiting is not advisable and we need to re-attach everything.
The process of fishing using the Herabun method
It can be divided into several stages:
- Preparation of the workplace. Includes installation of chair and rod rests. The stands are installed so that the tip of the rod is in the water.
- Preparing gear. Collecting equipment, loading the float to the “point without bait”. This is done on bare hooks so that we know when our bait falls off them.
- Test preparation. The dough is diluted according to the recommendations on the package. We can knead one dough and use it on both hooks, or we can knead two types of dough, bait and bait. After we have moistened, the dough needs to sit for 3-5 minutes.
- Determining the depth at the fishing point.
- Starter feed to attract fish. You can do this by placing bait dough on both hooks, or by making larger balls.
- Frequency of re-casts. Our sensitive float will help cope with this task, because it’s not for nothing that we surrounded it so carefully. By placing balls of dough on the hooks, we further surround the float and as this dough disintegrates, the float begins to float up and tend to the “point without bait”. And it becomes clear to us when to re-throw the tackle.
Measuring the depth of a pond
Both when fishing from the bottom and in the water column, it is very important to know the depth in the fishing area. And we must not only know it, but also fix it on the equipment. This is done with a special marker thread. But more on that later, first you need to determine the depth. Depending on the choice of fishing method, the depth measurement scheme also depends:
Fishing from the bottom
When fishing this way, we need to adjust the float so that the bottom hook lies on the bottom, and the top one just touches the bottom. To do this, we will use a device such as a depth gauge. Essentially it is a small rubber ball with a metal core that can sink a float. You need to stick the top hook into the ball and throw the tackle to the fishing point, while you need to adjust the depth so that only the tip of the antenna appears from the water.
Next, we attach the float to the main fishing line and knit a marker knot at the point of contact between the top of the antenna and the fishing line. The knot is knitted using a special thread, or you can take a piece of braided yarn. Once we have recorded the depth, we can remove the depth gauge. In this case, you need to understand that the float will float to our loading point and, accordingly, the hooks will rise above the bottom. In order for us to still fish from the bottom, we need to forcibly increase the depth. To do this, we need to move the float so that the marker node and the “point without bait” coincide. And now, while fishing, the bottom hook will lie completely on the bottom. In this case, the top hook will only touch the bottom.
Fishing in the water column
To do this, we do all the same steps, only the depth gauge needs to be placed on the bottom hook. At the same time, we don’t have to fish so that the hook touches the bottom; we can make the depth smaller. We just need to know in what layer of water we are fishing.
Thank you for reading this article, in which information is collected bit by bit and tested by me personally. On my own behalf, I want to say that this method is unlike anything else; it combines my favorite float and the concept of feeder fishing.
You can also read my reports on fishing using the Herabun method. Soon I will publish detailed instructions on how to do without special gear and test, but still enjoy fishing using the Herabuna method.
Night fishing
In recent years, battery-powered floats have appeared on the market (photo 24) . Not miserable ones, as before, but ordinary floats with a slightly lower carrying capacity, but with a luminous antenna. The float is threaded, there is a battery inside. Fiber optic antenna. It glows beautifully. The battery lasts for several full night fishing trips. Here, in essence, everything is the same as in regular daytime fishing, only the float still needs to be loaded a little less. At night, the fish are less timid, there is, as a rule, no wind - and let not 2 divisions stick out of the water, but 3 - 4.
You can fish with regular tackle, but here you will need a UV flashlight. The flashlight is not the most ordinary, but narrowly focused. And its beam targets the float. This lantern is mounted on a special swivel bracket to a chair or platform.
Although I prefer the first option - with a battery-powered float.
Well, our equipment is ready, the float is loaded correctly, the depth on the equipment is set correctly. It's time to catch fish. And now the most important thing is the nozzle.
Method of catching "herabun"
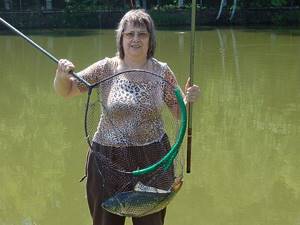
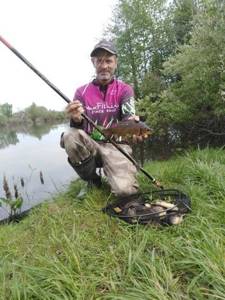
Photo by the author
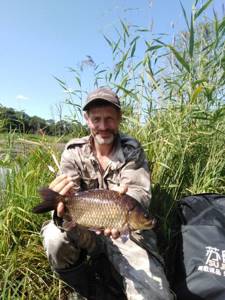
Information about this traditional Japanese and Chinese gear is increasingly appearing in the media. In some regions, competitions for catching crucian carp in this way have been held for years, and, as far as I understand, they are held, trying to copy the established rules.
What I liked about the tackle was not its aesthetics and integrity, but the fact that you can easily and simply hold the bait at the bait point, despite the roughness of the water and the wind. Deepening the fishing line near the float by half a meter or more, in combination with the tip of the rod lowered into the water, negates the influence of the surface current. And what is also very important, you can use floats with a small carrying capacity.
Carp tackle is significantly more powerful and structurally somewhat different from crucian carp tackle. The main line, like the leash, has a diameter of 0.22-0.25 mm. Drop-shaped float with a load capacity of 1.5-2 g. The float on a sliding mount on top is fixed on the fishing line with two standard silicone stoppers. There are also two stoppers at the bottom, the distance between the upper and lower stoppers is 2-10 cm. The sinker in the form of a sliding olive is limited by stoppers both at the bottom and at the top. The main line is connected to the leash through a swivel No. 18-20. There is one leash, 20 cm long. A hook from a well-known company, series 50328 or 50457, with a width of about 6 mm.
I make the floats from balsa wood, with carbon fiber keels and antennas made from long, thin, painted tubes made in Italy. I don’t see any difficulties in ordering them in China.
The most important thing to think about is the choice of rod. Unlike crucian carp fishing, it is better to take a rod for carp fishing a little longer, that is, 6-7 m. I tried a dozen different options in terms of structure and power and came to the conclusion that models made of hybrid carbon fiber are quite suitable for amateur fishing. The “softer” the rod, the more emotions there are when fishing, but budget rods are somewhat heavy, but since the rod lies on a stand, its weight is not critical.
For comfortable fishing, the plug-in platform is very convenient, primarily because the standard rod holders can be installed in the working position in a few seconds. However, you can easily get by with a chair and a simple stand.
If we deviate from Eastern traditions, then when mastering the tackle it is not at all necessary to make a “Chinese” load from thinly rolled sheet lead on a plastic mandrel. A sliding olive is no worse, but it has to be loaded with a small pellet. Where to place the pellet depends only on whether the bait will hang in the water column, lie on the bottom or anchor the equipment with a weight. As the practice of catching carp, crucian carp and bream has shown, the latter often makes sense to do. Everything is simple, when there is calm or very slight excitement on the reservoir - throw the equipment on the bait, put the fishing rod in the holder so that the tip is in the water, sit and watch the fish taste the bait.
The situation is completely different when a side breeze creates a surface current. In shallow places, a bottom current also appears, going in the opposite direction, and it actually pulls even equipment built on a much thinner line. If the fish prefers to take the bait, which lies motionless on the bottom, then it has to be anchored. As in pole fishing with light equipment, retention often occurs due to the own weight of a heavy and bulky bait in the form of a worm or several grains of corn. But as in the case of the plug, with a strong current you have to put an olive on the bottom. In this case, it is better to place additional pellets higher, moving them even towards the float. This is where some difficulties begin with adjusting the descent. You have to pick it up by moving the float literally centimeter by centimeter. It becomes clear why the top stopper of the olive is 10-15 cm higher.
Before installing a working trigger, in any case, I advise you to determine the depth at the fishing point at the very beginning of fishing using a depth gauge and mark it on the rod with a marker or felt-tip pen. This will then significantly save time on thinking and installing or changing the working trigger. This especially applies to fishing for crucian carp, which repeatedly changes its horizon during the day.
Direct field comparisons of herabuna with a plug have repeatedly shown that, in general, the plug is more effective. But this difference, of course, is offset by the beauty of the bites and interesting observations of how cautious fish try the bait. In addition, many anglers either do not know how or do not like to fish with a pole.
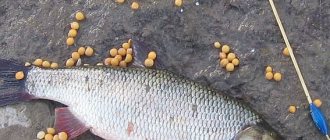
In carp fishing this is not so obvious, but in the case of crucian carp it is especially interesting. When hunting for crucian carp, you have to anchor the equipment relatively rarely, in special cases. This happens, for example, if a fish bites exactly on a spot of bait thrown in the evening before morning fishing, when it lies on a very limited area of the bottom among vegetation. The bait should be the most attractive so that the crucian carp “eaters” and collects it from the bottom. In this case, the bait must be kept motionless on the bait, even when this is difficult in conditions of a noticeable breaking wave and reverse bottom current. In all other cases, I set the descent from a few centimeters to several tens of centimeters above the bottom. Of course, not only the behavior of the fish at a given time and place plays a role, but also the consistency of the bait and the feeding technique. If you use light and highly dusty bait, you can “tear” carp, and even more so the bream, from the bottom. Moreover, I have more than once encountered cases when, in the heat during temperature stratification of the water, the same carp pecked not even at half-water, but almost from the surface.
To catch crucian carp, I use a different equipment design, which differs significantly from the “bottom” carp equipment. First of all, I appreciated the use of two leashes of different lengths. Moreover, I have a suspicion that different lengths of leashes when fishing for crucian carp are needed not so that different or identical baits do not touch, but in order to fish two horizons. I tried it and the conclusion was confirmed: the fish was caught either on the lower hook or on the upper one. The use of different baits significantly reduced the time for selecting the right one in each specific case.
During active fishing, you can place a lump of bait on the fishing line, using a regular shot to fix it, which underloads the antenna. Strictly speaking, this is not exactly bait, rather it is supplementary feeding of crucian carp. Whether it is necessary to pre-feed the fishing point with bait or not depends on the situation. If you are sure that the fishing point is determined correctly, and besides, the crucian carp stays at half-water or even closer to the surface, then there is no point in feeding with a large dose. The crucian carp will not go down after the falling bait, but it can be alerted by powerful splashes.
Another important point, in my opinion, is that it is better to use floats with an even smaller carrying capacity, that is, 1 gram or slightly less, but a problem may arise here. If the carrying capacity of the float body turns out to be too small, and the length and diameter of the antenna are large, then the float may not “want” to rise due to the surface tension of the water. Ultimately, after twitching, the float will return to its working position, but unnecessary movements are annoying. For crucian carp, naturally, you need to take the line as thin as possible, I use 0.090-0.115 mm as the main one, leashes are 0.01 mm thinner.
A few words about floats. There are two types that differ in the length of the keel. There is an opinion that floats with a long keel are intended for fishing from shallow depths, and with a short one - for extreme depths with a long rod length. The reason is not the keel, but the carrying capacity. A light float with a long keel takes its working position faster due to the long lever, and vice versa. But a float with a long keel makes a big turn after casting and it is quite difficult to absolutely accurately send the bait to the bite point with each cast. Therefore, the choice is yours. Personally, I gave up sinking the rod tip and use the old technique. I place an additional weight 20-30 cm from the tip of the rod on the fishing line. I took from the idea of the method what I needed and was interested in.
Andrey Yanshevsky June 2, 2021 at 04:21