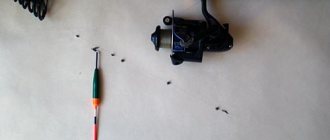
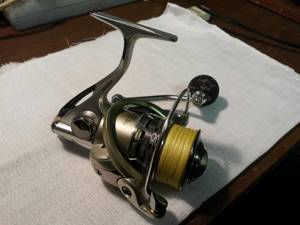
How does a spinning reel work?
The reel on a spinning rod is a disk with a handle and fishing line. When the handle is rotated, the following actions are performed:
- The bite is held and tends to go deeper into the river.
- The load on the fishing rod is reduced.
- The line fits perfectly onto the spool. The opening of the line laying arc is accompanied by the free movement of the main cord.
- Turning the lever by hand helps to wind the line.
- The choke moves back and forth and lays the line perfectly.
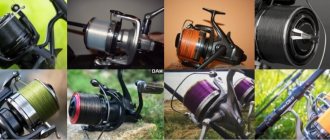
Reels come in the following types:
- Inertialess
- Inertial.
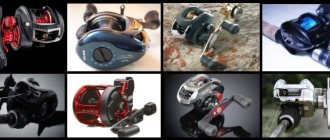
- Multiplier.
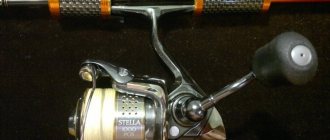
Anglers prefer to buy the following high-quality spinning reels:
- Cobra CB140.
- "Cobra" Spinning SV 440.
- "Cobra" SV 540.
- Daiwa Crest 4000.
- Stinger Predator.
- Ryobi.
- Shimano Katana 3000 FD.
- Linnhue.
- "Phishing" ROI Anaconda.
Attention! For spinning, you can also choose a multiplier reel (for example, Shimano (“Shimano”), “Daiwa” Kohga).
Scheme of an inertia-free reel
A multiplier reel for a spinning rod works due to the centrifugal force of the drum. Its design allows you to catch fish with massive baits designed for jerking. A casting bait is great for catching large specimens.
What materials are used to make the case?
When making a spinning reel, two materials are most often used - plastic and metal. Its body can be made of the following alloys:
- Polymer - for cheap products.
- Aluminum alloys + carbon fiber - at an average price.
- Titanium + magnesium - for premium reels.
Important! Expensive reels are made of durable light alloys (titanium, aluminum, brass, bronze). As a result, the fishing rods last a long time, and the operation of the mechanism is uniform, silent and easy.
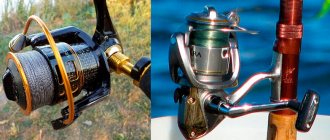
Coil characteristics
When purchasing, you should pay attention to the following technical characteristics of a spinning reel:
- spool size;
- rotor rotation speed;
- weight.
The spinning reel is designed as follows:
- handle;
- anti-reverse;
- spool;
- friction clutch (brake);
- line layer (line holder).
Attention! The operation of the line layer directly determines the distance to which the line can be cast.
Rotor speed and mechanism
The reel is equipped with a rotor. Its rotation mechanism consists of 2 elements:
- Bobbin feed devices.
- The main pair (transmits rotation from the handle to the rotor).
The rotor contains the following parts:
- Driven gear.
- Drive wheel.
The wheel shaft has a 4-sided hole for the reel handle. When the handle rotates, the drive wheel also rotates. As a result, the driven gear rotates the rotor.
The main pair is a gearbox with a gear ratio (for example, 4.6:1, 6.5:1, etc.). The ratio of the first and second numbers is the ratio of the number of teeth on the driven gear to the number of teeth on the drive gear.
Inertia-free reel mechanisms
Reference! By the value of the gear ratio you can determine how many times the rotor will rotate with 1 revolution of the coil. So, the fraction 6:1 means that with 1 rotation of the handle 360 degrees, the rotor winds 6 revolutions.
The more powerful the rotor, the larger the diameter of the gear in the gearbox (main pair).
The bobbin feeder is a carriage and other elements that periodically return to their original position. There are 2 types of device:
- Crank gear.
- Screw feed (reduces backlash).
The device with a crank link has the following parts:
- small gear (on the wheel shaft);
- parasitic gear;
- carriage + guides;
- stock.
The rotation from the handle is first transmitted to the small gear, and then to the “parasite”. As a result, the gear moves the carriage.
Important! When moving, the carriage and spool periodically return to their original position. This ensures smooth laying of the line during winding.
Handle
The handle rotates the spinning reel mechanism. However, sometimes you have to move it to a comfortable position (under your right or left hand).
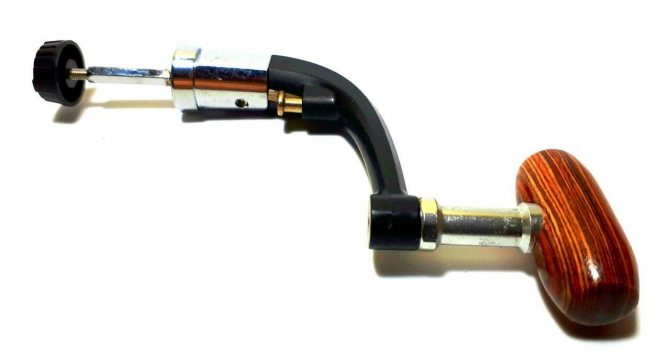
Spinning reel handle
To rearrange the handle, you must perform the following steps:
- Remove the nut on the clutch and spool (or press the release button).
- Remove the washers. Moreover, you also need to remove the gears located under the spool.
- Unscrew the handle.
- Reposition the handle. Moreover, the handle must be moved to the opposite side of the reel body.
- Screw the screw into the hole.
- Place the washers and gears located under the spool.
- Place the nut on the clutch and spool (or reinstall the lock with the button).
High-speed fishing reels are equipped with a double handle. They also have one handle with a compensator. The compensating device prevents vibration caused by unbalanced spinning reel handles.
Anti-reverse
The reverse stroke of the reel on a spinning rod means the rotation of the handle and rotor, which is directed towards winding the line onto the spool. The overrunning clutch is responsible for blocking the movement of the handle towards itself. Thus, during fishing, anti-reverse does not allow the rotor to turn in the opposite direction, and the line does not “get stuck” and form unnecessary knots.
Anti-reverse is installed inside the coil. A lever is installed outside its body to disable the reverse rotation stopper or activate it.
Attention! Thanks to anti-reverse, the fisherman can make a hook with one right or left hand. Also, the reverse stopper prevents heavy loads on the line. After all, it often breaks when fishing in jerks when catching large prey or when there are blind hooks.
Modern reels are equipped with instant anti-reverse. It is also ideal when using low-stretch braided scaffolding.
Friction clutch
The drag adjusts the tension force required to pull the line from the spool. As a result, it reduces the impact force and reduces jerks both when playing and when hooking.
The friction clutch also protects the rod from heavy loads. This prevents the fishing rod from breaking and the line from breaking.
Spinning reel clutch
When adjusting the clutch, the braking force must be adjusted so that it is 1/3 less than the tension force of the fishing line used. Thus, for fishing, fishing lines are used with a breaking load of 6.0 kg. As a result, the clutch should produce such a force that a fishing line of 4.0 kg is released (released).
As a result, the life of the fishing rod is extended. After all, after adjusting the friction, the fishing rod is subjected to less load.
To successfully adjust the clutch, you need to bring the fishing tackle into working condition. The algorithm of actions looks like this:
- A bait hook is placed on the line.
- The fishing line clings to the tree.
- When moving away from the tree, the position is taken as when playing.
- The fishing rod is bent, and the line is stretched as much as possible.
- The clutch is released to the ratchet.
The clutch adjustment has been successfully completed.
Spool dimensions
Another important parameter of a spinning reel is the size of the spool. Each figure of a fishing rod is the product of the length of the line and its diameter. This determines the capacity of the spool.
Example! The spool size is 5000. This means that 100 or 200 m of fishing line with a diameter of 0.5 mm or 0.25 mm, respectively, will fit into it.
For catching small fish, spools up to 2500 are suitable (with a weight of up to 5-20, 7-21 and 5-25 g). For medium-sized fish, products from 2500 to 3500 (max) are used. For catching large fish, spools of 4000 and above are used.
How to repair a spinning reel
A modern technological fishing rod, be it a spinning rod or a float rod, must be equipped with one of the types of reels. Most often, this element of equipment is an inertia-free, easy-to-use and affordable option.
When purchasing a mechanism, an angler expects long-term use of the product with minimal maintenance costs.
But one way or another, sometimes you have to deal with some malfunctions of the device, which in most cases can be repaired yourself, without resorting to the services of professional technicians, thus saving both time and money, and ultimately gaining confidence in the well-functioning operation of the mechanism.
We will present to the reader's attention a number of minor troubles that can happen to an inertia-free machine during its operation, but such breakdowns are quite capable of being corrected by any fisherman who is more or less familiar with plumbing work.
How to disassemble a coil
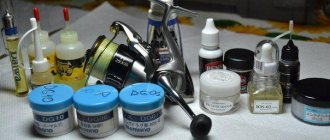
Before planning to repair a fishing reel with your own hands, you should worry about the availability of the necessary materials and tools.
For these purposes, the fisherman will need a small and medium-sized figured and flat screwdriver, pliers, tweezers, an awl, a soft and hard hair brush, an oil can, a piece of rags, as well as any type of cleaning agent containing alcohol and a special mineral oil intended for lubricating rubbing parts. device details.
https://www.youtube.com/watch?v=z2GepKVpP9s
It is convenient to carry out repair manipulations on a desk under a bright lamp with a white spectrum of light, on a backing made of a sheet of white paper, where small parts and connecting elements of the product will be clearly visible.
Disassembling the coil
The coil is disassembled according to the clear algorithm presented below. In the process of performing work, it is important to remember the order of the sequence of operations and scrupulously delve into the nuances that contribute to the accuracy of the work associated with the application of efforts to disconnect the threaded, bushing and locking connections of the elements and assemblies of the product.
- unscrew the nut of the brake system and the spool;
- remove the gears and washers located under the spool;
- remove the reel handle;
- unscrew the clamp nut in the mechanism;
- disassemble the rotor;
- dismantle the line-laying bow;
- dismantle the line guide latch mechanism;
- dismantle the line pulling roller;
- unscrew the screw of the reverse locking device;
- dismantle the switch lever;
- unscrew the plug screw;
- dismantle the plug;
- dismantle the wall.
The most popular problems and their repairs
In continuation of the article, we will look at a number of the most common problems with inertialess motors. These problems, which are not critical for the complete failure of the mechanism, can be associated both with defects in the materials of the product and with incorrect operation of the device.
After all, the unfavorable conditions under which the meat grinder units operate, such as high humidity, abrasive sand particles and elementary dirt, certainly only have a negative impact on the operation of the unit as a whole, despite the scrupulousness and care with which it is treated.
But often, in fishing practice, even if the minimum rules for using inertia-free gear and regular maintenance of gears and bearings are observed, these troubles occur due to exhausted periods and resources exceeding the maximum capabilities of the components and parts of the product. The presented reel breakdowns should not confuse or unsettle the fisherman, because he should be able to put the device in order on his own, which is quite doable.
Self-resetting line handle
An irritating defect during fishing is a defect in the device, in which the line-laying arm self-resets, which occurs in the cord rewinding mode. In one of the repair options, the problem can be resolved by tightening the clamping screws securing the bow.
If tightening the mounting screws does not resolve the issue of incorrect operation, it is worth increasing the stiffness of the spring located under the device cover.
There are two ways to adjust the required spring stiffness: install a spacer on the rod, reducing the working stroke of the spring, or replace the original part with a spring with greater rigidity.
How to clean a spinning reel
To carry out a preventive inspection and cleaning of a spinning reel, you must perform the following steps:
- Loosen and unscrew the clutch screw (or press the lock button).
- Remove the bobbin.
- Remove dirt, dust, grains of sand from the surface of the reel and spool.
- Remove sand grains from the spool.
- Wipe the inside of the bobbin.
- Unscrew the line roller and carefully remove it.
- Remove the handle.
- Remove grains of sand and dirt.
- Lubricate the 2 bearings on which the handle and other disassembled parts are mounted.
After lubricating the coil, you need to reassemble it in the reverse order. It can only be cleaned with a soft cloth.
Attention! In the first 2 fishing seasons, it is better not to disassemble the reel at all. If the movement of the spool is very difficult, it is recommended to lubricate its axis with machine oil (1-2 drops). Then you need to rotate the coil 3-5 times so that the lubricant gets inside the rotor.
Your question to the expert
Mikhail Konovalov
Amateur fisherman with 20 years of experience
Ask a Question
How to assemble
In order to successfully assemble a spinning reel after cleaning, you need to adhere to the following scheme:
- Place the coil wall on the slider and 2 gears.
- Screw in the anti-reverse bolt and put on the switch.
- Screw the plug bolt and insert it back.
- Reinstall the line guide bar
- Reinstall the mechanism that locks the line guide arc.
- Assemble the roller with the scaffolding.
- Assemble the spinning reel in part of its mechanism. Assembly is carried out by screwing in the clamping nut with a wrench or pliers.
- Place the rotor in its original place.
- Screw the handle.
- Put on the washers and install the gears.
- Place the nut on the clutch and on the spool (or return the lock with the button to its original place).
Assembly is complete. On the next fishing trip, the spinning reel works as it should.
How to properly disassemble a coil
If you are repairing a fishing reel with your own hands for the first time, then you must strictly follow the sequence of actions and lay out the spare parts in the order in which they were removed. This condition is necessary for its correct collection after repairs or preventive measures. Disassembly steps: Before disassembling, you must thoroughly wipe the outer part of the product from dirt using a cotton swab dipped in plain water or using liquid soap. If the dirt is not washed off, you can use more effective products (gasoline or alcohol). First of all, easily accessible external parts are removed: • the clutch nut, followed by the spool; • small washers and gears. The main thing is not to mix them during the filming process and lay them out in the order in which they were filmed; • mechanism handle. Next, the mechanism itself is disassembled: • it is necessary to unscrew the clamping nut and remove it together with the lining; • the rotor is removed, then the bow and the latch mechanism is disassembled. The line roller also needs to be disassembled. The spinning reel body is disassembled: • the lever bolt responsible for switching to reverse is unscrewed and the toggle switch is removed; • the plug is removed and the bolt is removed using a screwdriver; • the coil wall is removed. Since this will require force, to simplify the process you can take tweezers and pick it up with it. Analysis of the main mechanism, including two gears and a slider. If the reason for disassembly is prevention, then it is better not to disassemble the contents, but to properly clean the spinning reel and lubricate it with a cotton swab. If the parts are heavily soiled, it is still better to remove them and rinse them thoroughly. Assembling a fishing reel after repair or cleaning is carried out in the reverse order in which the parts are folded. But at the same time you need to check the correct installation of each part.
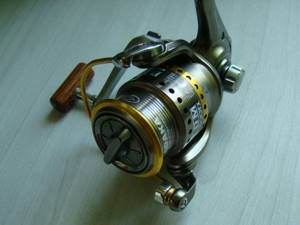
How to fix a reel yourself
A spinning reel is designed in such a way that before repairing it at home, you first need to remove the spool from it.
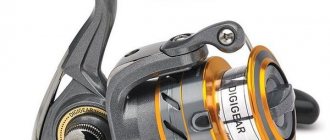
Ryobi Ecusima reel
After repair, all parts must be returned to their original places.
How to remove the spool
Before repairing a spinning reel with your own hands, you should first remove the spool from it. The part can be dismantled in 2 ways:
- When you press the button on the latch.
- After unscrewing the clutch.
To remove the spool with the rear brake, you need to press the release button. To remove the spool from a reel equipped with a front drag, you need to unscrew and remove it.
Handle replacement
If the handle of a spinning reel often falls off, it must be constantly replaced. Moreover, the handles are lost due to improper transportation or use of the fishing rod.
To replace the handle, you need to do the following:
- Remove the nut on the clutch and the spool.
- Remove the gears and washers located under the spool.
- Unscrew the handle.
- Screw in the new handle.
- Install washers and gears.
- Place the nut on the friction brake and on the spool.
To prevent the handle from quickly falling off the reel, it is recommended to buy models with additional fasteners in the form of bushings or washers.
How to adjust the spool
Spools come with 2 types of friction:
- front (for spinning);
- rear (feeder).
The front clutch is more sensitive. It reacts even to barely noticeable resistance from the scaffolding. As a result, you can catch even the smallest fish with a fishing rod.
The rear clutch is less sensitive. It is used when catching large fish with thick tackle on a feeder, trolling or when using a powerful spinning rod.
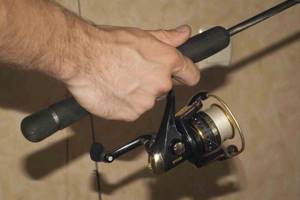
The friction brake mechanism is adjusted using an adjusting screw located behind or in front of the reel. To adjust the clutch, you need to perform the following algorithm:
- Pass the line through the line guide.
- Thread the line through the rod rings.
- Secure the end of the scaffold.
- Enable anti-reverse.
- Place the fishing rod at an angle of 45 degrees.
Important! If the clutch response threshold has reached its limit, you need to turn the brake adjuster 1/4 turn back (counterclockwise).
With front clutch
To adjust the front drag spool, you must first remove it. To remove the coil element, you need to remove the regulator handle and unscrew the clutch.
To adjust the spool, you must perform the following steps:
- Move the spool along the reel rod.
- If the spool moves forward, then a large number of turns are wound at the wall.
- Place 3-5 metal (plastic) washers on the axis under the drum on top of the clutch ratchet sprocket. In total, their height should not exceed 5 mm.
By adding washers, you can change the winding taper. If there are no washers included with the reel, you can use any stainless ones (plastic and polyethylene).
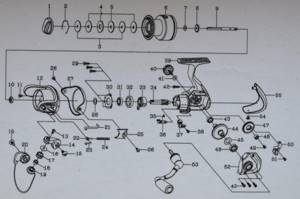
The structure of inertia-free coils
Inertia-free devices have the following components: body, drive, brake clutch, rotor, reel seat leg, rear direction switch, spool fastening rod, line guide with shackle, roller, gear with shackle.
How to disassemble
Repairing a spinning reel at home is carried out in the following sequence:
- the nut of the brake system and spool is unscrewed;
- remove the gears and washers located under the spool;
- the reel handle is dismantled;
- the clamp nut in the mechanism device is unscrewed;
- the rotor is disassembled;
- the line-laying bow is dismantled;
- the line guide latch mechanism is dismantled;
- the line pulling roller is dismantled;
- the bolt of the reverse locking device is unscrewed;
- the switch is dismantled;
- the plug bolt is unscrewed;
- the plug is dismantled;
- the wall is dismantled.
The main mechanism, consisting of a pair of gears and a slider, remains undisassembled. Its disassembly is undesirable unless absolutely necessary.
To clean the parts of a spinning reel, damp cotton pads and swabs, fresh warm water, or preferably distillate are used. To eliminate contaminants in inaccessible areas, cotton swabs and tweezers are used.
When repairing fishing reels and cleaning them from dirt and sand, it is not advisable to use caustic household cleaning solutions. Replace them with gasoline or ethyl alcohol.
Regardless of the type of gear, when disassembling mechanisms, parts and pieces are placed on a clean surface in the dismantling sequence. This method will allow you to assemble the structure back several times faster.
Disassembling the multiplier inertial reel
Before starting restoration, the spinning reel is disassembled in the following order:
- The locknut securing the reel handle is unscrewed.
- To remove the spool, the multiplier casing is disassembled. For this purpose, the lock nut is unscrewed, the “cheek” of the multiplier is turned and removed.
- The spool is removed from the multiplier housing.
- To reach the main device of the multiplier, the assembly is removed from the axle and the gasket placed under it.
- Remove the cover on the axial brake.
- The bolted connections securing the main mechanism cover are unscrewed and the cover is removed.
- The main mechanism is disassembled. The largest gear in size is the main gear; it houses the friction discs of the spinning reel.
- The decorative overlay is removed and the slider guide is removed.
- The stopper of the worm assembly is dismantled, the cover is unscrewed and the “tooth” is removed, then the “worm” is removed.
After complete disassembly, the product is washed, the coil faults are diagnosed and repaired. To prevent malfunctions in the operation of the coil, certain procedures are carried out.
Periodically it is necessary to clean the device from dirt and dust, wipe the side of the spool to remove deposits. They lead to wear on the cord and deformation of the side when the reel handle is rotated. But the most important thing in self-prevention of part malfunctions is the timely repair of the line roller.
The reasons and frequency of roller prevention may vary. This depends on the individual design features. The sliding roller assembly must be serviced once every 10 to 20 hours of operation of the device, that is, every three to four fishing trips. The ball bearing-based roller is serviced at intervals of 40 to 50 hours. Such a high frequency is caused by the significant rotation speed and constant contact with the cord.
During operation, water, suspended sand, and algae constantly fall under the roller during operation, through a moving cord. Acting as an abrasive, these substances prematurely wear out the unit, leading to the “cut” of the roller, breakage of the cord and loss of trophies and baits.
Disassembling the line roller
Dismantling will require the following tools:
- tweezers;
- pencil;
- crosshead screwdriver;
- packaging of paper napkins;
- a set of cotton swabs;
- a bottle of liquid oil;
- jar of white spirit.
Do not use lubricants of dubious composition and origin. A popular option is hydraulic spindle oil.
Before disassembling the line roller, sketch or photograph its position in the assembly. During the entire disassembly process, step-by-step photographic recording should be carried out. The spinning reel is assembled in the opposite sequence. How to repair a spinning reel is determined after diagnosing the problem.