Content
- Disadvantages of purchased girders
- Making a stand
- Making a transverse bracket, adjusting the coil
- Checkboxes
- Equipment and “anti-beard”
- Tests
I read on the website how Colleague Anton Yuryevich modified this winter trap for crocodiles, and watched his video on YouTube. I decided that I could do a lot of things my own way for winter.
Photos of flags for winter fishing
Read here Fishing in December - features, what kind of fish bites, how and what to catch (115 photos + video)
Help the project, share on social networks 
0
Disadvantages of purchased girders
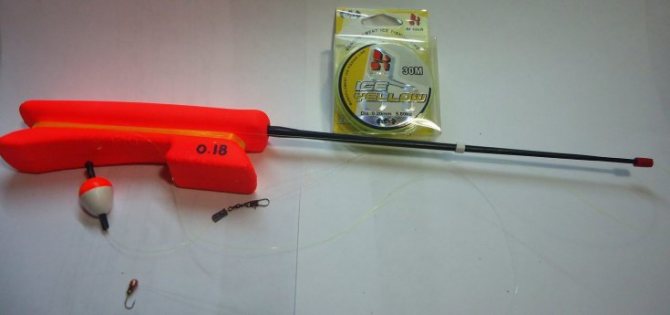
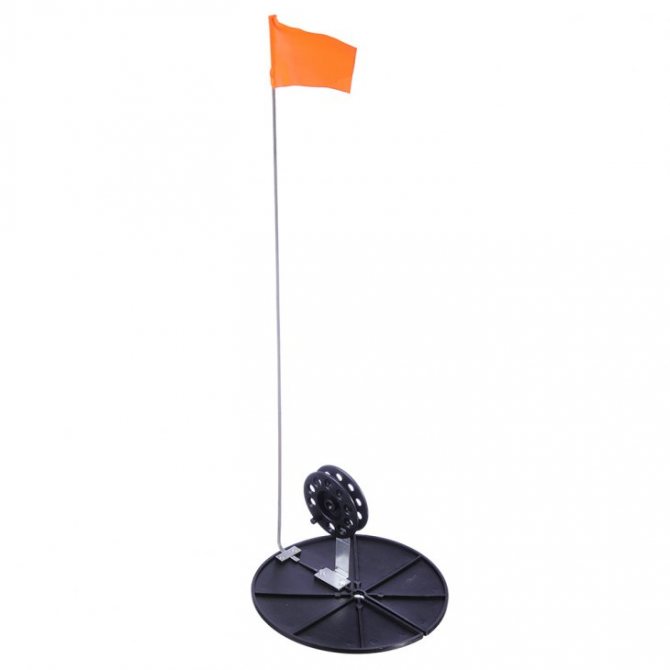
I bought 10 pieces of Terminator lanterns inexpensively (200 rubles each). In the video (available on the Internet), it was captivating that the manufacturers made an excellent bracket for attaching the reel (already made of plastic from a Kalashnikov assault rifle!!!) and came up with the “anti-beard” concept.
Having opened the packages with the zherlitsa at home, I could only say with words from my favorite book “12 Chairs”, when Bender took the warrants for the chairs from the archivist: “Never before has Bartholomew Korobeinikov (i.e., I) been so vilely deceived. He could deceive anyone, but here he was deceived with such brilliant simplicity that he stood for a long time, kicking the thick legs of the dining table ... "
But seriously, I felt ashamed for my fellow countrymen who made a good development, apparently in a small batch, advertised it well, and is on sale now... (you can use the letter “G”, you can use the letter “X”, you can use “D” or And how). In general - a set of disgraces. 2 Some of the shames are indicated in the photo:
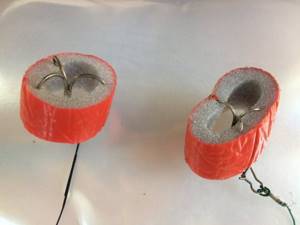
No. 1 – the bracket is made not of automatic plastic, but of soft metal stamping. A 5-year-old boy will bend it with his hands.
No. 2 – a hole with a cambric for passing fishing line for “anti-beard”, the cambric will burn under load on the 2nd, maximum 3rd pike grip and the fishing line will be cut off on the edges of the hole in the metal.
No. 3 – the bracket is fixed to the 14 mm rail with a self-tapping screw (!)
No. 4 – the handle on the reel is on the same side as the iron lamb; when winding “toward yourself” in the cold, you will either bleed your fingers, or the bracket will bend, or the winding will not be tight.
Other shortcomings are smaller, let’s call them “costs of mass production”: coil play, strong swaying of the stand in the plastic base circle, you can completely forget about the “anti-beard” in this design.
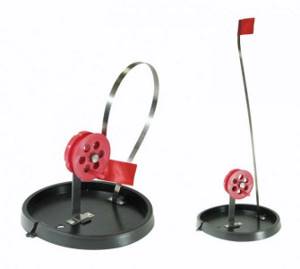
I wanted to throw away the “miracle” I had received, but I decided to make candy out of it all. Only three things turned out to be useful: the base circle, the reel and the flag whip.
Varieties of girders
Before you start making gear, you need to understand the types and characteristics of vents:
A shifter is a structure that is assembled from a plastic tube, wire and colored adhesive tape. A hook with bait is attached to the end of the wire and placed above the hole. The tip of the tube, wrapped with a bright ribbon, shows whether the fish is biting or not.
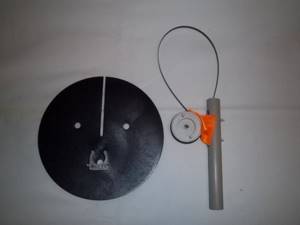
A pole with a leg is constructed from a plastic tube, a bright piece of fabric, a reel of fishing line, nuts and washers, and a piece of hose. The leg of the tackle is securely placed in the snow, and the fishing line with a hook and bait gives a signal about the catch.
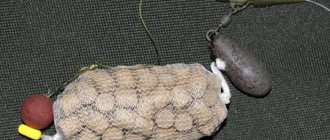
To make a summer girder with your own hands you will need a platform made of plastic or wood, a reel, bright fabric, brackets for fixing, fishing line and a hook. If a fish bites the bait, the line will break out from under the fixation and the fabric flag will rise.
A container made from a plastic bottle. This option is the easiest to make yourself, since its base is a simple soda bottle.
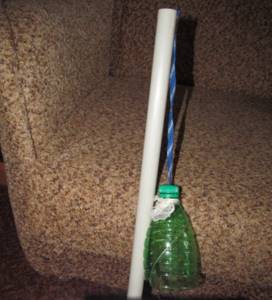
If you are fishing for large-sized fish, then the volume of the bottle should be at least three liters; in other cases, a half-liter bottle will do.
Vent for under-ice placement. It is best to leave such a device for a long period of time, for example, overnight.
Check it out here too!
Do-it-yourself winter fishing rod - an overview of the best options. Instructions for creating an unusual winter fishing rod from different materials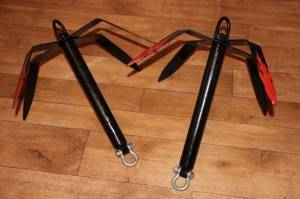
DIY boat anchor: making a homemade anchor for PVC boats (95 photos and videos)
Fishing camera: rating of the best models and tips for building a homemade device (135 photos + video)
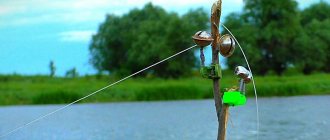
Making a stand
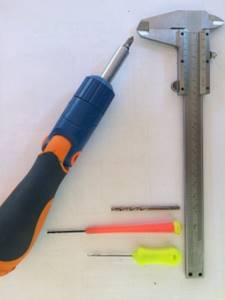
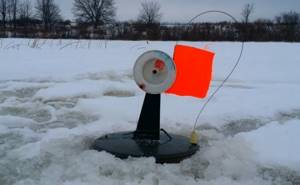
I am convinced that a 14 mm slatted stand, even though it is made of birch, will not support a normal pike, especially with all sorts of self-tapping screws in it. I asked a friend and he made me half-meter-long racks with a cross-section of 20x20mm from ash (wood-stone). The seat in the base 14x14 mm was adjusted using sandpaper and a file. It fits in with little effort, I did it on purpose without any play at all.
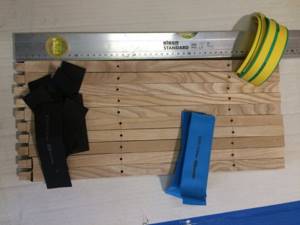
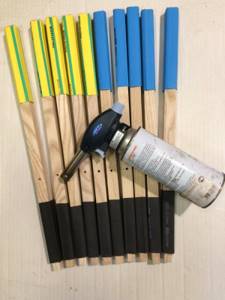
I didn't paint the racks. I picked up a heat-shrinkable sleeve and used a gas torch to place it where I saw fit.
This is required to attach the flag.
I decided to make the stand universal. For winter, when the coil is high at the top (so that it is not snowy and so as not to stick all sorts of branches for searching after a snowstorm) and for spring, when the coil is at the bottom (so that a strong wind does not overturn the structure standing on bare ice). Another “trifle”: from the ends of the rack to the axis of the bracket attachment is from 100 to 170 mm. If the pole overturns or the base circle is damaged, the pike will not drag the structure into the hole (I work with a 150 mm drill); in any case, the stand will lie across the hole.

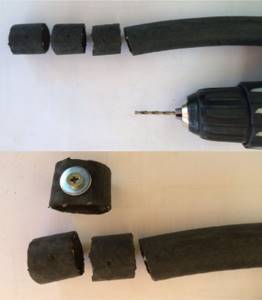
For the “anti-beard” concept, I took ordinary plastic plugs and made 2 holes. with a diameter of 3 mm opposite each other and secured the plug to the stand with a self-tapping screw, because There is no load from the plug in this place.
You can’t screw anything into ash without first drilling it with a thinner drill bit, so the post is not weakened.
The main thing in any girder is the versatility in fixing the live bait so that it does not make a false alarm and does not run away to hide in the grass at the bottom. At the same time, the pike should immediately unwind when it strikes. If the fixation is strengthened too much, it’s bad again; without unwinding, the pike will immediately spit out the bait. Basics, of course, but this is the thought of any really working zherlitsa.
That is why I made a place on the stand for a fishing line clamp using a chopper. I cut pieces from a rubber hose, having previously drilled holes in them for another self-tapping screw.
I won’t advocate for this design, some people like to fix the reel simply with a flag, but if the live bait is a perch under 300 degrees, then no flag will hold it, there will always be false alarms. I make a lot of chops on purpose, I even paint them sometimes.

You can simply take twigs or break a match in half and clamp the fishing line inside the rubber clamp with the required force.
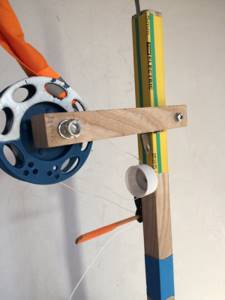
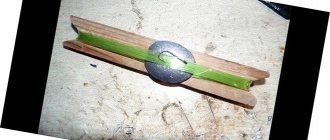
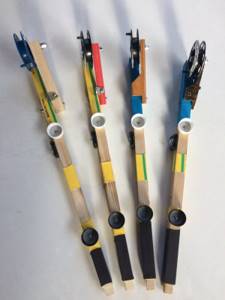
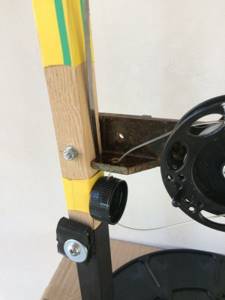
Making a transverse bracket, adjusting the coil
The bracket was specially made from 4 different materials: a 20x20 mm block made of ash, a durable plastic rod 15x15 mm (red used Morzan from a mini-guillotine), a wooden corner 30x30 mm made of ash, a carbolite corner 25x25 mm from a device that burned out at work.
Therefore, we had to come up with different options for fixing the bracket in the working (almost horizontal) position. For corner brackets, you need to make the correct cuts on the shelves and fit them in place, nothing complicated. For the brackets, I took a regular furniture corner from a block.
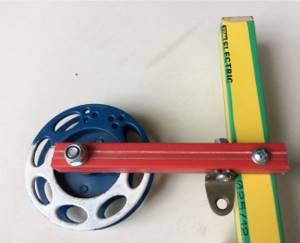
I’m not very happy that it’s metal, but the construction is very durable.
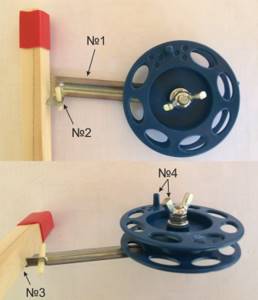
The bracket is secured to the stand with a 4mm screw (don’t forget the washers) and is firmly secured with a second nut - this is a very important point.
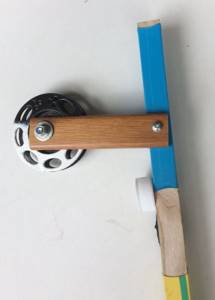
The nut closest to the rack is tightened to the required force (so that the bracket moves smoothly and does not slack), then this nut is held with side cutters and secured with a decent amount of force with the second nut. The tip of the screw is sawed off in advance so that it does not stick out, or a screw of the required length is selected.
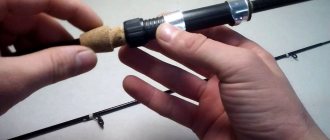
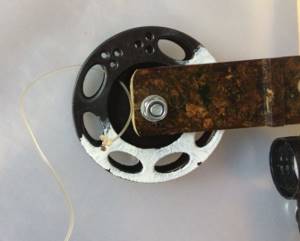
The coil is attached to the bracket with a 6 mm screw, which is also the axis of the coil.
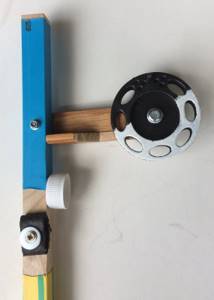
A hole is drilled in the bracket 6.5-7.0 mm. Be sure to lay the contact points of all planes with washers, preferably bronze ones (I couldn’t find any and took regular galvanized ones). I don’t recommend using wing nuts (they come loose, burn your fingers in the cold, don’t fix the force for smooth movement of the reel, stick out and get caught on everything). Ideally, the nut is self-locking. Choose the smoothness you want and fix the entire assembly just like that. Again, ideally it is necessary that the tip of the screw-axis does not stick out beyond the nut (saw off the excess in advance).
Don’t forget that the reel handle should be on the side of the screw-axis head, this is clearly visible in the photo.
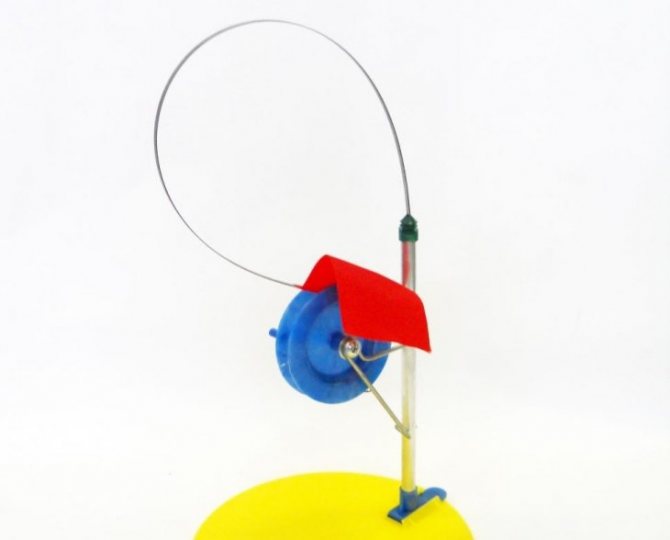
Design of the vent
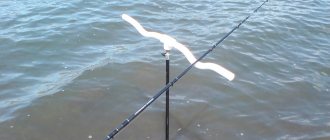
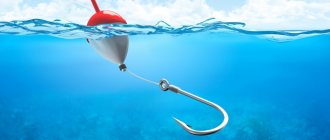
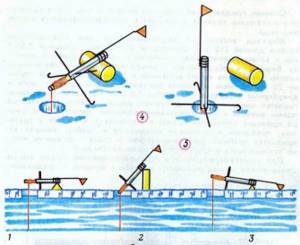
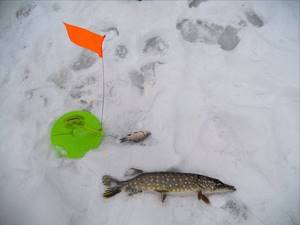
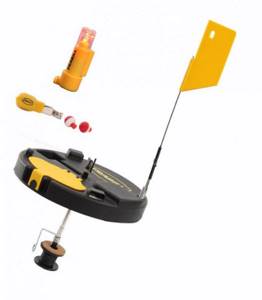
Winter fishing with live bait using a flag is characterized by good results due to fast and effective bite signaling. Usually they use red flags, clearly visible on a white background.
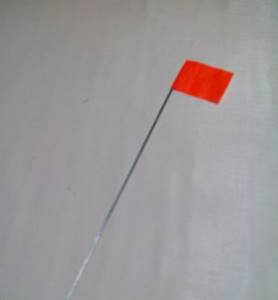
Let's look at the easiest and fastest way to make flags for winter fishing:
Make a wooden or plastic base (metal is not suitable). Place a reel and a flag on it. The length of the base of the flag should be 30-40 cm.
You can use a metal rod of small thickness (up to 3 mm).
Wind about 20-30 m of fishing line onto the reel. Typically, braided fishing line with a thickness of 0.1 mm is used.
Attach a leash to the main fishing line (you can use a string or special types of fishing line). The length of the leash should be about 20 cm. It is advisable to use a triple hook.
Step back from the leash about 6 cm and install a weight that ensures that the live bait is lowered to the bottom.

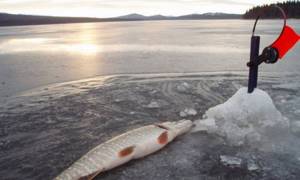
The most effective way to set a flag for ice fishing is to hook it behind the reel handle. The effectiveness of the alarm depends on the correct installation of the flag. Mount it so that during the process of resetting the fishing line, the flag takes a free sensitive position.

Checkboxes
Let these details not seem unnecessary - without a good signaling device, the zherlitsa turns into an “old-fashioned” one, i.e. not visual. As the Colleague advised, the existing flag is mostly cut off parallel to the whip, the remainder is wound around the whip and wrapped with adhesive tape.
The new flags are made of thick cotton fabric and have a light-emitting strip sewn on top (available in any women's fabric store).
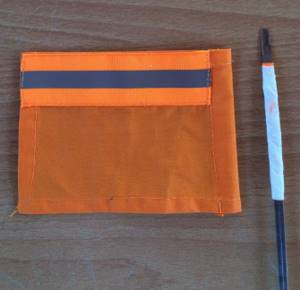
The size of the flag was also chosen on the advice of a Colleague, so that when twisted it fits into the groove of the coil with some effort.
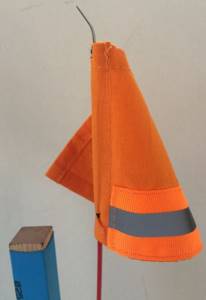
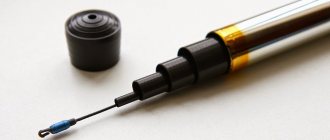
The tip of the whip should be slightly bent so that the flag does not fire falsely. The body of the whip, except for the lower 15 cm, was covered with multi-colored heat-shrink tubing, I just wanted it and it was left over. The flag on the stand is fixed in working position under the heat-shrinkable sleeve on the stand.
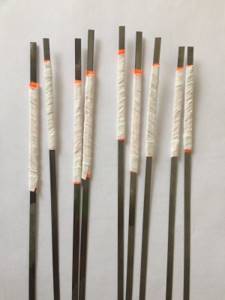
Homemade flags from skewers
Another simple option for making flags for winter fishing is the use of kebab skewers. To construct the flags you will need the following materials:
- wooden kebab skewers. Choose the simplest, inexpensive option with a length of about 30 cm;
- cocktail straws;
- plastic file folders;
- stapler
Secure the cut out flags onto the cocktail tubes with a stapler. Place 2 kebab sticks in each tube. No additional fixation is required here.
Equipment and “anti-beard”
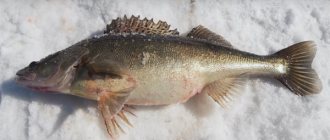
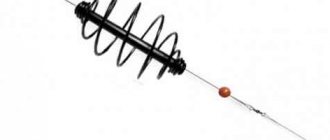
Only fishing line, ideally 0.6-0.8 mm. If the pike is always expected to weigh up to 2 kg, then you can take 0.4 mm.

A leash of 20-25 cm has a swivel at one end, a snap hook at the other, and an olive weight of 10-15 g. (I got it with a cambric, this is not necessary), or you can take 2 ordinary lead fillings, no beads are needed - lead will never break the knots on such a fishing line, a double or a tee to your taste, I have tees and almost never put them through the gills – the live bait quickly dies.
For the transport position, so as not to remove the tees, you can use a heat-insulating tube, which is very convenient.
For the authors of the fishing rod, in the first correct equipment with a plastic bracket, the “anti-beard” could only work when winding a long fishing line (15-20 meters). That's a lot.
I won’t describe it, here’s a video from a Colleague.
But even so, in the last 3-5 meters there could well be an overlap of the line and the reel would stand up. The second point is that you need perfectly correct winding (it is almost impossible to do it 100% on ice). And thirdly, the fishing line should go onto the reel strictly in the center of the reel groove. The anti-beard cord does not work from the very beginning. The best option against a beard is to set the reel well for a smooth move (see Stage 3), then no jerk of the pike will make the reel spin without tension, and accordingly, there will be no beard. And there is no need for a second turn of line on the reel. I still attached the plastic plugs for the “anti-beard” concept to the stand, I will try different options. Even without wrapping the line around the reel a second time, these plugs will serve as a kind of calmer for the line.
Recipe for winding fishing line: pass one end of the fishing line one by one through the holes of the cork from top to bottom (let me remind you that the cork is fixed to the stand), then insert it into the 1.5 mm hole in the groove of the reel (done in advance with a hand drill), tie a couple of knots and melt the tip of the fishing line.
This way we avoid the slightest roughness and knots that can interfere with the smooth flow of the line from the reel. Wind the fishing line (6-7 meters) with a little force, rotating the reel towards you so that the fishing line is on top in the groove of the reel when winding. After winding, tackle is mounted on the second end of the fishing line: a weight, a swivel, a leash, etc.
Tests
Nothing prevents you from setting up the vent properly at home in a calm environment: lock the axis so that the reel moves smoothly with little tension, practice installing the choppers in the lock, try the advertising method of “anti-beard” and, perhaps, find your own zest.
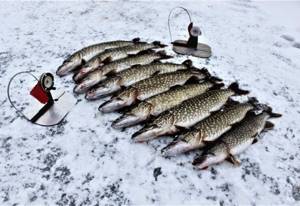
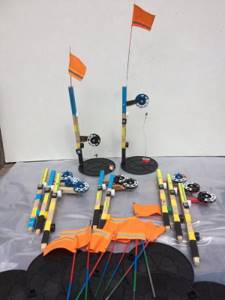
The author spent a whole lot of time on these 10 steps, but he’s sure that everything will work on ice.
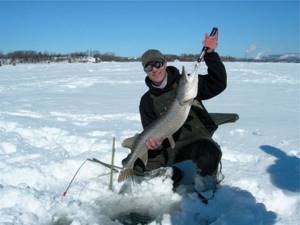
Don’t believe anyone who says that they went to the store, bought an already equipped bait, hooked a live bait - and let’s carry pike! Our ancestors were wise: “You can’t take a fish out of a pond without difficulty!”
Good luck on pike hunting and bright emotions!