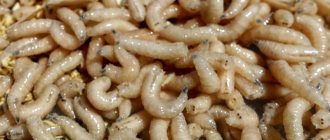
Maggot is a widespread and popular bait used in many types of fishing. Most freshwater fish love it, including roach, crucian carp, carp, bream, etc.
You can find colored larvae in fishing stores, but not all of them, so you have to paint them yourself, fortunately it’s not difficult. Food can help in this matter, but it is more convenient and effective to use special dyes.
In this article you will learn: methods for coloring maggots, what food products are suitable for coloring, and how to flavor the larvae. You will also learn how to paint red, green, yellow and even white.
How does the color of maggots affect the fish bite?
In the process of amateur fishing, the color of the bait does not significantly affect the bite; it has a more significant significance in sport fishing, since the fish in sport reservoirs are very picky.
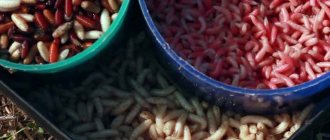
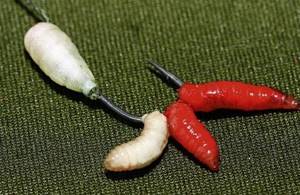
But as a rule, it is quite enough to have among the bait white maggots and larvae with pink or red coloring, and they are often hooked on the hook at the same time.
The simplest and most effective way to color maggots is to add fat-soluble dyes to their feed mixture.
Since the skin of the larvae is very thin, and the food they eat lingers for a long time, after some time they will acquire the necessary shade.
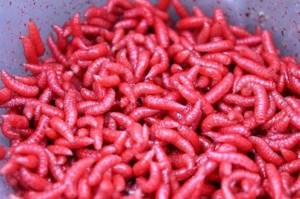
How to paint a maggot red or pink
- In order for the maggot to get a red color, the following methods are used:
- Chop the beets thoroughly and add this mass to the container with maggots;
- Grate and mash the bloodworm well and add it to the larvae;
- Feed the maggots finely chopped worms;
- Grind the red brick as much as possible and add the resulting powder to the container with the larvae;
- Use carrot mass;
- Natural juices from vegetables and fruits (cherries, strawberries, beets) can also be effective.

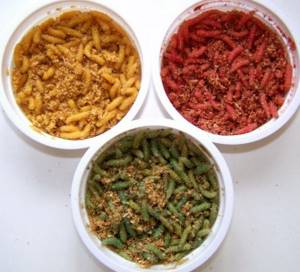
We paint the maggot. Color selection and painting methods
Let's talk about such a thing as painting bait in different colors. More precisely and specifically about maggots. If you use ordinary products, it can be painted in the following colors:
- red,
- white,
- yellow,
- green.

It should be noted that the chemical food industry has appeared; if the desire arises, maggots can be painted in almost any color.
Color red
To dye it red, you need to boil the beets. Of course, let it cool, otherwise the maggot will not be painted, but you will simply cook it. Then grate the beets and place the resulting pulp in a container where you place your bait overnight. During this time, the maggot will be saturated with the resulting gruel and will receive a radical red color!
Yellow color
In this case you will need an egg. You will need to boil it. Then separate the yellow from the white, crush the yolk and add maggots to the resulting mass. Then the story will repeat itself, as with the option where beets are used.
White color
There are several coloring methods here. If the fisherman has already boiled the egg, then you can use the white and paint part of the maggot white and part red. Of course, you will need to chop the protein. You can also use regular cottage cheese; the bait is placed in a container with cottage cheese overnight and turns white.
Read: How to store natural baits
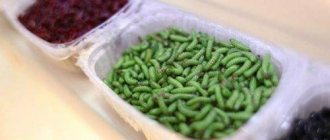
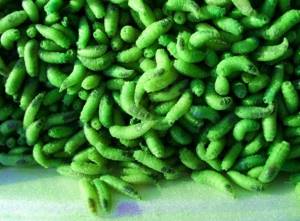
Green color
The most original coloring for maggots, which is quite rare in water bodies. Interestingly, this may be due to the fact that in Soviet times “green peas” were a scarce product. After all, maggots can easily be painted black by putting them in a mixture with black caviar, but such fishing will be very expensive, it seems that there was a similar situation with peas. As you might have guessed from the above, you need canned green peas, then open the jar, grind the peas to a pulp and add bait there. Overnight the maggot will turn green.
All the colors of the rainbow
As mentioned at the beginning, you can paint it absolutely any color! Even in black, but without using black caviar. The food industry, or rather its chemical component, will help here. If you want to show originality and surprise your friend with some unusual color for your bait, then you can look at food coloring. Although most fishermen are quite satisfied with ordinary products without the use of food coloring.
The only thing that can be recommended is that when a fisherman paints maggots, it is best to add part of the bait to the bait after painting. The fish will come to the feeder and eat the bait, and at the same time take the bait of a color that is already familiar to it.
Yellow
To give maggots a yellow tint, egg yolk is most often used, which is crushed and added to the feed.
Another option is to place some food product with the addition of yellow dye into the container with the larvae. Cottage cheese is very good as such, which, even without dye, can over time change the color of maggots to milky with a yellowish tint.
Green maggot
The greenish color of the larvae can be obtained using fresh parsley, dill or other herbs. It is thoroughly ground into a paste and also added to food.
In almost all cases, it is optimal to start coloring the day before fishing. The first effect will be noticeable after 2-3 hours, and after 5-6 hours of active feeding of the larvae they will receive a pronounced desired shade.
However, it should be remembered that after stopping feeding with dyes, the color will gradually begin to fade, because the dye will begin to leave the maggots’ body.
Pickled maggot
Pickling maggots - so as not to write about this “amazing English method” - is a necessary measure that makes sense only in conditions when your supply of maggots has begun to deteriorate, and there is nowhere to get fresh ones.
The maggot is kept in a marinade containing about 10% vinegar for an hour and then slightly dried. You can add any flavorings to the marinade. Pickled maggots are stored very well, and that’s where all of its advantages over live ones end.
Flavoring maggots
In addition to painting the larvae, you can also provide them with a new scent. A proven and effective method is to use a bed of boiled sawdust with added flavors to the water.
The ratio of the volume of water to the amount of sawdust is 2:1.
Various substances are used directly for the purpose of aromatization, including:
- vanilla;
- honey;
- dill and parsley;
- coriander;
- garlic;
- various oils.

When all the necessary ingredients are placed in a vessel, the mixture is boiled over low heat for 3-4 minutes. After this, the water is carefully drained, and the sawdust itself is thoroughly wrung out and dried. Ultimately, the litter is placed in a container with larvae and soon the latter will acquire the desired smell.
How to get maggots at home?
Breeding maggots yourself is not such a difficult and troublesome task as it might seem to someone at first glance. As for the “aesthetic” side of the issue, there are not much more problems here than, for example, when harvesting dung worms.
It is advisable to carry out all work with thin latex gloves, and keep starch, small sawdust or wheat bran on hand, which significantly simplify all operations with larvae.
For fishermen with a particularly sensitive sense of smell, we can also recommend a respirator. You can also use tweezers, preferably plastic ones.
Using an egg
One of the simplest ways is to breed larvae in a chicken egg. To do this, take a hard-boiled egg, cut off the top and leave it in places where flies gather.
It is not recommended to take a raw egg, as some authors advise - it does not spoil for a very long time and attracts few flies. Flies lay eggs in a boiled egg quite quickly, and in warm weather, within a week you can shake a small portion of maggots out of the shell.
A significant disadvantage of this method is the foul smell of hydrogen sulfide, which produces a rotten egg and a negligible yield of larvae from one egg.
In a bottle
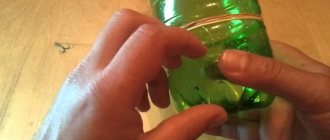
It is much more convenient to breed maggots in a plastic bottle. There are many options here. The easiest way is to take a PET bottle (1.5-2 liters) and cut off its upper part so that you get a funnel.
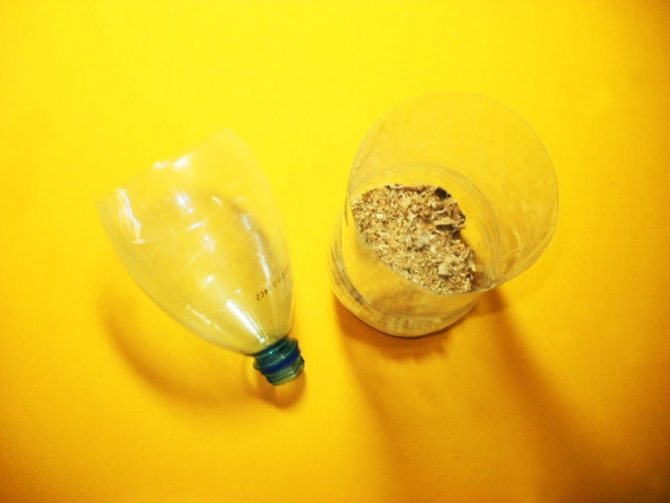
This funnel is inserted into the cut part of the bottle. Flies will fly into the container through the neck. Bait for flies is placed in the cut part of the bottle - it can be fish, meat, or minced meat. A little sand and sawdust is immediately poured onto the bottom. It is not worth covering the nutrient substrate itself with sawdust. For example, meat covered with sawdust will begin to attract flies no earlier than a week later, since sawdust delays putrefactive processes and absorbs odors.
It is advisable to place the bottle in a secluded place so that it does not attract the attention of household members. Various country houses are ideal. In the city, of course, the only suitable place is a balcony. The bottle needs to be shaken periodically and checked to see if larvae have appeared. In summer they grow very quickly, and if you miss the moment, they will turn into pupae, or even adult flies.
Typically, the larvae grow to working size within 3-4 days after the flies lay eggs. You can delay their development by putting the bottle in a cool place. After the flies lay their eggs, the neck of the bottle needs to be covered with several layers of gauze, since not only fish love them, but also predatory little beetles, which can easily destroy your entire strategic supply of bait.
You can cover the bottle with a plastic bag, but not tightly. Rural fishermen should also not forget that rats are very fond of maggots.
In some articles there is a recommendation to place a piece of meat or fish directly in the funnel. According to the authors, maggots from the funnel should themselves fall to the bottom of the bottle as they grow.
In practice, most of the larvae often remain in the funnel, from where they can easily crawl out or become easy prey for little beetles.
The method itself, of course, has a right to exist, but in practice it is not as convenient and simple as they say about it. When the larvae grow up, they are removed from the bottle. Partially you can shake them out, for example, onto a newspaper, partially you have to pick them out with your hands from the remnants of meat or fish.
Do not forget that maggots spread quickly, so you cannot leave them unattended for even a minute. The maggots are poured from the newspaper into a jar and covered with sand mixed with sawdust. The jar is tightly closed with a lid and turned upside down. The maggots, having passed through a layer of sand and sawdust, will be cleaned and practically get rid of the unpleasant odor. After this, the jar is turned over to its normal position and the larvae are transferred to any suitable box with a tight lid.
Maggot in the bone
There is an old, original method of breeding maggots in bones. A raw, fresh tubular bone with remaining meat is taken. It's good if it has already started to deteriorate.
The bone is split with an ax, but not completely, but so that a crack forms in it. The bone is lightly sprinkled with earth or sand. Blue flies quickly lay eggs in it, and the larvae grow, feeding on the remains of the meat.
Numerous theorists argue that maggots will certainly crawl inside through the crack, and the fisherman will only have to shake them out before fishing from a “completely bare bone.”
In practice, only part of the maggots is taken inside the bone, while others remain outside. In addition, by the time the bone is completely eaten away, some of the maggots will already have time to pupate. Another disadvantage of this method is the absolute availability of both bones and maggots for the same little beetles, as well as larger predators.
Maggot in the liver
Much more reliable is another ancient method of breeding maggots - in a piece of liver. Using a sharp knife, cuts are made in the liver into which wooden splinters are inserted - spacers.
A piece of liver is placed in any suitable container (in old books they wrote “pot”) and covered with a cloth. Sawdust or its mixture with bran should also be poured into the bottom of the container.
In warm weather, the larvae usually appear on the 2-3rd day, after which it is important to monitor the process daily so as not to miss the moment when the maggot is “ready” for fishing. Instead of liver, you can use a piece of light or spoiled meat.
Maggot in fish
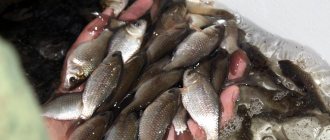
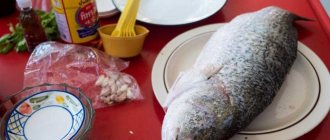
Of course, the simplest and most accessible for every fisherman is breeding maggots in fish. It is enough to simply spread the fish cut lengthwise in the open air.
In “flying” weather, a few hours will be enough for flies to lay eggs. After this, the fish is tightly wrapped in several layers of paper (newspaper will also do) and placed in a large glass jar with sawdust sprinkled on the bottom.
The jar can be closed with gauze, paper or a lid with holes. The holes should also be covered with gauze or paper. In the summer, after a few days, some of the maggots will begin to escape from the newspaper and crawl along the bottom of the jar. So it’s time to get ready to go fishing. A glass jar is convenient because you can visually control the process.
Maggot can also be obtained from salted fish. Any fisherman who has been drying fish has at least once in his life encountered the fact that, despite all the measures taken, flies managed to lay eggs in the hung fish.
It is these maggots that come out the densest and most elastic. Even a high concentration of salt does not harm them at all. “Salted” maggots grow a little longer than usual, but they are the largest and do not pupate for a long time.
In addition, they have virtually no characteristic unpleasant odor. Apparently, the preservative effect of salt is affecting. Perhaps this is one of the best ways.