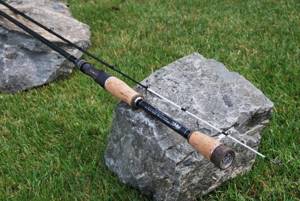
Telescopic fishing rod breakdowns and repairs
To understand how to repair telescopic fishing rods, you need to understand what breakdowns occur most often.
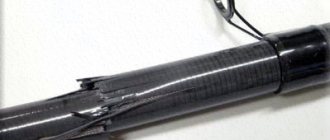
Most often, the knee breaks in its lower, middle or upper part.
Depending on the type of damage, a specific method of repairing the fishing rod is selected.
Very often the whip of an ordinary fly rod, which is hollow along the entire length, breaks:
- Usually the first third of the upper length of the whip is damaged. To repair it, you need to select and install a new connecting link.
- Breakage of the whip of the second knee occurs less often. Here it will help to wind the fiberglass to the desired diameter and fit it to the next cone. Of course, the fishing rod will have to be shortened a little, but this will have little effect on the quality of fishing.
- Forms with a monolithic carbon fiber insert rarely break. If used carelessly, the top of the insert may break, but it can be easily repaired with a diamond file and a new connector.
The situation is simpler with the repair of plug rods.
The whip breaks here infrequently, since the load falls on the rubber shock absorber tip. If this happens, the problem can be easily solved by selecting a new Teflon bushing.
Repair of the upper and middle knees is related to the location of the breakdown:
- Breaking the upper part involves building up the lead-in part of the thin elbow so that the connection point moves to the undamaged part of the knee. The breakage site is leveled and covered with a carbon fiber bandage, which can prevent further destruction of the gear.
- If the lower part is broken, they also make a bandage about 6-8 times the diameter of the knee at the fracture site.
In addition, you can straighten the broken areas and install the upper fragment in the lower part:
- The joint is treated with sandpaper inside and out.
- They are usually glued together with epoxy glue, making sure that there is no excess both inside and outside the cavity.
- A cotton swab dipped in solvent will help fight them.
- After the resin has hardened, a two-layer fiberglass bandage is installed on the outside, preventing the form from deteriorating further.
This method is suitable for repairing the upper and middle legs of plug fishing rods.
It is worth talking in more detail about how to repair the lower knees. If such a breakdown occurs, then fixing it consists solely of inserting a bushing and applying a bandage.
It is best to use a carbon fiber sleeve of similar quality to the fishing rod being repaired.
The bandage will have to be done both externally and internally. The length of the sleeve should slightly exceed 6 elbow diameters. The thin elbow should move freely in the sleeve.
The complexity of repairs sometimes forces fishermen to replace the entire docking unit.
But if you nevertheless set about repairing it and did everything correctly, then the repaired fishing rods will not lose their properties at all, only their appearance will suffer a little.
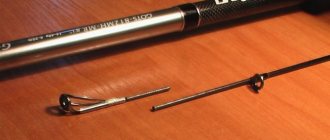
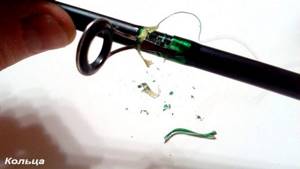
Repair of access ring
Often the internal metal-ceramic liner in the passage ring fails. The process of repairing such an element is very simple:
- We buy a set of rings of different diameters with internal inserts of the same or better quality as on the rod;
- We select a passage ring with a suitable diameter;
- Using a sharp knife, carefully remove the inner metal-ceramic liner from its metal frame;
- We remove the damaged liner from the frame using pliers, clean its inner surface with a small needle file;
- We insert the new insert into the prepared frame of the access ring and fix it by gluing it on both sides at the junction with the frame with super glue.
In case of damage such as a crack in the support leg or wire frame, it is better to replace the ring with a new one.
Replacing rings
Replacing rings consists of the following simple manipulations:
- It is better to start replacing the lower large ring, gradually moving towards the top;
- In order to remove the ring, we heat the place where it is attached to the form over a lighter until the varnish covering the fastening winding made of thin nylon thread softens;
- Using a sharp knife, cut the winding layer parallel to the plane of the form;
- Remove the winding and ring;
- We clean the area from any remaining varnish, winding, and degrease;
- Apply a little epoxy glue;
- We install a new ring, fix it tightly, winding a nylon thread over it in even turns;
- Apply a layer of colorless waterproof varnish on top of the thread;
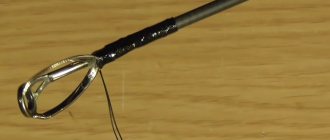
- In order to remove the last ring - the tulip - a thin wire is attached to it, heated over a candle flame, while at the same time trying to pull the ring off the top with the wire.
Feeder fishing rod breakdowns and repairs
Repairing a feeder rod while maintaining its length is characterized primarily by the use of a bandage.
The procedure is as follows:
- the broken part is placed on a wooden base lubricated with wax;
- a thin layer of fiberglass is heated and lubricated with epoxy resin;
- cut out a patch slightly longer than the boundaries of the breakage with the ability to wrap it around up to four times;
- the structure is fixed with the help of lavsan film, which is wrapped around fiberglass;
- it is necessary to monitor excess resin - it is important that it does not subsequently interfere with the movement of the knees.
After drying, the fishing rod is dried again with a hairdryer, and the film is removed. Sometimes a fishing rod is repaired using a flexible rod, which is attached with glue to the intact and broken part of the spinning rod and securely fastens them.
Spinning reel repair
Among the most common coil malfunctions and how to fix them yourself are:
- Noise inside. Disassemble the reel, remove sand and dirt from the drive mechanism, check the bearings in the handle and spool, and replace if necessary.
- Rotation mechanism jammed under load. Replace the drive gears with new ones;
- The line-laying arm snaps spontaneously when casting. Tighten the screws that secure the temple. If this does not resolve the problem, replace the spring responsible for latching the shackle with a stiffer one;
- The reverse stop does not work. It is necessary to lubricate the overrunning clutch, which is responsible for the operation of the mechanism;
- Creak. It is necessary to add lubricant inside the reel body;
- The fishing line gets under the front clutch nut and breaks. It is necessary to replace the thick felt gasket under the nut with a thinner plastic one.
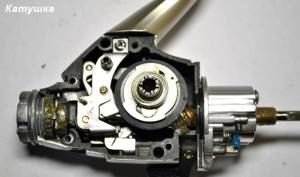
These methods will allow you to effectively repair the reel with your own hands, eliminating serious problems, extending the life of this expensive component of spinning gear.
Read: Repair of spinning reels
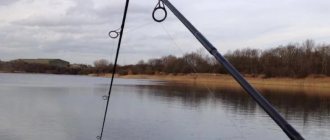
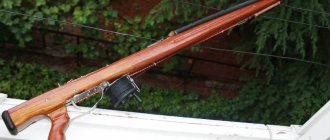
Fishing rods with rings
Repairing a telescopic fishing rod is sometimes made difficult by the presence of rings on the rod.
To begin repairing a broken knee, you must first remove the rings and then reinstall them.
Modern fishing rods have special protective inserts - plugs that prevent the edges of the knees from breaking on the rings. They are almost impossible to remove, so the only way out is to handle such fishing rods carefully.
Sometimes fishermen independently equip their fly rods with guide rings. This leads to changes in the characteristics of the fishing rod and threatens to break even under minimal loads.
If the problem is in the ring, then you should buy a new one or remove the whole one from another fishing rod.
Repair of rings is carried out as follows:
- remove the old ring;
- remove the winding of the ring legs;
- clean the installation site from old glue using sandpaper;
- the legs of the new ring are covered with glue and wound with a thin thread to the form like a tight spiral;
- the thread is filled with a thin layer of epoxy or superglue.
No gear can last forever. But, if a breakdown occurs, then you can repair the fishing rod yourself, at least temporarily. The main thing is to have basic repair tools on hand.
Telescopic rod repair
Like spinning rods, telescopic and plug fishing rods have several characteristic types of breakdowns, according to which a certain type of repair is selected. Let's look at them in order.
Rod whip repair
A frequent occurrence is the breakage of the whip of a conventional fly rod, which is hollow along the entire length. Most often, the whip is lost in the upper third of its length. The fix is to select and install a new connector. Somewhat less often, a breakdown occurs at the point where the whip exits the second elbow. In this case, winding a fiberglass bandage with subsequent adjustment to the diameter and cone of engagement helps. Of course, in both cases the rod will become a little shorter, but a few centimeters are unlikely to affect the fishing result.
The so-called “sports” whips with a monolithic carbon fiber insert practically do not break. Thanks to a more uniform distribution of forces along the length of the whip, it absorbs the load much better and does not overload the subsequent knee. Rarely does the thin upper part of the carbon fiber insert break due to careless use, but it is not difficult to straighten it with a diamond file and glue a new connector.
An extremely rare failure is the separation of the insert and the hollow lower part of the whip, but this is most likely a manufacturer’s defect. It is treated by gluing the whip back on; For reliability, it is worth wrapping the joint with a thin nylon thread impregnated with epoxy resin or making a microbandage from fiberglass. You can try to look for a suitable whip in the store, but you need to choose exactly the same one (preferably from the same model), approximately equal in rigidity and weight to the broken one.
One option is to replace the hollow whip with a “sports” one, but in no case vice versa, otherwise a stiffer hollow whip will break the second knee even with a small load. Such breakdowns occur quite often.
The situation is much simpler with a plug rod for fishing with shortened equipment. Here, a whip breakage is quite a rare occurrence, since almost all the load is taken by the rubber shock absorber, but even if it does occur, you just need to rearrange or select a new Teflon bushing. A small loss of length can be neglected. When selecting a new whip, it is better to choose the most rigid one and the appropriate diameter. There are often uncut long lengths on sale that can be used as spare parts for plug rods of various models. They are adjusted by cutting them with a diamond file to the required diameter and length.
Repair of upper and middle knees
Repair of these knees depends on the location of the breakdown. If the knee breaks in the upper part, then a simple and effective way is to increase the lead-in part of the thinner knee so that the joint moves to the entire section of the knee. The site of the breakage itself is trimmed and a bandage made of glass or carbon fiber, which will prevent transverse cracking of the upper edge of the knee, must be applied to a length equal to two to three diameters of the broken knee. This repair is very simple, but requires care when adjusting the gear cone.
It's even easier if the breakdown occurred in the lower part of the knee. According to the standard scheme, a bandage with a length equal to six to eight diameters of the knee is applied at the site of the breakdown. The pattern is made from fiberglass (it is not necessary to use carbon fiber for this) and is made in a rectangular shape. When winding, it is advisable to step back 1-2 cm from the place of breakage for ease of work, and then use sandpaper, first coarse, and then with medium grit, to rub in the engagement cone. Repair is more difficult if it breaks approximately in the middle of the knee. Of course, you can use one of the methods described above, but then the length of the rod will decrease by almost half the knee.
The following options are possible: If the knees are sufficiently tapered, insert the upper fragment telescopically into the lower part, having previously leveled the breakage site. The optimal engagement length should be equal to five to seven diameters of the elbow at the point of failure, the minimum – at least three diameters. If the engagement length is shorter, the connection will not be able to withstand the load. The joint must be cleaned with sandpaper on the outside of the elbow to remove varnish, and on the inside to remove special grease that does not provide sufficient adhesion during gluing. Epoxy glue is usually used. When gluing, it is necessary to ensure that no sagging or drops of resin form on the inner surface of the knee; they are removed with a swab moistened with a solvent.