Some fishermen prefer to make fishing lures with their own hands, and this is not surprising, because this way you can save money, have fun and try to bring your own ideas to life. In the article we will look at how to make some basic spinners used in summer and winter for catching fish such as pike, perch, and pike perch. To complete the task, practically no purchased materials will be needed; for the most part, improvised means will be used.
Benefits of DIY
To begin with, let’s note a number of positive aspects that accompany self-production:
- ease of creating bait;
- minimal cash expenses - the process is almost entirely based on the use of unnecessary materials that are available in every fisherman’s home;
- the process is limited only by imagination, which allows you to try various techniques that have not yet been used in mass production;
- it takes a minimum of time to work;
- The number of created baits is not limited, which means there is no need to be afraid of losing them.
With the proper approach, you can get a spinner that will not be inferior, and in a certain sense even superior to the serial versions. You should start studying the process by making a universal model suitable for any fishing conditions.
Device for bending the petal of a spinner
Let's start work by making a universal device for bending the petals of spinners under the number “2”. On such a matrix it is convenient to bend blanks of vertical winter baits in the shape of a boat, more commonly used for catching pike perch and pike perch.
As the starting material, we take any wooden block with smooth planed surfaces. Dimensions of my new device: thickness - 15 mm; width - 40 mm; length - 80 mm.
In principle, the dimensions of all wooden fixtures, both in longitudinal and cross sections, are not critical. For bending the petals of long pike-perch spoons, the length of fixture “2” can be increased to 100 mm.
But, having the skills, you can use this device to straighten the blades of a spinner for catching perch, pike perch and pike of any length and width.
To make this matrix, we glue dense elastic rubber 3-3.5 mm thick onto the upper surface of a wooden block. The increasing thickness of the rubber does not play a special role. You can generally use part of a sheet of thick rubber as a device.
Eg. It’s more convenient and quicker for me to bend a batch of petals of lures of simple shapes on a piece of rubber 12 mm thick. The remaining devices - matrices involved in bending a section of the thin petal of the spoon, are made in the same way.
This device can be used to push through thin petals - the blanks of most perch and pike perch winter lures with a one-sided bend along the entire length of the bait. Next, you can look at the purpose of each mandrel with different shapes in more detail.
Shapes here mean the cross-section of mandrels with longitudinal grooves in wooden blocks.
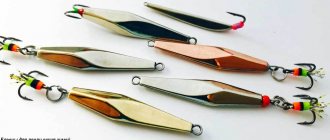
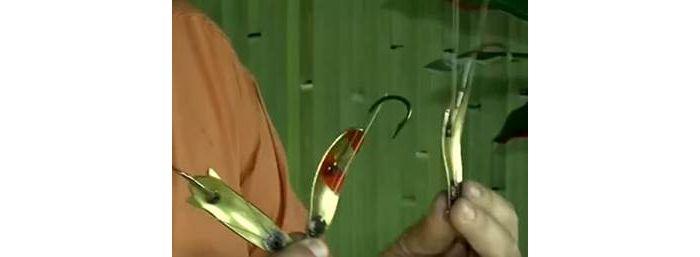
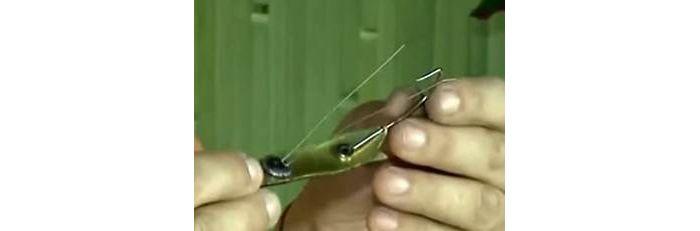
How to make a universal spinner with your own hands
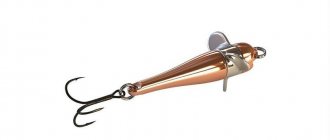
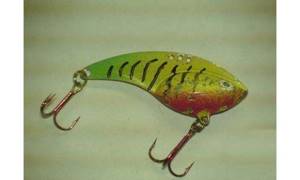
The option, which can be used in any conditions, is called “Torpedka”. The bait is capable of diving strictly vertically under water and playing with minimal movements.
For manufacturing you will need the following materials:
- sheet metal, preferably stainless steel;
- small diameter wire (should not rust) or guitar string;
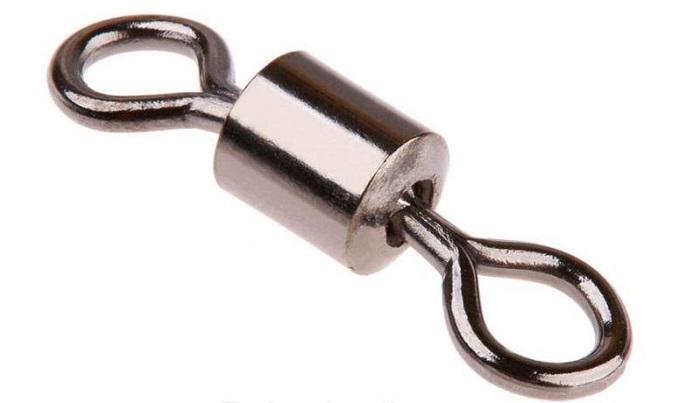
- swivels (2 pcs);
- paste GOI;
- winding rings.
When everything is ready, you can start production. It includes the following steps:
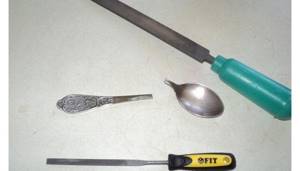
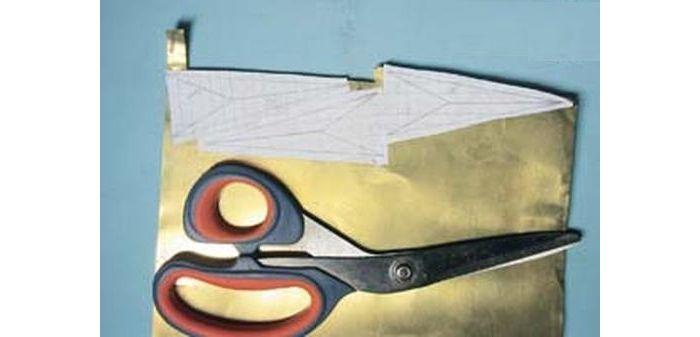
- Creating a template and transferring it to a sheet of metal. It is recommended to first draw the template on cardboard and then trace it onto the aluminum. You need to cut carefully to avoid the appearance of sharp jagged edges. The simplest form you can use is a tablespoon.
- Folding the workpiece in half. You should end up with two identical parts arranged symmetrically.
- Processing irregularities with sandpaper or a file.
- Soldering a fastener consisting of two swivels connected with wire. In order for the solder to stick to the aluminum better, the latter needs to be sanded with coarse sandpaper.
- The workpiece is filled with solder. After hardening, it is polished with GOI paste. If desired, one of the sides can be painted in the color of copper or gold.
This completes the main part of the production. All that remains is to hang the treble hook on a loop and decorate it with multi-colored cambrics to attract the attention of the fish.
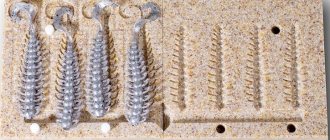
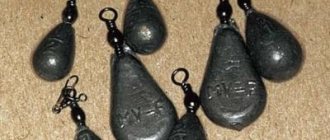
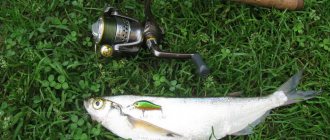
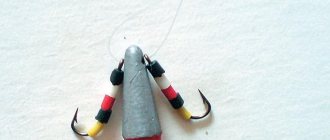
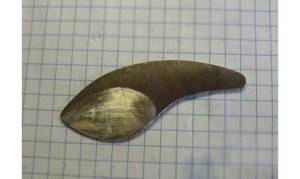
Ebb of the spinner - balancer
It is also called winter spinner or vertical spinner. The shape of the spinner imitates a fish. When you twitch the fishing rod, you create the effect of a fish swimming. This is the only horizontal spinner. The balancer consists of a double-sided hook and an oblong tube, at the ends of which the hooks are attached. Most often, a hook is also attached in the middle of the tube, and the spoon itself is disguised as a fish. The shape can be found from global manufacturers. Then you need to create a mold for casting in the shape of a fish.
It can be cast with tin or lead. A gypsum block is used for the mold. Having hollowed out the desired model of fish, we make a place in the plaster for hooks and for the wire to which the fishing line will cling. Lubricate the mold with rosin. Having heated the metal with a soldering iron, carefully pour it into the mold, having first secured hooks and wire at the ends of the mold.
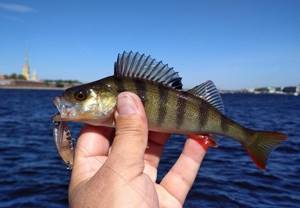
The sizes are not large, like a regular match. When everything has cooled, we pull the workpiece out of the mold and check whether the hooks are holding tightly. Then you need to paint the spoon, give it a bright color. The most popular color, say professional fishermen, is the back is green, the belly is yellow or orange. This color goes well with perch.
At this point we will finish our master class. In conclusion, I would like to say that making spinners with your own hands is not as difficult as making them work in water. You must always remember that they must spin well and hit well.
Do-it-yourself spinner for pike
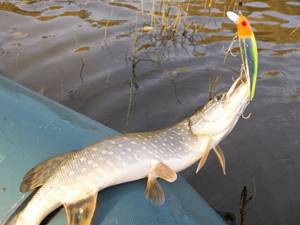
Predatory fish live in water jungles, and catching them from there is very difficult. With every bait cast, there is a risk of getting caught in algae, snags and other debris hidden under the water. As a result, this will lead to the loss of an expensive spoon, and possibly the disruption of the entire fishing trip. To prevent this from happening, experienced fishermen use a “non-snag” spinner, the hooks of which are covered with wire.
Necessary materials:
- Cheap spinner spoon.
- Hook with one point.
- Screw with washer and nut (2 pcs). The best option would be rivets, if they are available, of course.
- Weight weighing 1 g.
- Steel wire.
Sequence of work:
- Two holes are drilled in the spoon: the first for the covering antennae (almost at the very top), the second for attaching the hook (measured so that the tip of the fixed hook is located at the level of the edge of the spoon).
- Taking into account the weight of the hook, you should install a small weight cast from lead on the opposite side of the spoon. The metal is melted and poured in the form of a drop; a hole with a diameter of 2 mm is drilled in its center.
- The wire is bent in half. At the bend, a ring is created into which the screw will be threaded.
- The homemade lure for pike is almost ready, all that remains is to secure all the elements in place:
- The hook is threaded into the factory hole where the tee used to be located. The rounding on its upper part is matched with the previously drilled hole, then a bolt is inserted there. A washer is inserted on the reverse side and the nut is tightened.
- The wire antennae are attached to the second drilled hole. On the reverse side, a weight is placed on the bolt and the nut is tightened.
- Excess length of screws is cut off if necessary. The edges are filed or sealed with solder. If rivets are used, they only need to be flattened.


The spinner is ready. Now you can take nail polish of different colors and apply attack points.
DIY cicada spinner
To make such a spinner you will need sheet metal. Stainless steel is often used, but you can use any other that is thin (0.5-0.8 mm), light and at the same time durable. It should be mentioned that not all stainless steel is soldered. Galvanized steel works well.
|
In this example, the cicada will be made in the form of a small fish. A pre-prepared template is used for marking. After marking on the sheet, the part is cut out with metal scissors. You can make several spinners at once.
Further making of spinners with your own hands includes the following steps:
- The workpiece is given a concave shape. To do this, take a hammer with a rounded head or a 6 mm thick matrix. If a hammer is used to give the shape, then the cut piece of metal is located at the end of the wooden beam; if it is a matrix, rubber is placed under the workpiece, and a recess is tapped on the matrix.
- The loaded part is soldered. A soldering iron with a power of 60-100 W and tin solder will do. In the case of an oxidized metal surface, only the soldering area is cleaned; this limits the area where the solder spreads. On bare metal, the borders are covered with masking tape. When soldering the second side, you must ensure that the first does not melt. You can also solder the bottom tee at this stage.
- The irregularities are cleaned up and a streamlined shape is given. Coarse sandpaper is used for painting, fine sandpaper for polishing.
- The location for attaching the carabiner is marked. It should be located strictly in the center of the top of the bait. To determine it, the spoon is taken with tweezers with sharp edges. When the first hole is drilled, 2.5 mm are retreated from it in both directions and two more similar ones are drilled. This is done so that when suspended from the front hole, the bait plays less actively, and when suspended from the back hole, it plays more actively.

The spoon is ready, all that remains is to paint it and hang the hooks. It is used at great depths from 8 meters. The length was approximately 6.5 cm, weight - 25 g.
Making an oscillating spoon
Well, now let's get down to the action itself. For example, first we will make an oscillating spoon. It's the easiest to do. To do this, we need a metal blank or a piece of metal sheet - copper, aluminum or stainless steel. If you have nothing to gain from this, then you can use a tin can, you just have to fold it in half. Metal scissors, drill, rubber hammer and wooden mold - blank, file, marker, carabiner.
First you need to decide on the shape of the spinner; there is a sufficient selection of them on the Internet. Having printed out the desired shape, apply it to a sheet of metal and trace the outline with a marker. Then we use scissors to cut out our spinner along the contour. Now we have a workpiece, we need to clean it with a file along the edges from scissor marks from burrs, and clean the surface itself with sandpaper so that it is smooth. Then, having marked the places for the holes with a marker on opposite sides, we drill holes, one for the fishing line, the second for the hook.
To create bends, as in the selected picture, you need to use a hammer and a form - a blank. To make a mold - a blank, you need to have a piece of a wooden block from hard wood (ash, oak, beech). Using a carving tool, we independently make a bend in the wood, the size of which the future spoon should be. If you choose tin for the spinner, then you can simply bend it with your hands in the required directions; if the spinner is made from metal, you need to place the spinner in the bend of the mold and use a hammer to beat the surface so that it bends into the recess. The best type of hammer is rubber; it leaves no scratches and hits the surface evenly. The bend should not be strong, and can be double, for good catchability.
Now we have a blue blank; to give the final look, the spoon needs to be painted and, if desired, applied with a design. A piece of felt is used to polish the surface to make it smooth. Then you can apply paint or silver plating. You can use paint to paint fish eyes, stripes, and fins. But silvering can be done artificially using paint from a spray can.
The areas for stripes or fins can be covered with duct tape, and after painting silver, the clean areas can be painted red, yellow or another eye-catching color. The scale effect can be achieved by painting using a mesh. You need to take a piece of mosquito or other mesh, attach it to the spoon and apply paint with a spray can or airbrush. Remove the net, and we will have an almost factory-made spinner with our own hands.
A carabiner is needed to make it convenient to change one lure for another or to hook a triple hook instead of a single one. It should rotate well so that there is no decrease in the performance of the lure during fishing. That's it, the spinner is ready! All that remains is to test it in practice.
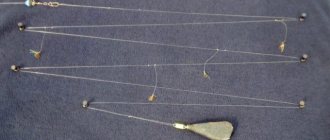
DIY spinner spinner
Loading …
Let's imagine design options that will be easy to make even for an inexperienced fisherman. The procedure includes the following steps:
- A petal-shaped blank is cut out of sheet metal. A hole is drilled in it for the location of the clamp.
- Using a bearing ball, the workpiece is given a curved shape.
- Now the metal surface is polished using a special attachment for a drill or screwdriver.
- The diamond edge version is manufactured using the same bearing ball. The workpiece is placed on top and struck with a hammer. Each hit creates one edge.
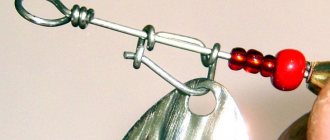
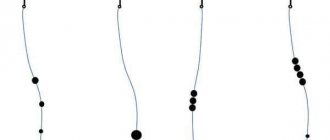
- Pre-purchased clamps and beads are placed on the wire.
- A pinwheel can be made using copper wire, which is tightly wound onto a thicker rod. One end of the pinwheel is sharpened on an emery wheel until it is shaped into a cone.
- As a result, a wire is hooked onto the hook, onto which a pinwheel, multi-colored beads, and a petal blank are sequentially put on.

You can play with the length of the pinwheel, the size and thickness of the petal. These parameters will affect the rotation speed.
DIY bat spinner
This bait is used for spinning fishing. It attracts predators with its noise and vibration. Manufacturing is reminiscent of creating a universal spinner. The only difference is in the shape of the workpiece. You need to create a template that will resemble the shape of a bat's wings. It is then transferred to sheet metal and cut out.
The next step is to create the bulge. For this you will need a ball bearing and a hammer. When the desired shape is ready, another blank is soldered in the center of the bait - the “bat body”. To impart special dynamic properties, several holes are drilled in the wings and body.
How to make a winter spinner with your own hands
If you don’t yet know how you can make the simplest but full-fledged winter gliding spoon with your own hands - a boat from waste materials, then the introductory text of the topic that interests you is open to you.
After reading the materials in this section, you will be convinced that any novice fisherman can make winter lures at home from the materials most common in everyday life.
In principle, you can make a winter lure in the shape of a so-called boat with your own hands in a few minutes if we have a heated soldering iron, thin-rolled annealed non-ferrous metals and a simple tool at hand.
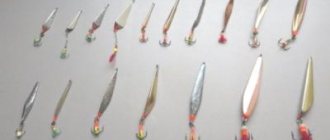
How to make spinners of different shapes
You can make vertical spoons of different and rather complex shapes with your own hands for summer and winter fishing. But for this you will need bending devices that can be cut from wooden blocks, which will be discussed on the following pages of this topic.
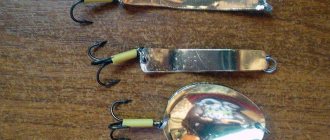
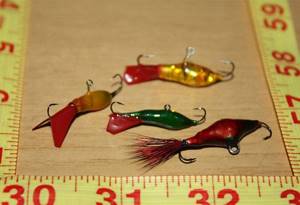
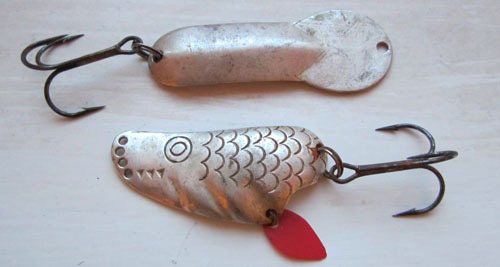
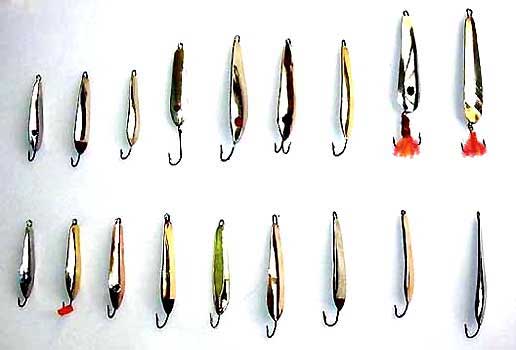
Samples of my hand-made winter gliding lures are shown in the picture. If you look closely at the shapes of the baits, you will notice that all winter lures are different, having different sizes and aspect ratios.
On this Internet resource, my homemade spoons are called “winter”, but fishermen with boats are well aware that vertically floating baits, no less than in the winter season, can be effective when catching predatory fish in open water.
Do-it-yourself spinner from a tube for pike perch
This is a fairly simple bait to make and requires a minimum amount of materials. Any tube will do, the color and material don’t matter. The current example uses chrome plated steel.
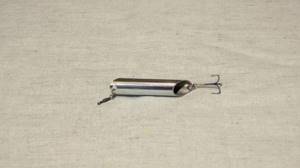
To create a spinner:
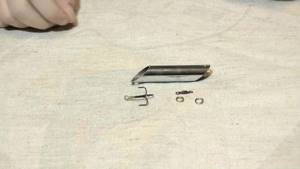
- The tube is cut to the required size at an arbitrary angle. Each end may have the same or different angle. You can make several at once, so that later on a pond you can test their performance in different conditions.
- Sharp edges after cutting are processed with a file.
- A hole is drilled in the top and bottom of the tube. One will be used to secure the tee, the second for the swivel.
- A do-it-yourself winter spinner for pike perch will require the appropriate equipment: a tee, several winding rings and a swivel. The dressing sequence is as follows: first a tee, then a ring and a swivel at the other end. Rings are sometimes replaced with clasps, this allows you to quickly change the bait.

Fishermen note good catchability and low manufacturing costs. It is effectively used both in summer and winter.
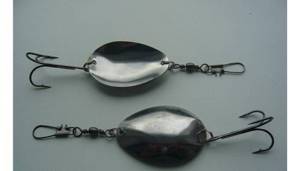
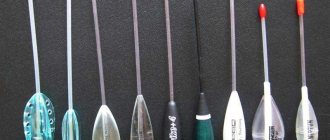
Rotating spoon and its types
Now let's start making a rotating spoon. The spinner has a petal that is attached to an axis and can rotate freely on it. For manufacturing you need almost the same materials and tools as for an oscillating spoon, adding only wire, various beads, balls, bows, spirals, you can even take a few synthetic feathers.
First, we make a petal for the spinner with our own hands. We do the same as in the previous version, we also look for the desired shape of the petal, then after printing it out, we cut it out and make a blank. The petal can be curved, it can be bent like a willow leaf, round or oval. While the applied paint dries, you need to start making the body. To do this, fold the steel wire in half, with the tips facing up.
We hook a hook at one end, then string beads and weights onto the wire to shift the center of gravity for good rotation of the petal and improve casting distance. The beads can be bright and shiny. For weight, lead beads or disks are used. They are hooked immediately after the hook.

Having made the body, we attach our petal to one end of the wire. To avoid friction and poor rotation of the petal between the base and the petal, string a bead or metal disk onto the tip of the wire. Having rounded the wire, firmly fasten the petal. A fishing line is attached to the second tip of the wire. There you can use a carabiner as an attachment option to make changing bait easier.
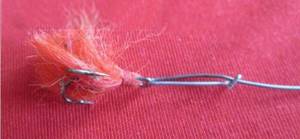
To disguise the hook, you can use a couple of red feathers or hairs. They attract the attention of fish by oscillating in the water, like the tail of a small fish. The main thing when assembling a spoon is not to forget that it should play in the water, rotate well, so that additional elements do not reduce catchability.
It is also important when choosing a petal to pay attention to its shape. For example, a slightly elongated shape and pointed petals at the ends are the most universal. Asp, chub, and pike go after it. This bait works well for different types of fish. The wide and oval shape of the petal attracts pike well, and ide also readily attacks it.
Manufacturers of such products also offer a slightly unusual type of petal. It is not attached at the tip, but rather closer to the center, and in the water it goes well behind and against the current, luring pike perch, perch, and asp. And also note: spinners with a narrow blade are designed for faster retrieve and play on the water, and a wide blade, respectively, for slower action.
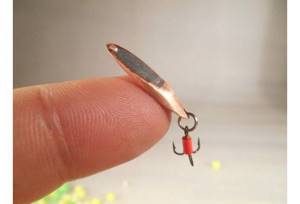
Spinner for pike from a spoon
With your own hands, it’s easy enough to create bait for such a dangerous predator as pike. The following components will be required:
- aluminum tablespoon;
- file or sandpaper;
- hammer;
- nail;
- hook;
- winding rings or clasps.
The creation procedure is more than simple:
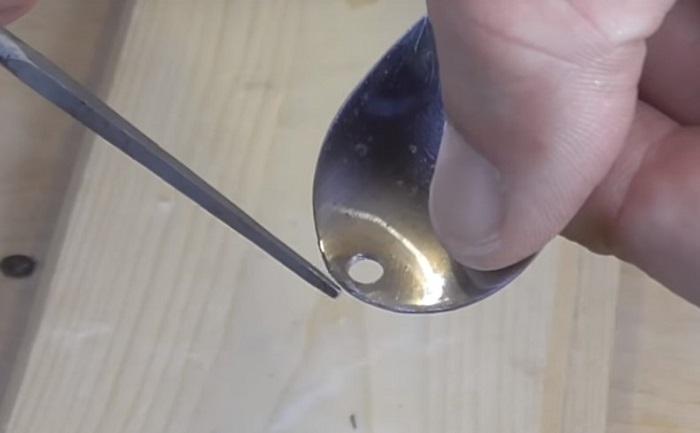
- The handle is cut off from the spoon.
- The cut area is sanded with a file to remove sharp edges.
- Holes are drilled at the top and bottom points. Winding rings are threaded through them.
- The hook, swivel and any other components are put on. If necessary, use bright cambrics.