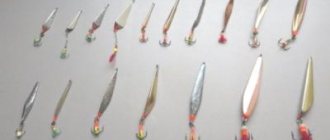
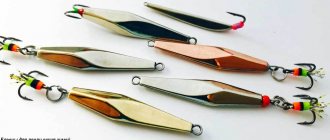
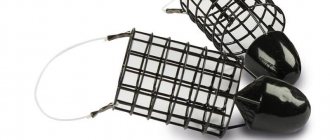
People who are fond of fishing and often travel to bodies of water in search of luck undoubtedly know that this hobby is quite expensive. Of course, the lion's share of money has to be spent on assembling fishing rods and purchasing auxiliary equipment, but modern artificial baits with high fishing intensity also require expenses that affect the family budget. Wobblers, spinners and silicone lures are the main lures of a spinning angler and collecting an effective fishing arsenal will require not only time and the use of fishing experience accumulated over the years for a competent selection, but also significant sums of money.
One of the alternatives to buying factory baits can be the angler’s hobby of making silicone bait with his own hands. Due to the pliability of the innovative material, this is a very real idea, which has had practical application for quite a long time in a certain circle of spinning anglers who prepare silicone rods to suit their needs and fishing technology.
In the article presented below, we will reveal the secrets of preparing nozzles at home, focusing on the nuances of organizing work, choosing the equipment and raw materials necessary for the foundry process, and also discuss the cost of the product and point out the basic safety rules when carrying out work.
What is the advantage of a silicone bait made independently?
Before moving on to a description of the organization of production technology, the purpose of which is making silicone baits with your own hands, let us dwell on the advantages of this type of work. Undoubtedly, fishermen consider the cheapness of the process to be the main advantage, but this is not only a matter of the budget component of producing homemade products.
Important! In addition to the low final price of the product, the spinning angler has the opportunity to customize the bait to suit his personal preferences and fishing technique.
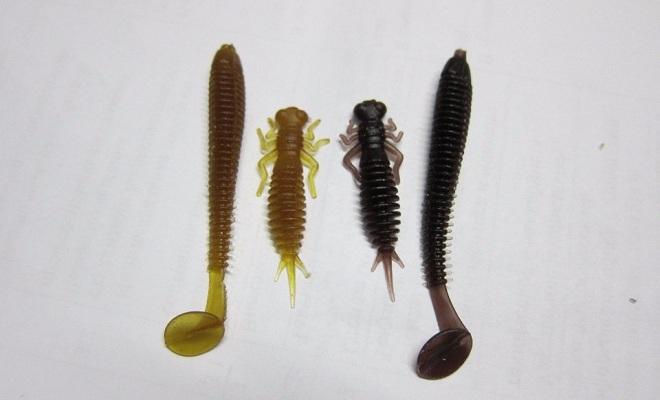
The nozzle can be made of a certain size and weight, as well as shape, sometimes using a creative approach to the matter, casting fantasy specimens that are distinguished by exclusivity and originality. The homemade product can be endowed with color shades that cannot be found in factory baits, the material can be supplemented with fluorescent compounds and an attractant suitable for fishing conditions and fish preferences by releasing the so-called edible rubber.
Another advantage of self-producing bait is the use of outdated factory baits as raw materials, which, as a result of successful fishing or frequent attacks by a predator, have become critically damaged beyond repair, capable of restoring the original settings of the game of the soft bait. We believe that even these above-mentioned advantages are quite enough to try to start casting silicone baits yourself at home, replenishing your fishing arsenal.
Tuning silicone baits - how to paint and make them edible
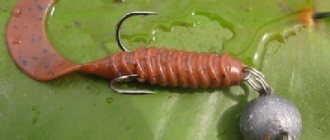
Vibrating tails are excellent silicone baits for predatory fish. Dietmar Isaiasch began experimenting with them early. Over time, dozens of silicone baits have developed their own signature. The expert explains how silicone baits can be further improved.
Installing a silicone bait on a jig head without breaking
Perhaps the most frequently asked question to me by anglers concerns the correct installation of vibrating tails on the hook of a jig head. This becomes clear when you see a huge number of silicone baits on sale and a relatively small selection of corresponding jig heads. There are only two types of heads: models with a lead “nose” on the hook shank for fixing silicone bait and those that do not have a lead beard on the shank. They only have a small “bait holder” - a wire spring that screws into the bait and secures it.
By making small channels in the silicone baits, you can easily attach the vibrotail to the hook of the jig head. When placed on a jig head that has a lead “spout” on the fore-end, the silicone bait regularly breaks. And especially delicate Japanese silicone baits with artificial eyes burst when you try to insert a lead holder into the head of the silicone bait. This is not only annoying, but can also be quite expensive. The solution is simple: either remove such a lead thickening from the jig head, or stamp a channel in the silicone bait.
To do this, a thin metal tube is inserted to a depth of approximately 1 cm into the “mouth” of the vibrotail and then rotated when pulled out so that the silicone mass is removed from the silicone bait. Not only a hole is formed, but also a small channel. Thanks to this, baiting is easy by hand, and there is enough space for the lead “nose” of the jig head. The lead head and silicone combination can withstand many casts. Even delicate silicone baits can be equipped with a suitable hook.
Fixing silicone baits with hot water
When you place new silicone baits in a box of baits, you are sometimes horrified to discover that half of the silicone baits are bent or have an askew tail end. In silicone baits that are stored for many years, the delicate tails warp over time and wrinkles form on them. Such vibrating tails lose the ability to play correctly. What to do? To find a solution, you need to know how the vibrating tail is made.
Silicone baits are produced by casting. The liquid synthetic material is heated and then pressed into a mold manually or using an injection machine. “Newborn” silicone baits are cooled in molds, removed and placed in a bath of cold water to harden the silicone mass. Until this moment, everything is fine: the tails of silicone fish are straight, the sickle-shaped tails of twisters are without folds, the limbs of crayfish and salamanders are in a row. But when packaged and transported for a long time in sea containers at high temperatures, many silicone baits lose their shape. To return it, silicone baits should simply be heated. To do this, I place them in boiling water for about two minutes.
There they get the opportunity to change shape and return to their original state. In most cases this happens on its own. The success of such an operation is visible immediately after removing the silicone bait from the water. Only in exceptional cases do I help her by stretching or bending the corresponding area with my hand. But this should be done carefully, as silicone baits are very hot. Then I cool the heated silicone baits with cold water, let them dry and put them in boxes according to color. Another tip for storing large vibrotails. Some manufacturers supply vibrating tails for sale in stamped plastic molds. There, silicone baits lie without bends and are waiting for a new owner. Whenever possible, it is better to store vibrotails in such forms to save yourself from the “cooking” process. So, purchase similar molds or ask the seller if he has a few more free molds.
Flavoring silicone baits or how to make edible ones
Scented silicone baits are in greatest demand. The most popular flavoring options in the trade are natural fish oils. They are added to the silicone mass during the production process. Some manufacturers additionally foam them so that air enters the silicone mass and the aromatization result is more pronounced. Or they refuse air microbubbles and use instead mixtures of fishmeal and synthetic components that have an odor. Other manufacturers do it simpler: they attach flavored salt in bags to silicone baits or pour an attractant into the bag. Decisive, however, is the duration of action of the flavoring in the silicone bait. From the outside it quickly washes off. The more complex the process that fixes the smell in the bait, the more expensive the silicone bait itself. Every fisherman has catchable baits that have no aroma and always smell only of silicone. They can be tuned. First, I wash the silicone bait with warm soapy water and degrease it. Then I clean it with fine sandpaper so that its surface becomes porous and susceptible to treatment with flavoring, and put it in an airtight container containing a mixture of salt, edible vegetable oil and attractant. For an 800 gram jar I need 250 ml of edible vegetable oil, 10 tablespoons of salt and 5 ml of carp flavoring. Which carp flavoring to choose is a matter of everyone’s taste. I mix everything thoroughly, place stripped silicone baits inside and keep them near heating devices for 10 days. During this time, the salt will corrode the silicone baits, draw moisture out of the silicone, and tiny holes will appear. The porous silicone mass will absorb the liquid and store it in the tiny holes. Warmth favors this process. In this way, anyone can create an edible silicone bait.
Coloring silicone baits
The color of the silicone bait can be changed using special liquids and felt-tip pens. But you can do this in another way, for example using water. Water brightens silicone baits, but not for long, but as long as they are in a humid environment. This is what I use to bleach too brightly colored baits. You just need to place the cuttails in a sealed plastic bag with a little water and wait two to three days. The longer the silicone bait is kept in water, the more it bleaches. After removing silicone baits from the water, it will take several days for them to acquire their original color. But you can lighten silicone baits for a long time if you place them on a windowsill under the bright rays of the sun. The process of such whitening lasts, however, for weeks, but it lasts forever.
You can give silicone baits a different color by combining them with another type of silicone baits. But this can only be done with lures of aggressive colors: motor oil, chartreuse and red. To do this, white and pearlescent baits are placed together with baits of the above-mentioned colors and delicately colored copies are obtained from them. To enhance the process, I cut some silicone baits from the aggressive range into pieces and place them in a vessel with a small amount of edible vegetable oil and salt. This is how the aggressive coloring is drawn out of them. Then I place the vibrotails intended for painting in the same container with a mixture of pieces and leave it all for two weeks. The result is a silicone bait with color shades that attract fish by their very appearance.
Source: www.prospinning.ru
What is needed for silicone casting
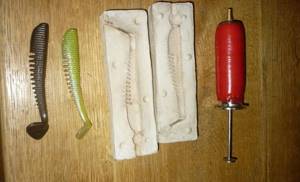
Initially, it seems like a complicated matter, but in practice, silicone casting is not such a costly and technologically labor-intensive process. Production is quite easy to organize in your own kitchen, having at hand a gas stove or a regular microwave, a large disposable syringe or a small metal mug with a molded spout and a pre-prepared matrix mold.
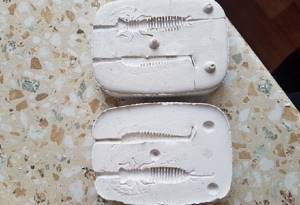
To prepare a matrix mold, you will need to buy construction plaster and prepare an analogue of the manufactured product to form the impression required for casting. As a rule, this is a factory bait, which, based on the results of work on the matrix, is given additional touches that affect the final shape. It will be useful to have a sharp knife and a metal spatula, similar in appearance to a tool for sculpting products from plasticine and an ordinary metalworker's scriber, for the possibility of applying marks and corrugations on a still raw workpiece that has not frozen into a matrix form.
The raw materials for production will be old baits or newly purchased silicone mixtures, as well as dyes, fluorescent compounds and glitter, as well as concentrated attractants. The above-mentioned modest belongings and materials are quite enough to start productive work.
What kind of silicone can be used for filling molds?
There is no doubt that the easiest way to make silicone bait at home is from used material. For these purposes, you can even mix used baits without paying attention to their color differences, ultimately obtaining a unique shade in the hope of its promising bias for catching predators. But besides this possibility, there is the option of purchasing specialized compounds.
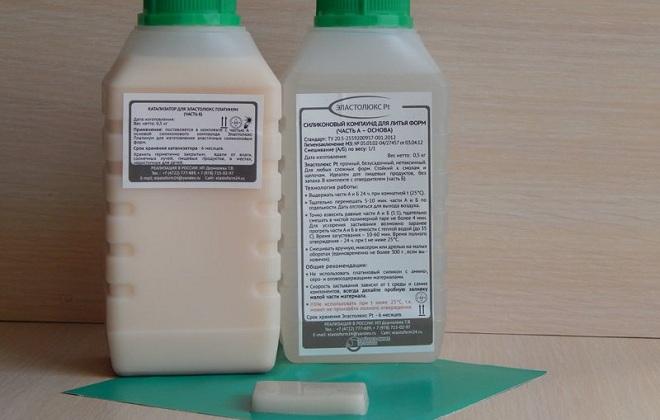
Among such opportunities, the purchase of such material as Elastolux (TV 25) stands out. The composition proposed for the production of silicones is distinguished by a low level of viscosity of the mass, which allows, during use, to fill various elements with the material, even the smallest and thinnest parts of the future bait, and subsequently, after this factor, paint them in the desired and ultimately intense color. In addition to the presented composition, we recommend that you take a closer look at such materials as Pentalast 718 and Pentalast 710, which, like the previous raw material base for bait, are quite common in retail chains and are ideal for making your own baits.
Casting silicone baits using Redbug molds
The Redbug company sells products for casting silicone baits. In their store they have molds for casting baits, silicone, glitter, dyes, flavors, fluoroplastic syringes, mixing containers and other auxiliary tools.
Particular attention should be paid to casting molds that are made of artificial stone. The quality of the molds is quite good; before each use they need to be lubricated with silicone grease. The assortment includes molds for casting both one and multiple baits. There are shapes of the most popular lures such as Keitech Swing Impact, Pontoon 21 Awaruna, Dexter Worm, Imakatsu Javastic and many others.
You can get acquainted with all Redbug products by following the link.
Author of the article: Vitaly Leonidovich Ivanov, 2021.
Silicone cost
Let us separately dwell on the price factor of raw materials, which is important for the process of making silicone bait with your own hands. Indeed, in most cases, as we have already seen, the cost of the product is the main catalyst for starting independent work. It is clear that old baits will cost the fisherman zero cost, but their absence will require certain costs to purchase the necessary goods.
At the moment, the cost of such material as Elastolux, offered to the buyer in measuring containers of 1 kilogram, will cost 1220 rubles. From which you can easily calculate the cost of the resulting one specimen of bait based on its final mass. Fortunately for the fisherman, it is worth noting that there is practically no waste during production, and the resulting scraps or scraps can simply be melted down again, obtaining a product of decent properties.
The material mentioned as promising for the production of silicones in the form of Pentalast 718 and Pentalast 710 components, as well as analogue compounds in the form of Vixint K-18, will cost a little less. A kilogram of these materials will cost about 800 rubles for the above-mentioned kilogram container, complete with a hardener, or more simply put, a hardener that promotes hardening of the cast composition at room temperature.
In addition to kilogram containers, in sales there are sets of formulations in smaller packages, but as is typical for most products packaged in small portions, the price for them is an order of magnitude higher than standard packages, which will ultimately significantly affect the final cost of the product. And most likely, for home production it is better to have a supply of well-preserved raw materials with an eye to producing larger batches of promising and working attachments.
How to make a mold for pouring silicone
The mold for casting is also most often made independently at home using simple technology based on preparing an impression of the future bait. The easiest way to make a matrix mold is from building or dental plaster. Some craftsmen quite effectively use plexiglass or plastics for these purposes. The use of these materials for the manufacture of molds will require a lot of labor and investment, but it will become equipment with which you can work for quite a long time and produce much more baits without fear of its destruction.
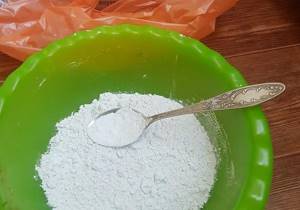
Gypsum
The technology for working with gypsum is simple and can be done even by a beginner trying to start producing silicone castings. The process consists of mixing the gypsum mixture in a ratio of 4 parts to the proportion of water and thoroughly mixing for 1–2 minutes until a plastic mass is obtained. After forming a volumetric body with smooth parallelepiped-type planes, which is achieved by filling a plastic container for any product, the prototype of the bait is pressed into the workpiece, obtaining an impression. You can form grooves or notches on the print using a scriber or spatula according to your understanding of the final product, or change its shape by leveling or bending the planes and adjusting the volume.

After achieving the required result in obtaining the matrix form, it is allowed to harden at a temperature of 20–22 degrees. After complete hardening, the matrix is ready to begin the main casting work. The only drawback of the plaster mold is its fragility, so the fisherman should take care of the resulting impression, protecting it from impacts and excess pressure from other objects.
How to make silicone at home
First way
To prepare silicone rubber (polydiethylsiloxane), you will need liquid glass and ethyl alcohol. Take a plastic container into which the components are poured in equal proportions and carefully mixed with any instrument. When the mixture thickens, you need to knead it into plasticine by kneading it with your hands.
Next, you can sculpt the necessary shapes from the silicone mass, which are left to harden for a while until the product becomes solid.
Second way
- 150 g white spirit;
- 1 drop of acrylic paint;
- 3 drops of liquid glycerin;
- 30 g silicone sealant.
To make silicone, you need to immerse the sealant in a container, add paint, glycerin and white spirit. The solution must be mixed until a homogeneous mass is obtained. You can work with this solution for no more than five hours, since after this time it hardens.
Third way
You need to take equal amounts of silicone sealant and potato starch. Stir the mixture for about 10 minutes until the silicone begins to easily come off your hands, then you can begin making the required shape.
Fourth method
Take gelatin and glycerin in equal proportions and mix thoroughly. Then the solution must be heated in a water bath for about 10 minutes, stirring constantly. It is important to prevent the gelatin from boiling, otherwise a strong unpleasant odor may appear.
Fifth method
It is used to make silicone for DIY molds.
To do this, you need to take a shape slightly larger than the object being copied. A little silicone is poured into the bottom of the mold and left until it hardens - this is the base of the object. The thickness of the base should be one centimeter or more so that the “house rubber” securely wraps the object on all sides. If the mold comes out thin, then it will quickly tear when removing the prototype or will not hold on at all.
The prototype is then dipped into a container of gelatin to get rid of any air bubbles, and then quickly transferred to the bottom of the mold to stick. Then the mold must be completely filled with silicone. Homemade resin from the fourth method, which hardens very quickly, works well. Immediately after cooling, the mold must be disassembled, an incision made and the prototype carefully removed.
At the last stage, you will need to mix and pour epoxy resin into the mold. It will be difficult to remove a frozen casting, so you will need to completely break the silicone.
Main types of matrices for filling molds of baits
As a result of the practice of producing silicone fishermen, fishermen have developed a technology for manufacturing two main types of matrices - one-sided and two-sided variations of the casting device. In both cases, you will have to have a ready-made sample pressed into the matrix. The one-sided mold is prepared using the technology presented in the previous chapter and is a quick way to start producing baits. A two-part matrix is more difficult to manufacture and will require certain production efforts, but as a result, the nozzles cast in this type of mold have a more realistic appearance and look much more attractive to a predator.
A double-sided matrix is made of two parts in which a mirror impression of half of the analogue nozzle is made. To fill, the two parts of the device will have to be combined into one product, obtaining the volume required for the production of silicone. In such matrices, a sprue and up to 6–8 holes are provided to remove air displaced from the volume filled with silicone. The plaster halves are connected using a thick rubber band, in other words, a model, or using clamps.
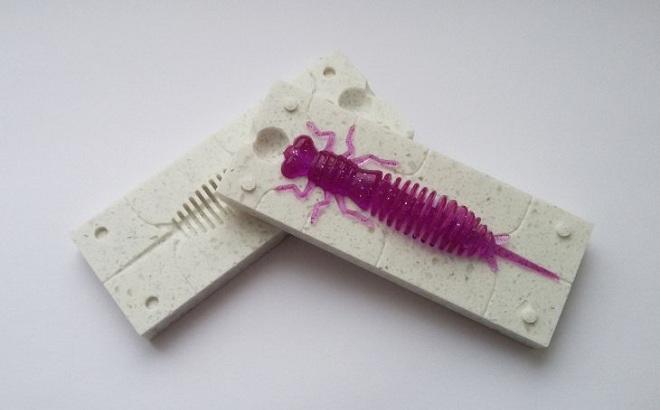
For a tight connection and subsequent separation of the parts, it is recommended to coat them with Vaseline. Masters of silicone casting often use a multi-matrix, in which, when casting, they immediately obtain a series of attractive baits of the same type or different in shape and parameters.
Instructions for making silicone baits with your own hands
In this part of the article, we invite the angler to familiarize himself with simple and understandable instructions that will help him understand how to make a silicone bait himself. To begin with, we take old deformed silicone that has spent its time and melt it in a metal container over an open fire, or finely cut it into pieces, pour it into a large disposable syringe and, closing the spout, place it in the microwave. After melting, which only takes a couple of minutes of heating, the resulting liquid solution is poured into prepared molds and after waiting 3-5 minutes for cooling, they begin to remove the almost finished bait.
Important! The easiest way to pour purchased plastic solutions is to use a syringe.
To color the baits in certain colors, regular or fluorescent dyes are used, and finely chopped multi-colored foil or cosmetic glitter are added to the mixture. Edible rubber is also often made by mixing silicone with an attractant. In this case, it is worth paying attention that after the first fishing the bait may completely lose its smell and during subsequent use it will require additional treatment of the outer surfaces with a flavoring agent.
Syringes for casting silicone baits
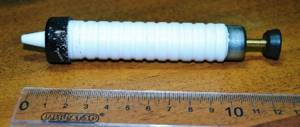
Ordinary plastic syringes are not used, as they immediately deteriorate from the temperature of liquid silicone. Glass syringes or special syringes made of fluoroplastic are used. Glass syringes are fragile and you need to be very careful with them. PTFE ones are more reliable.
It is worth noting that silicone can be melted in a separate container, or directly in a syringe. In a separate bowl, mix melted silicone, dyes, glitter and flavors. After stirring, the silicone must be heated before pouring.
If silicone melts in a syringe, then it should be placed in the microwave with the spout facing up. The nose of the syringe can be plugged with a toothpick or match to prevent the silicone from leaking out.
Types of baits that can be made using silicone
Silicone is a very malleable material for casting and, in theory, you can prepare almost any shaped nozzle with many small and thin elements and different textures. The main thing is to have the right matrix. As a rule, worms are most often cast as the simplest type for making matrix molds. The color of the silicone is adjusted using dyes to match the natural color of a living worm, resulting in a fairly realistic product.
The casting of large-sized vibrating tails is common, which, as practice shows, is still not enough in free sales, as well as double-sided twisters, which are popular in spinning fishing. The production of crustacean forms with many legs, tentacles and claws of various sizes stands apart. Futuristic fantasy forms are fully capable of complementing any spinning arsenal with products that actually work for most species of predator.
Foam fish
Of all the jigging baits, the foam fish is the cheapest and at the same time one of the most catchy. The secret to the success of the foam fish is that at the bottom it takes a vertical position, imitating a feeding fish and is clearly visible to the predator. It is generally accepted that foam rubber is a bait that has no game. Yes, undoubtedly, a foam fish does not have active elements like a twister or a vibrotail. But nevertheless, she wiggles her body very beautifully if she is led in a wave-like manner. Perch and pike love this kind of wiring very much. In the video below, I tell you in detail how to make a foam fish. In the video I made a small bait for catching perch, but using the same technology you can make both very large foam rubber for pike perch and micro products for fishing with ultralight tackle. Fishing with foam rubber fish is somewhat different from fishing with vibrotails and twisters. The pause is of great importance, as is playing along with it. When you first start fishing with foam rubber, you will catch a little less than with active jigging lures, but over time, when you master the technique of jigging passive lures a little, the number of your catches will be greater than ever before.
Safety precautions when making silicone molds
Although making a silicone bait is not that difficult, working with an open flame and molten silicone is considered harmful and not that safe. So it is worth paying attention to the container in which the plastic material is melted. The syringes are checked for cracks and wrapped with insulating tape for reliability. When loading old samples, the volume of the syringe is filled by two-thirds, leaving free space for additional volume that expands when heated.
When melting old baits, they work in a respirator with open windows with access to fresh air into the room, excluding poisoning by chemicals evaporating from the liquid phases of the molten solution. For safety and to avoid skin burns, it is recommended to wear thin cloth gloves.
Safety rules when creating silicone baits
To perform your work correctly and accurately, you must follow the following rules:
- Check the syringe for transfer of different temperatures and inspect it for cracks or breakages.
- When working with hot silicone, wear gloves and do not take them off until the work is completed.
- Wrap the syringe with special tape.
- Do not draw a lot of material into the syringe to avoid negative consequences.
- It is recommended to wear a respirator or ventilate the house during melting, or even better, turn on the air conditioner.
